Event List
By using the Enhanced Video Management System to notify you of detected motions, etc. as events, you can check them.
Table of contents
< [ Event List ] screen >
|
|
|
(Click each item to display the procedure and detailed information.)
Configuring the event notification settings
If you want to detect motions, etc. as events by the Enhanced Video Management System, you will need to configure the settings on the Nx Witness side in advance.
|
|
The Enhanced Video Management System can only notify you of motions detected and digital input. |
-
Setting on the Nx Witness sideSetting on the Nx Witness side
Cancelling time synchronization on the Internet Turn off time synchronization between Nx Witness and the Internet, and synchronize the time on Nx Witness with the one on the server (Edge Gateway).
If you do not perform this operation, the time when an event occurs may be displayed out of sync with the time on the server (Edge Gateway).
Launch Nx Witness, and click [ System Administration... ] from the menu.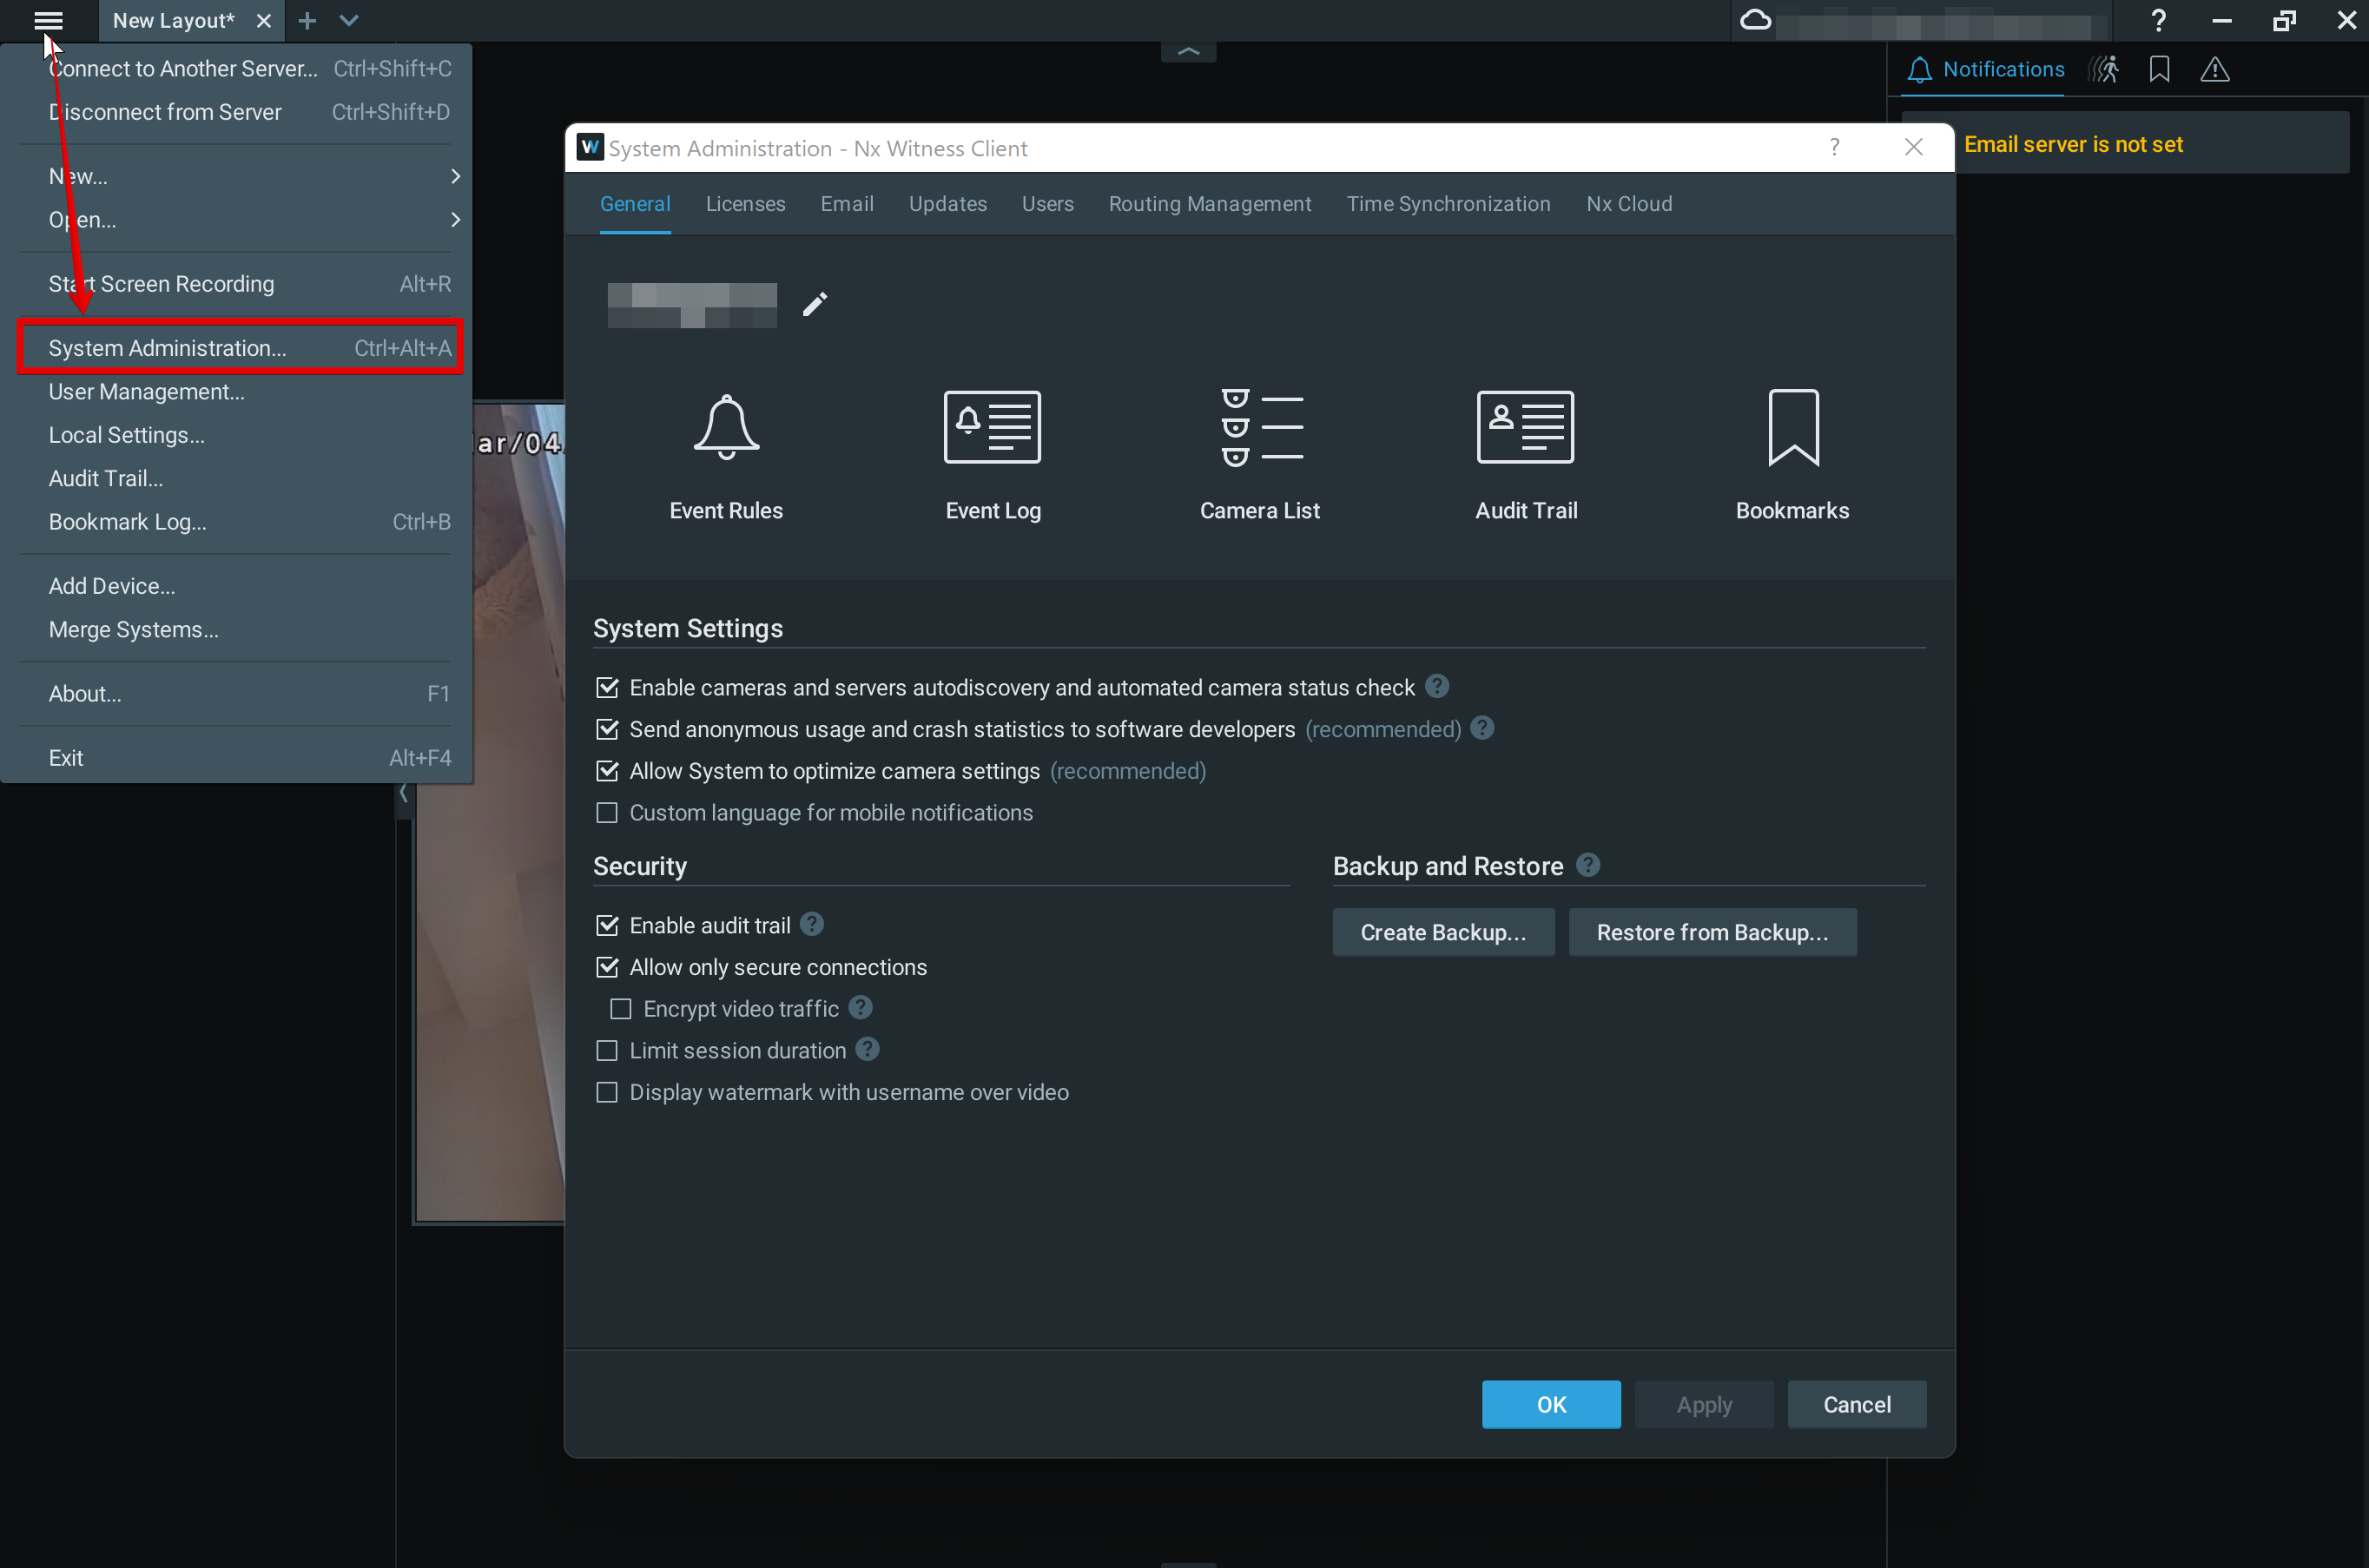
Click the [ Time Synchronization ] tab, and click the [ Sync Time with the Internet ] toggle to turn it off.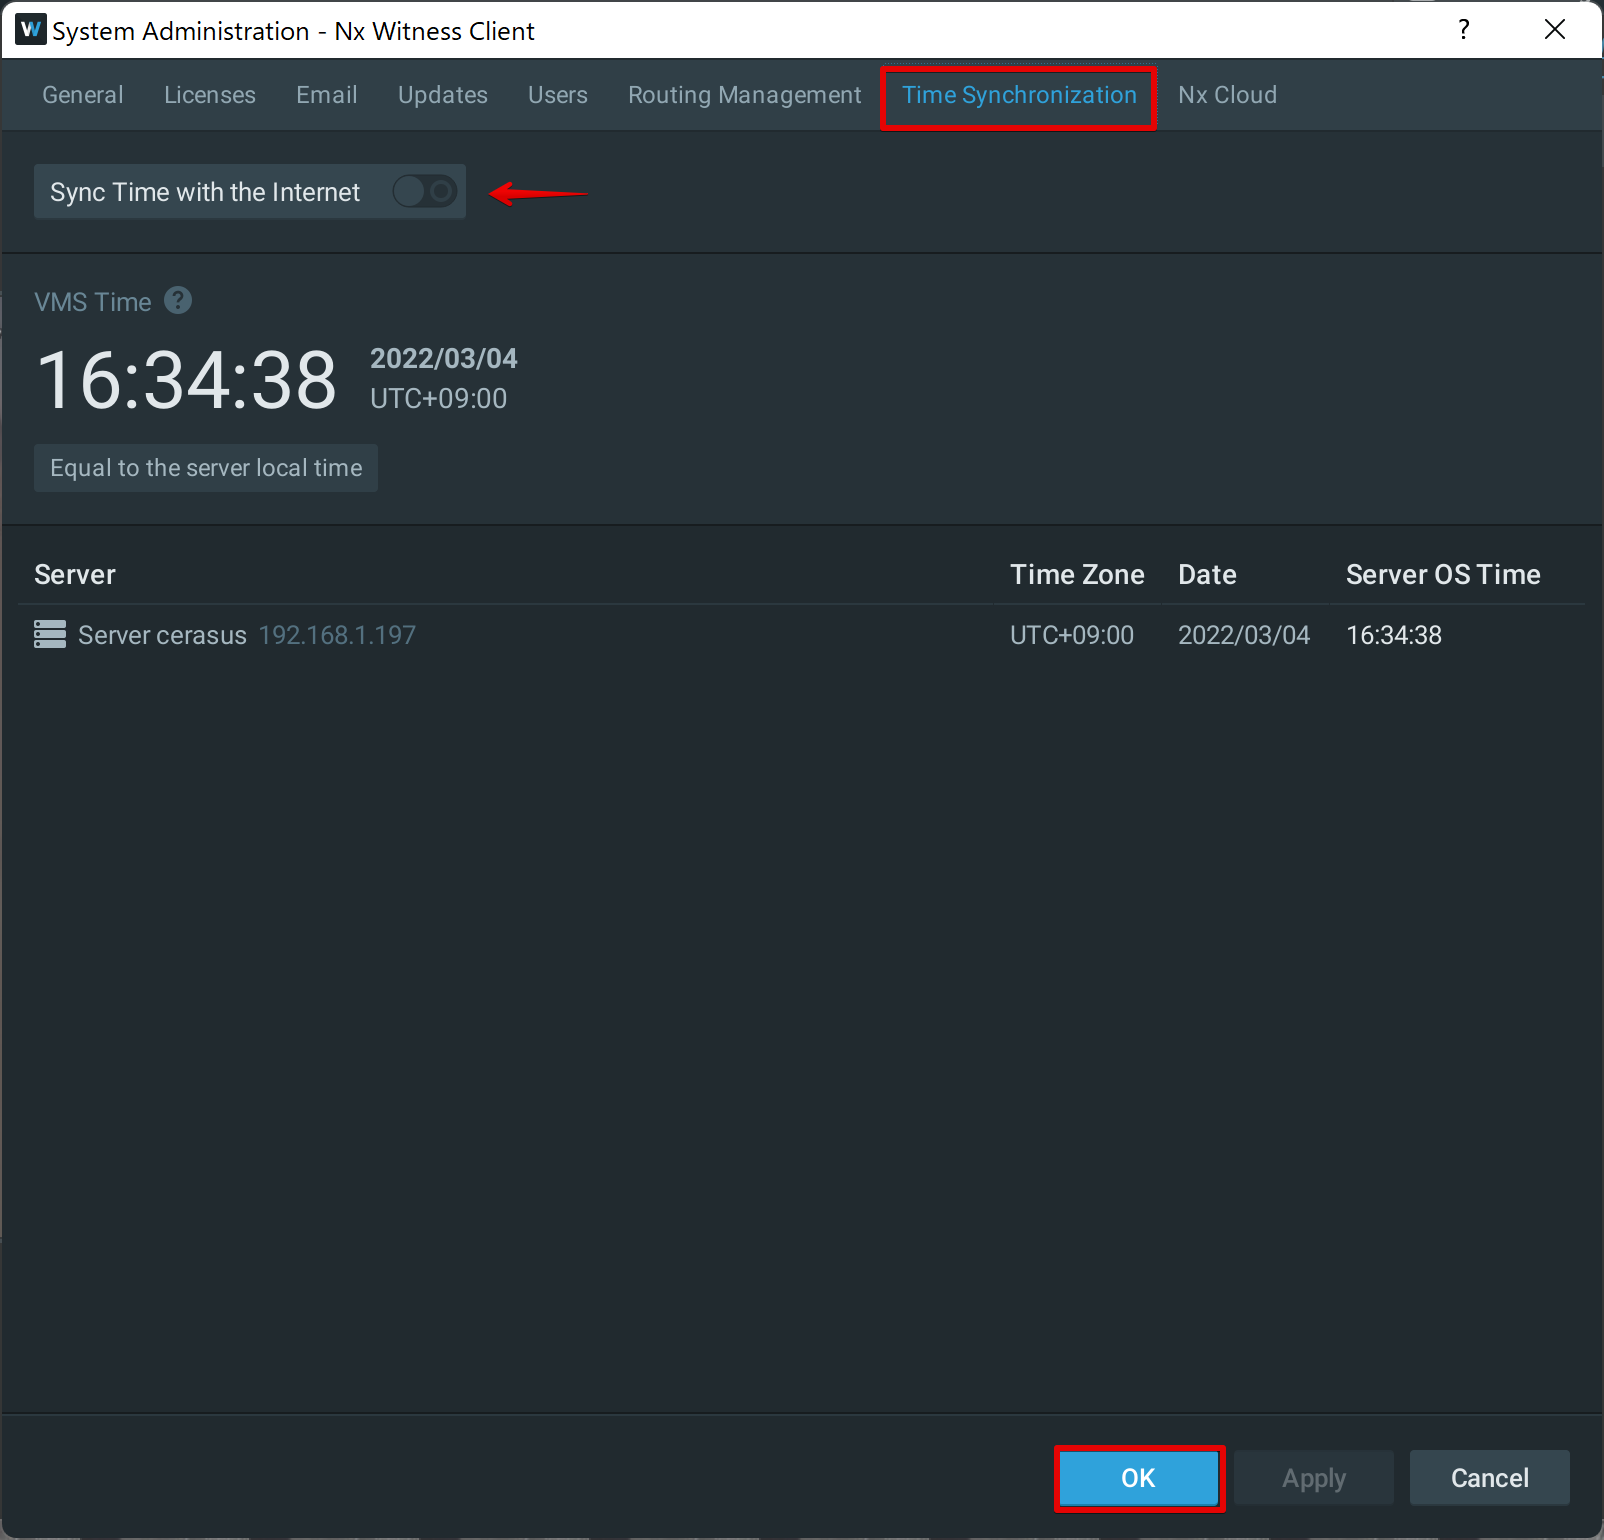
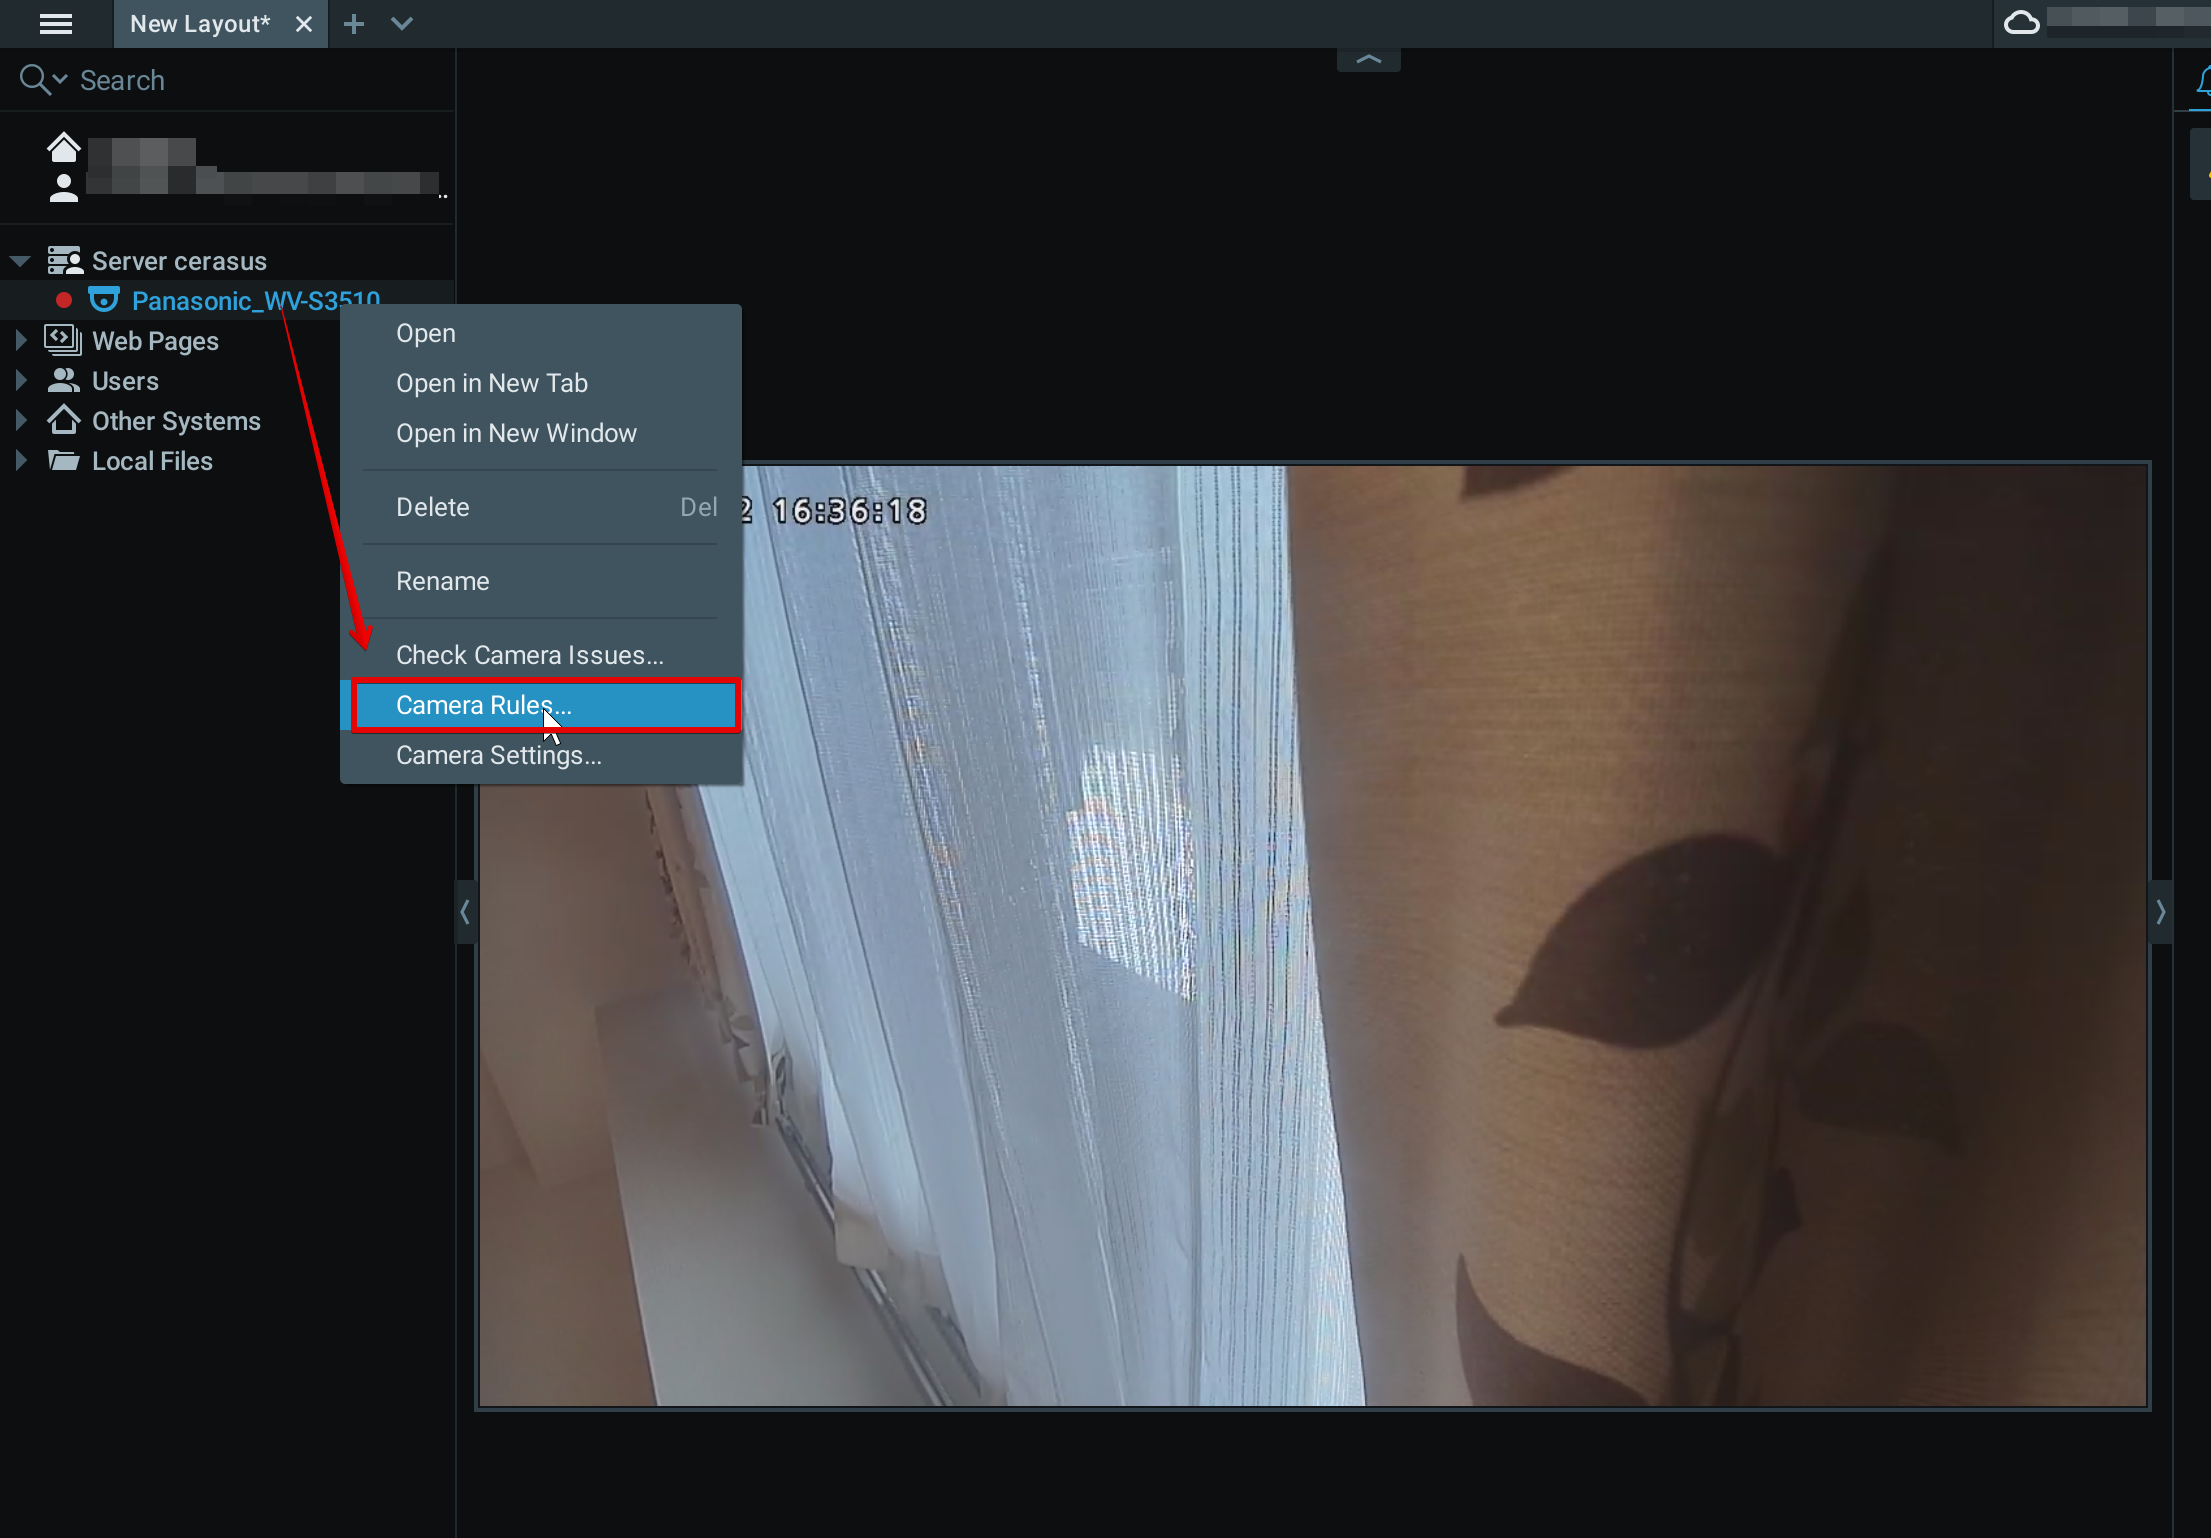
Setting camera rules - Launch Nx Witness, right-click the target camera, and click [ Camera Rules... ].
- Click [ Add ].
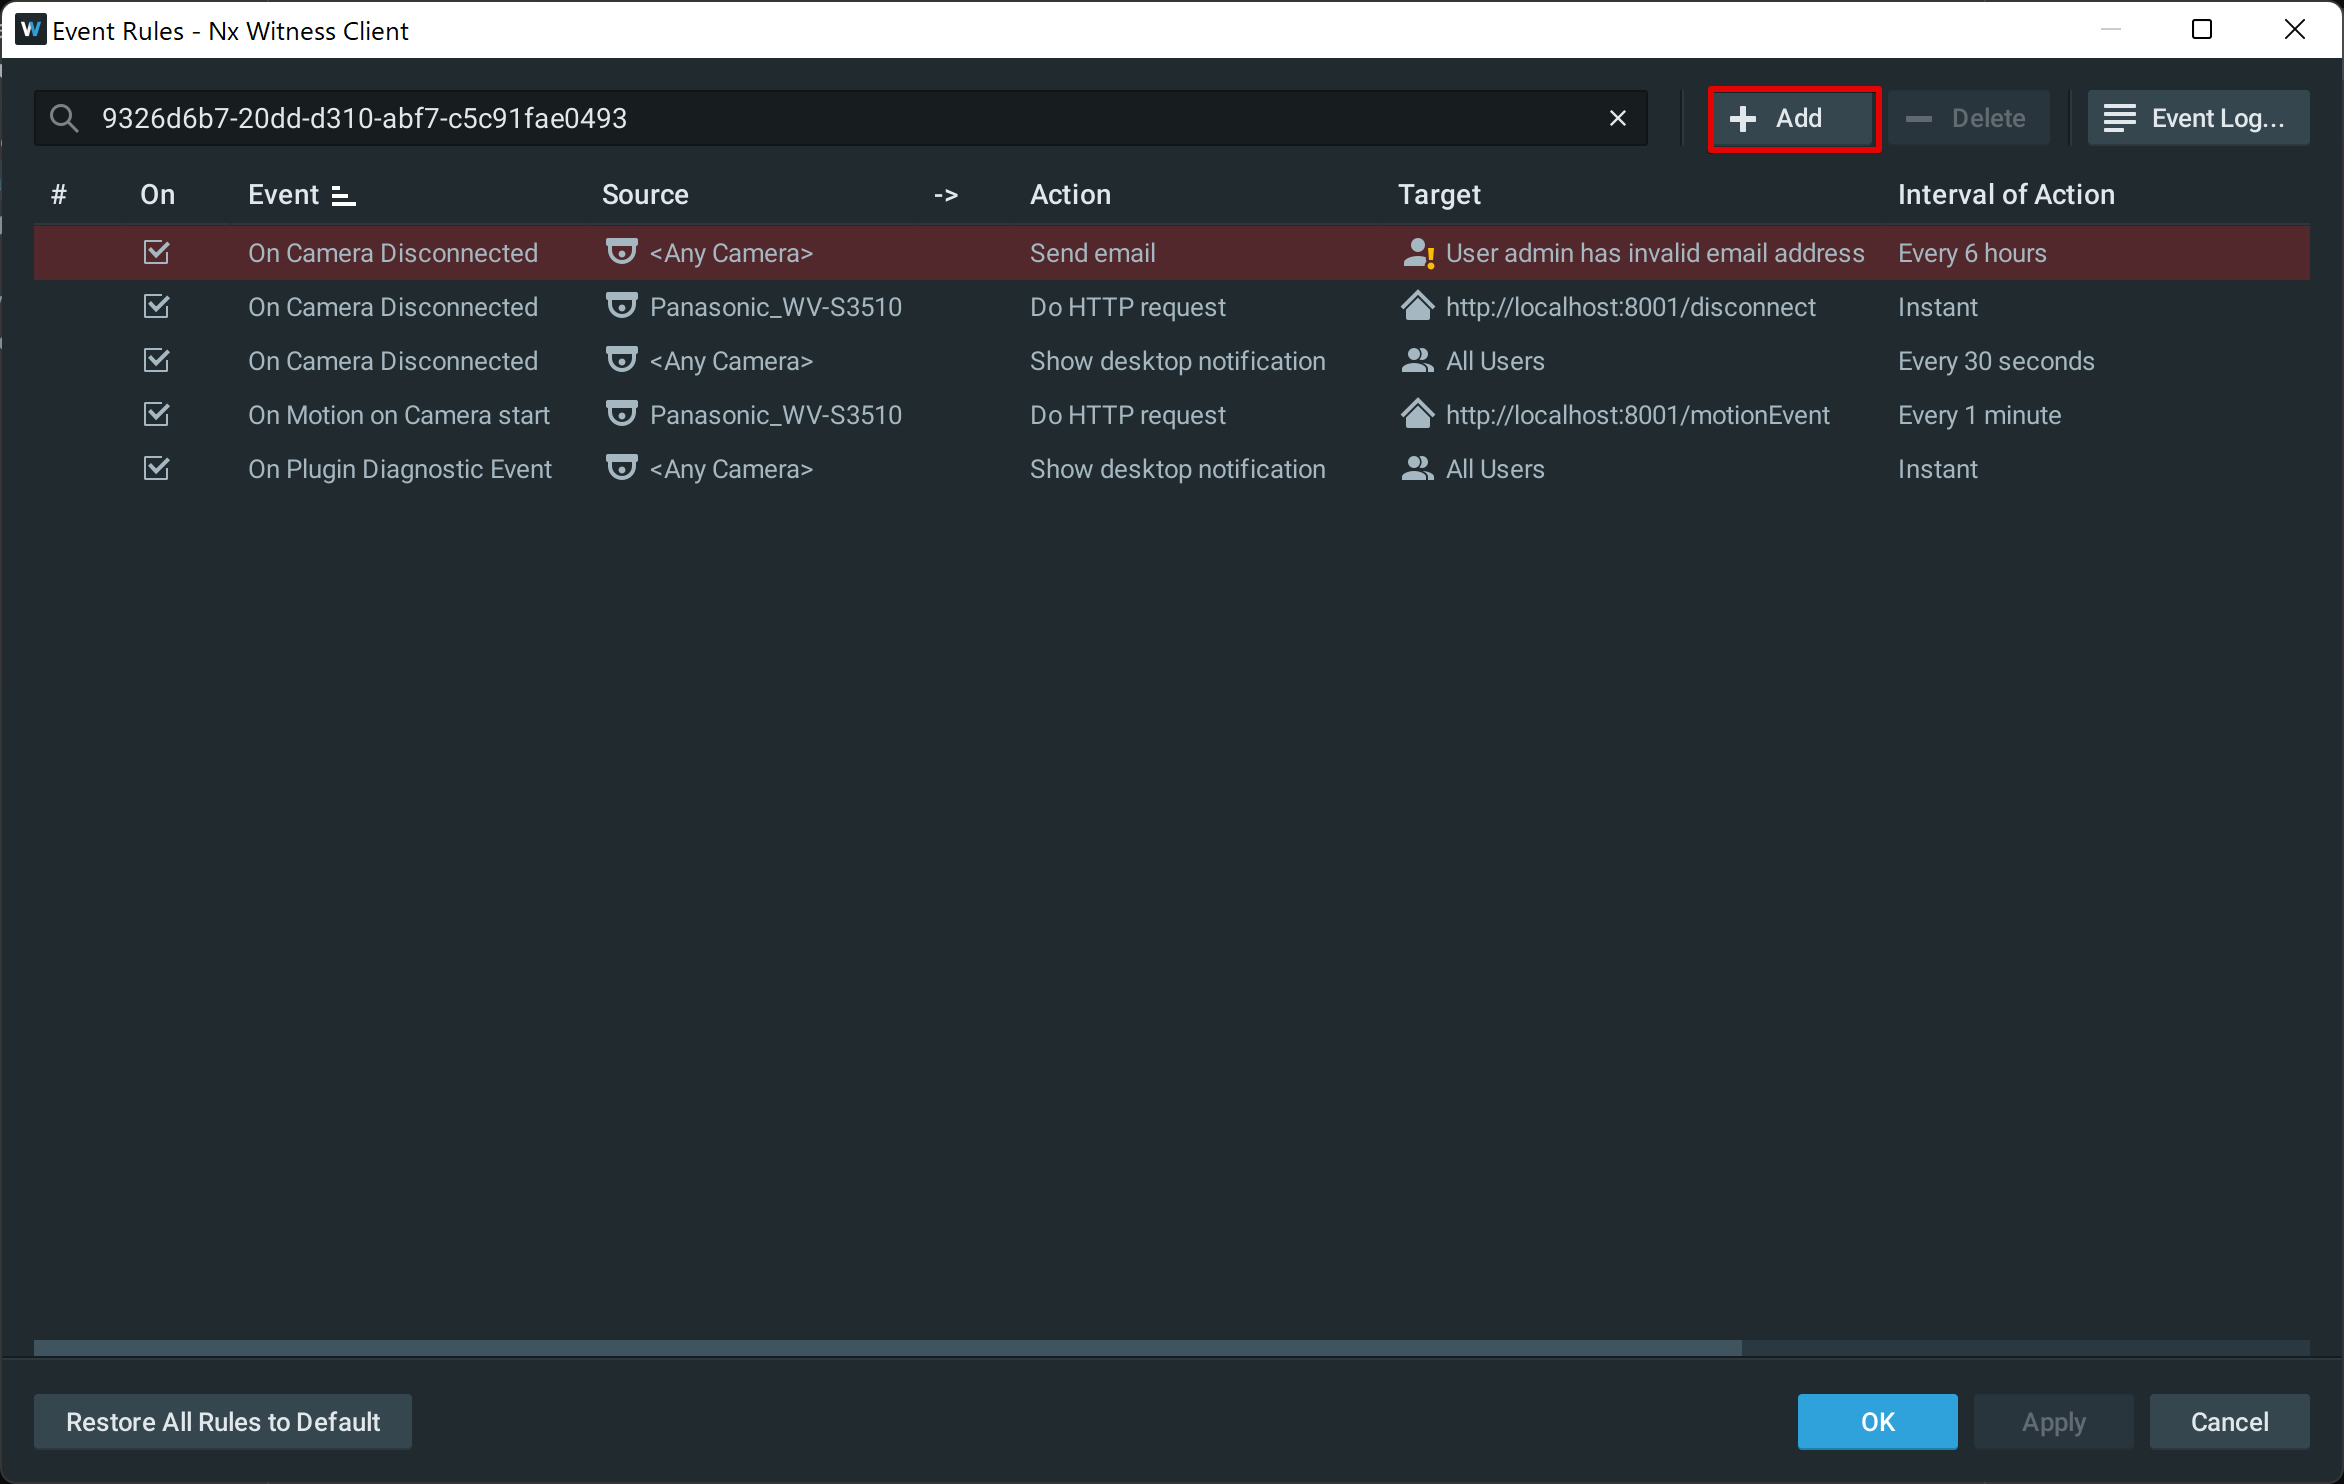
- Configure the event rule settings.
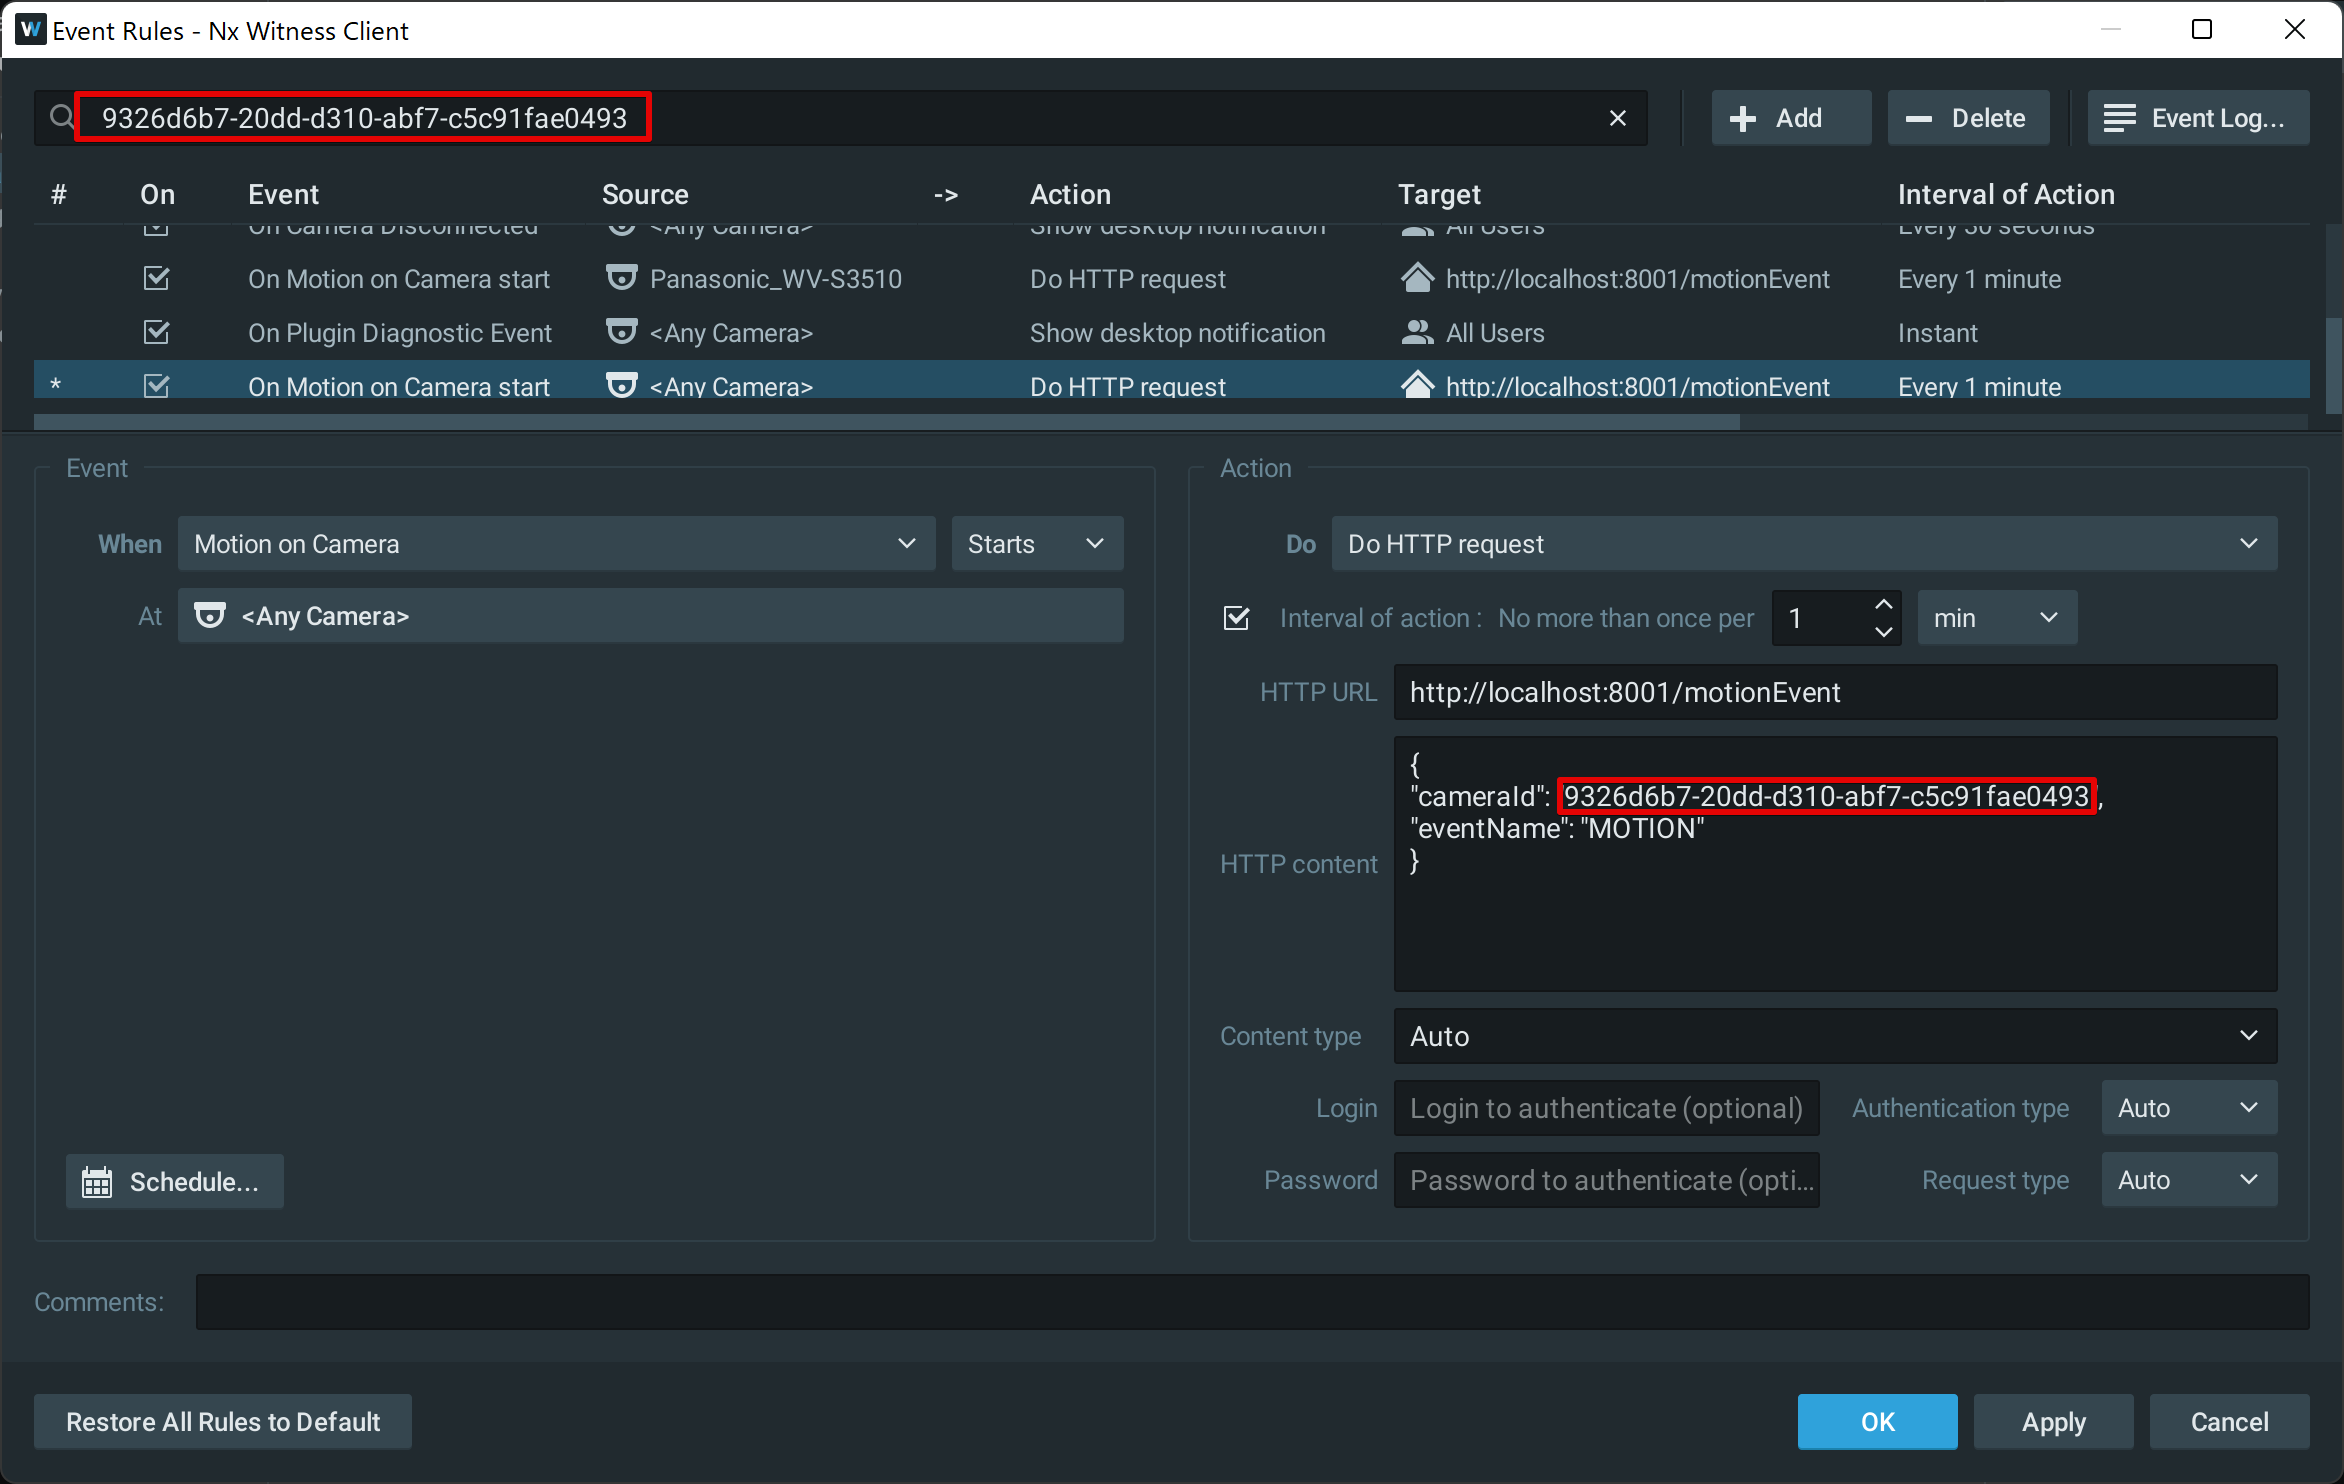
Setting example
This section introduces how to detect alerts when there is a camera motion.
< Event >
・When: Motion on Camera(Starts)
・At: Target camera
< Action >
・Do: DoHTTP request
・Interval of action : 1min
・HTTP URL:http://localhost:8001/motionEvent
・HTTP content:
{
"cameraId": "XXXXXXXXXXXXXXXXX", ← Enter the camera ID (the ID displayed in the upper left part of the image).
"eventName": "MOTION"
}
・Content type: Auto
・Login: Blank
・Password: Blank
*For the action interval, set the interval at which an action occurs. If you want to perform an action immediately, select [ Instant ].
*For events that occur multiple times during the interval, it is uncertain which event will be chosen when the next action occurs. - If you click [ OK ], you will complete configuring the settings.
- Launch Nx Witness, right-click the target camera, and click [ Camera Rules... ].
-
Setting on the Enhanced Video Management SystemSetting on the Enhanced Video Management System
Events set by Nx Witness(*) can be checked on the event list.
Also, if an event occurs, you will be notified of it on a Web browser. This section explains the procedure for notifying events with the Enhanced Video Management System.
*The Enhanced Video Management System can only notify you of motions detected and digital input.
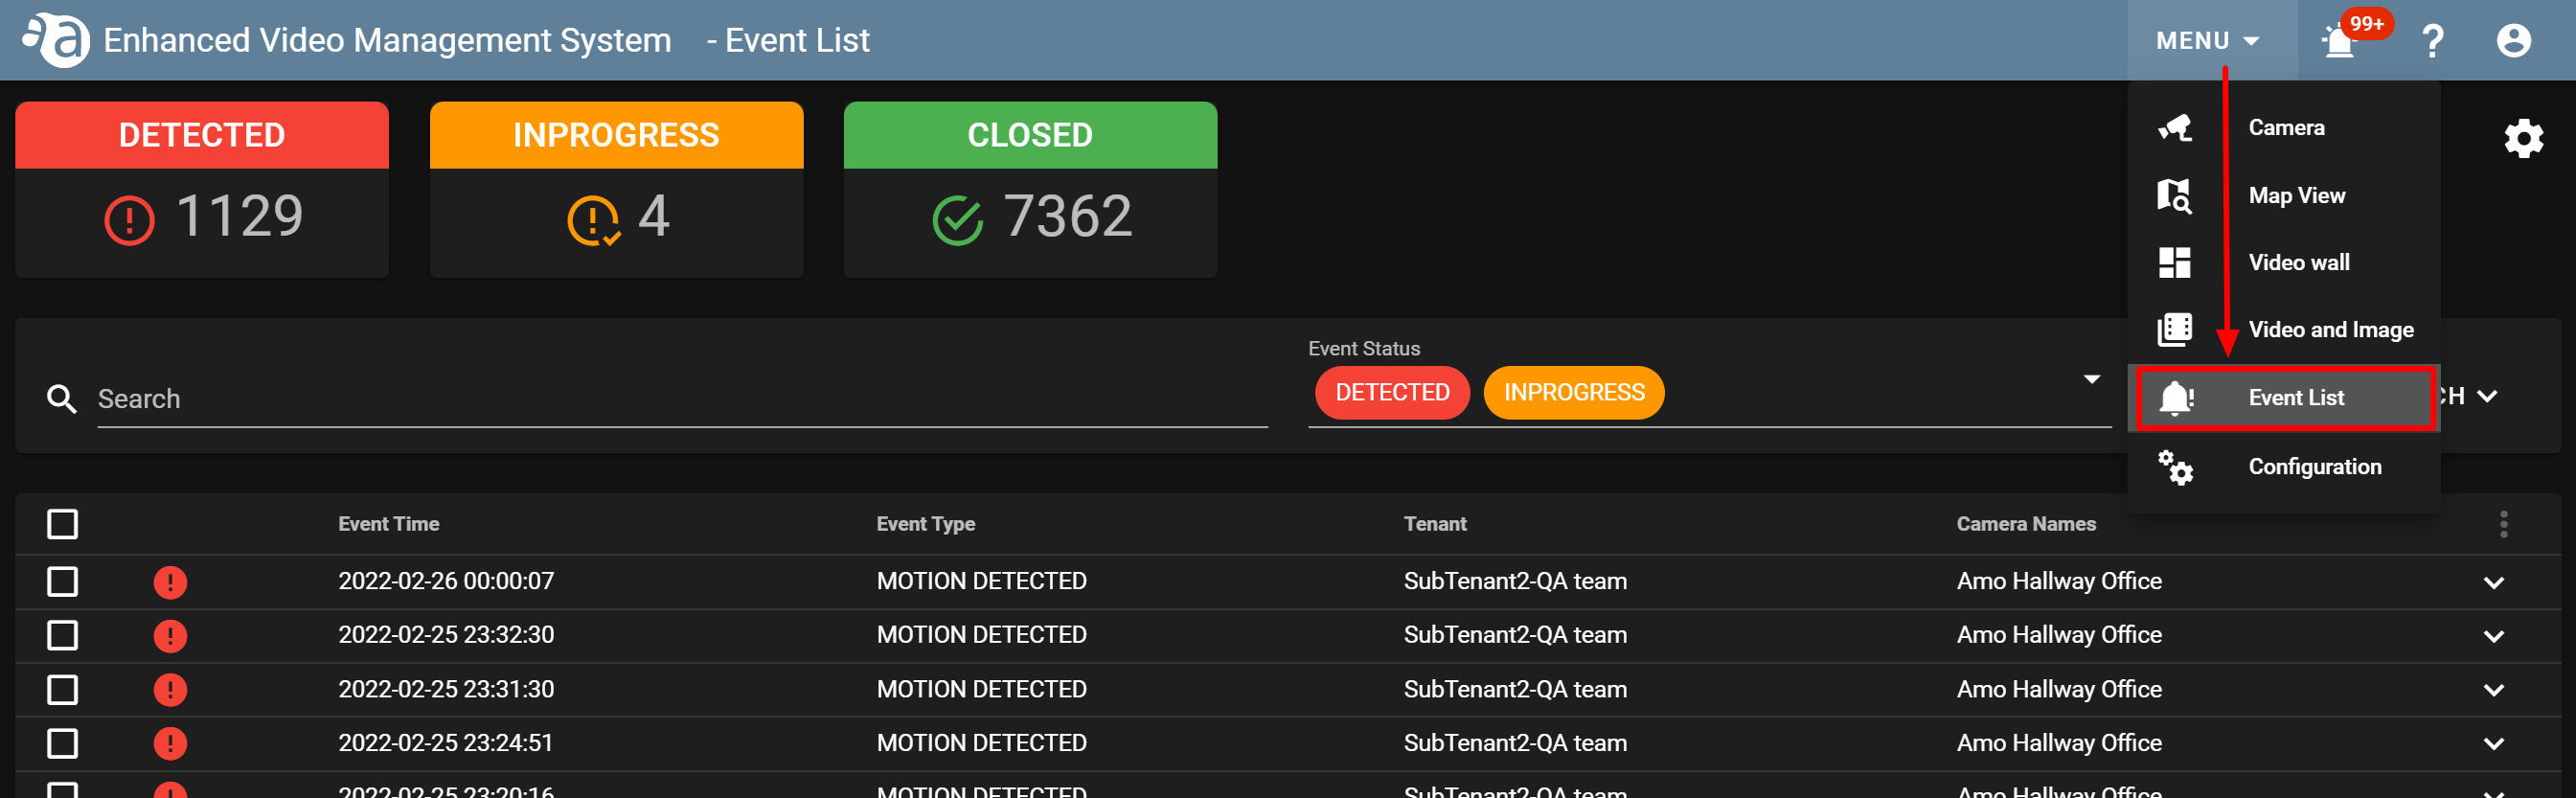
- From [ Menu ], click [ Event List ] to open it.

- Click the gear icon at the top right of the screen, and open [ Event Notification Settings ].
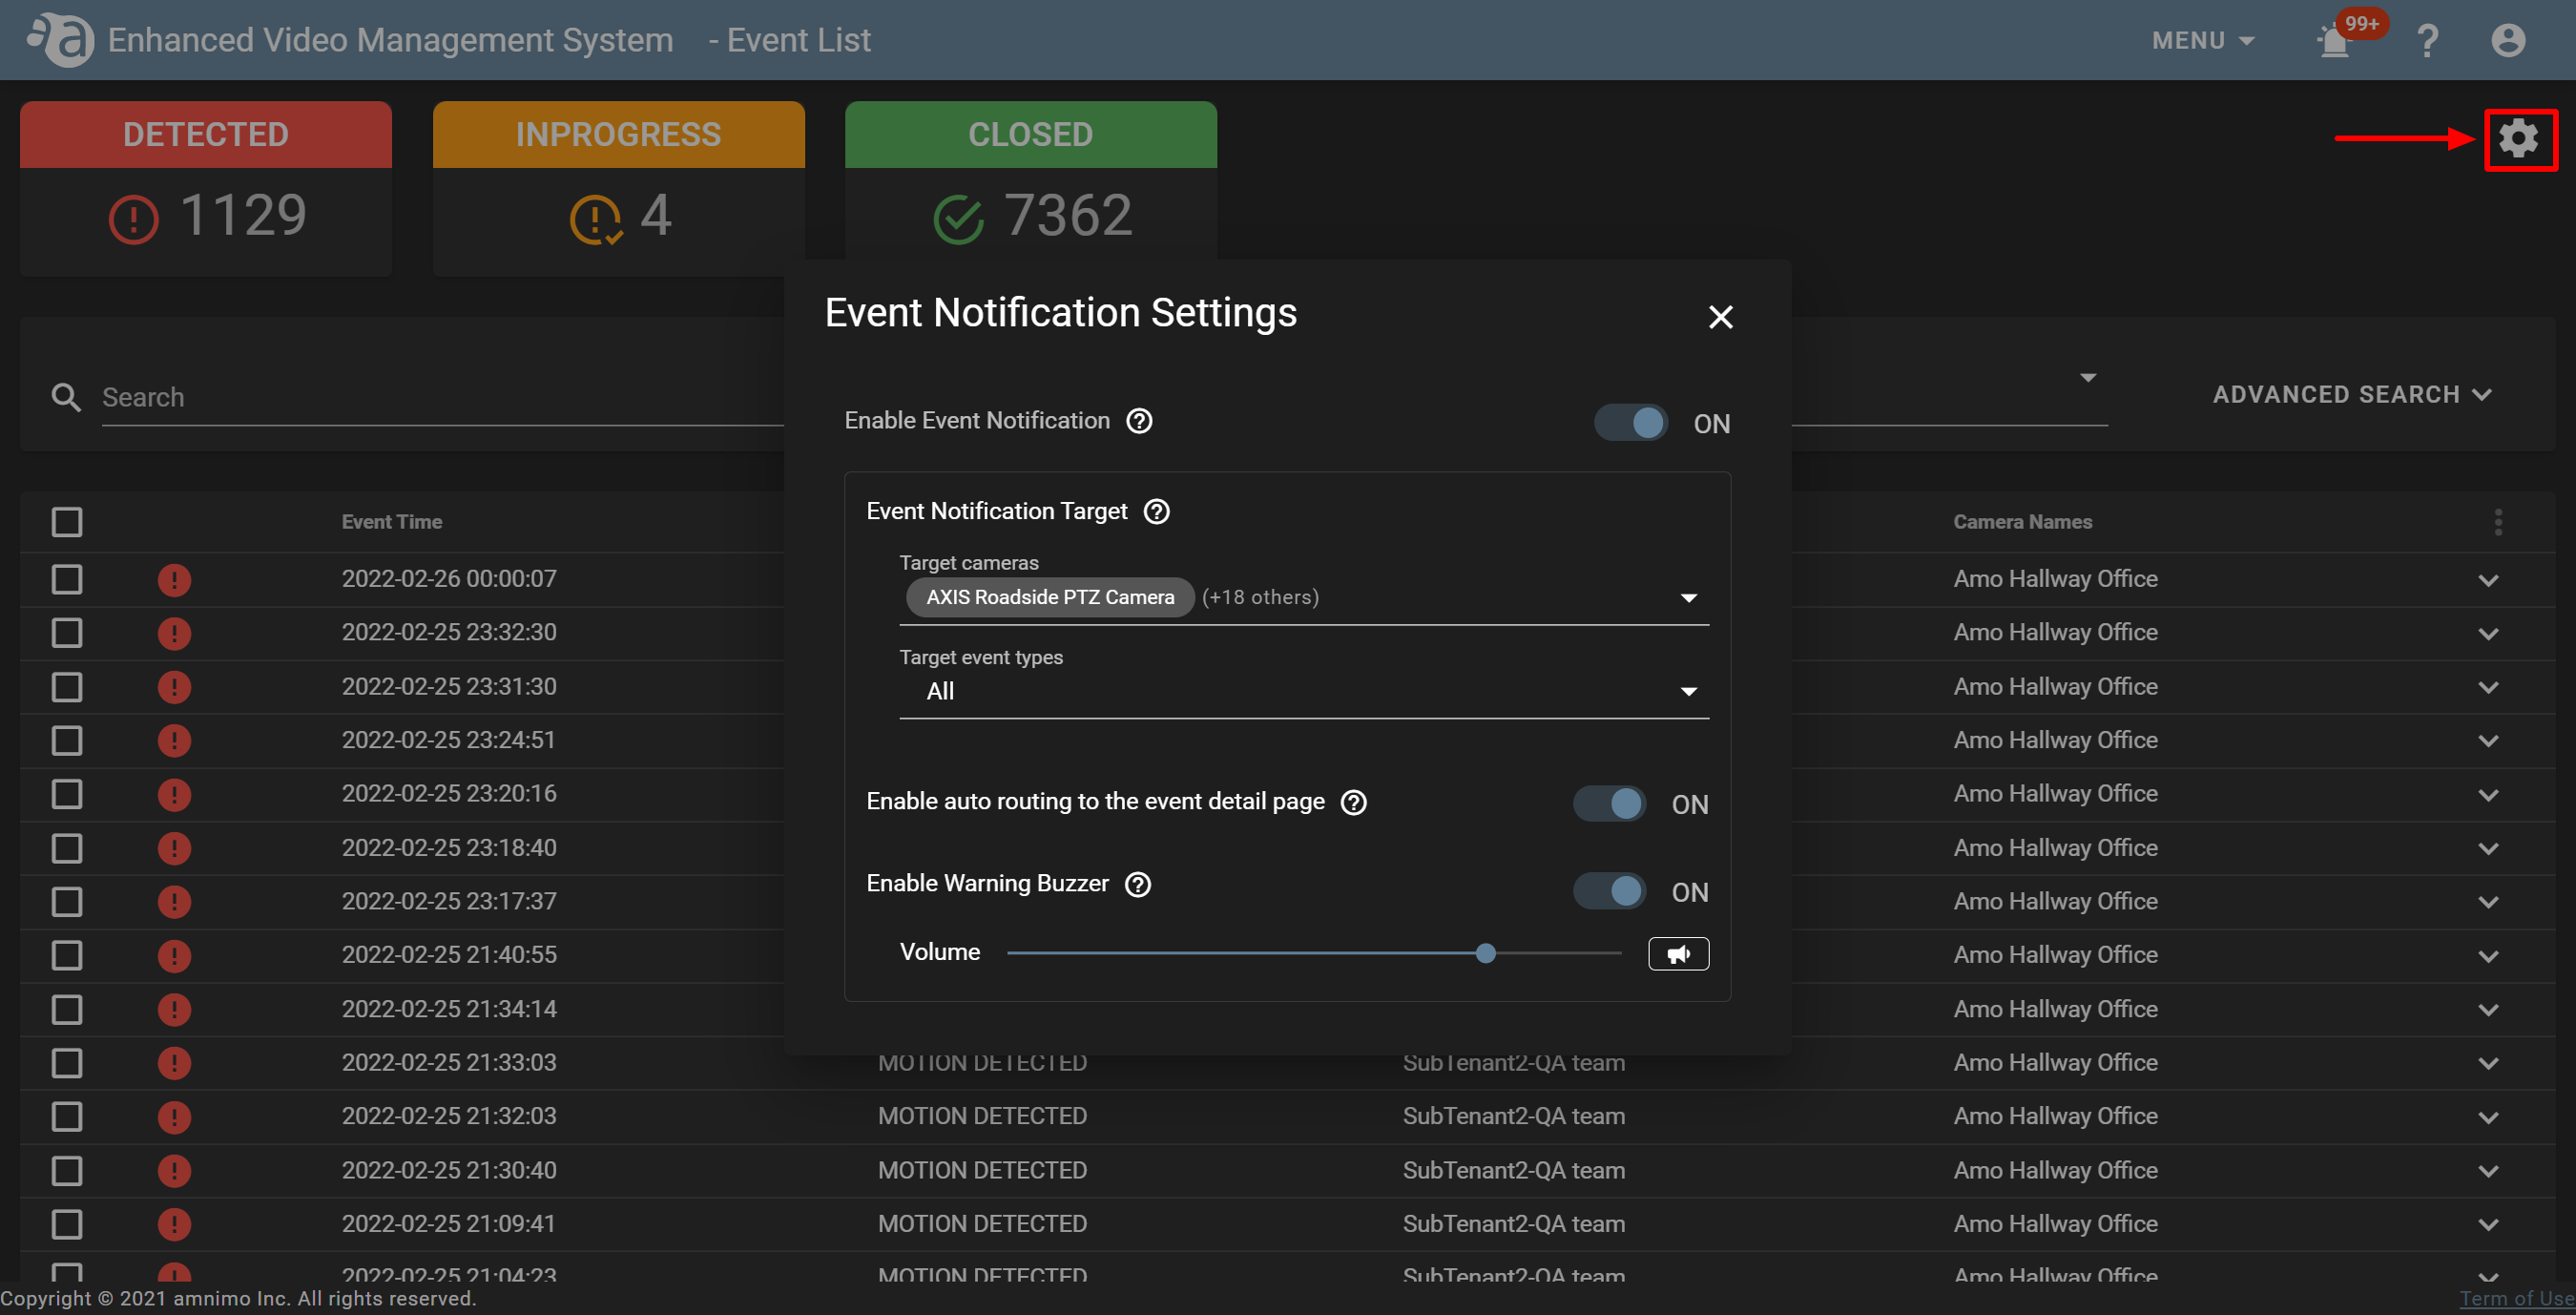
- If you set the notification method, close the screen.
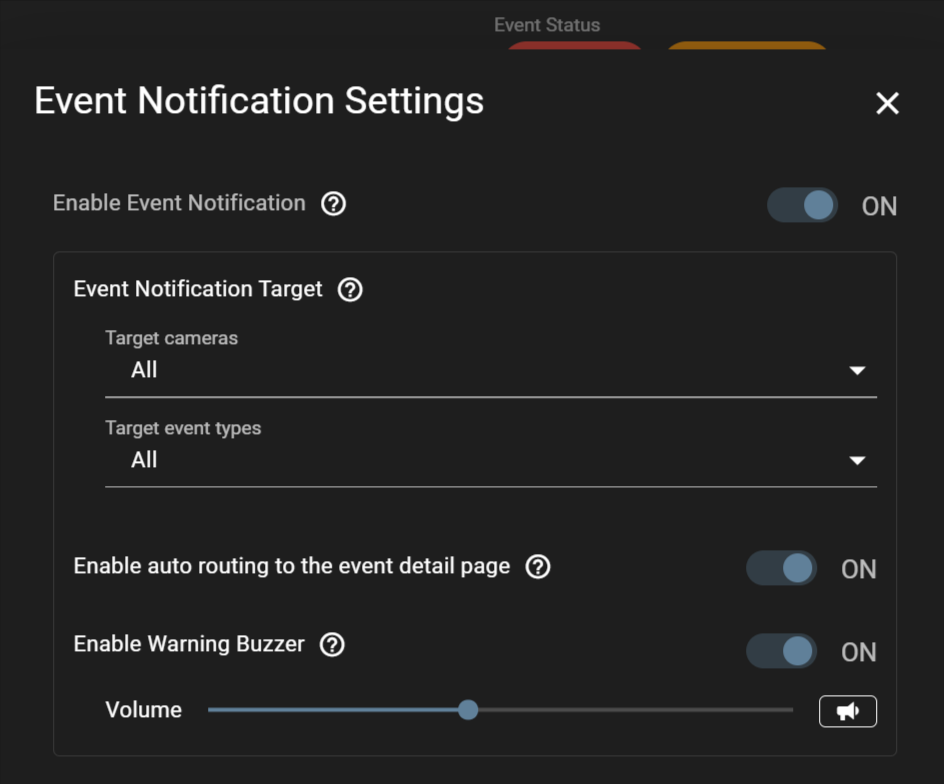
Enable Event Notification : This method enables the notification function for notifying events occurred using the event notification icon ( ) and displaying the event notification screen in a pop-up, etc. (The number displayed for the event notification icon shows the number of events detected.)
Event Notification Target : This method specifies cameras and events to be notified. Cameras and events that match the conditions will be notified. (The event types to be notified are only ”MOTION DETECTED” and ”DIGITAL INPUT”.)
Enable auto routing to the event detail page : If a new event to be notified occurs, the event notification screen will be automatically displayed. (Figure below)
Enable Warning Buzzer : This method emits a notification sound (buzzer) on the event notification screen.

- From [ Menu ], click [ Event List ] to open it.
Operations performed on the event notification screen
-
If Event Notification has been set If Event Notification has been set
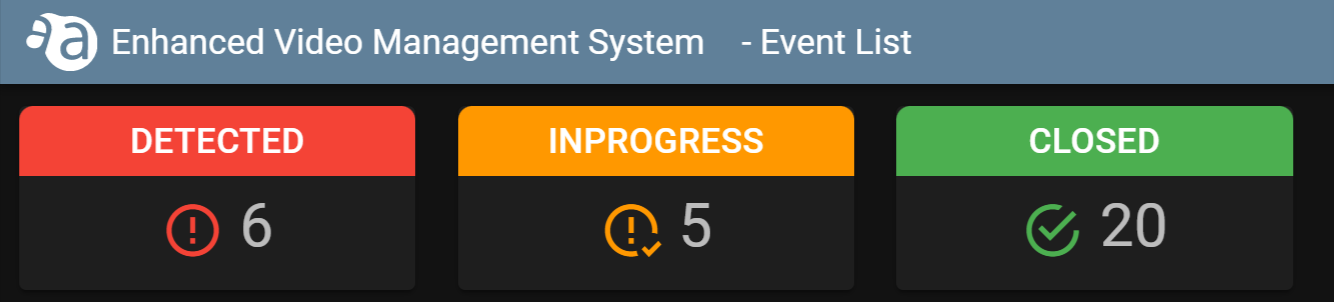
- If events occur, the number of those detected will be displayed for the event notification icon () at the top right of the screen.

If [ Event Notification Settings ] has not been set, the event notification icon will not be displayed.

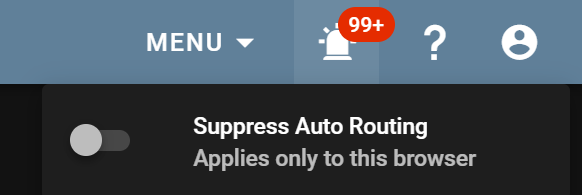
- If "Enable auto routing to the event detail page" is set for [ Event Notification Settings ], placing the mouse cursor over the event notification icon will display the [ Suppress Auto Routing ] setting.
If you turn on the toggle, you will not transit to the event notification page automatically on the browser you are currently using.
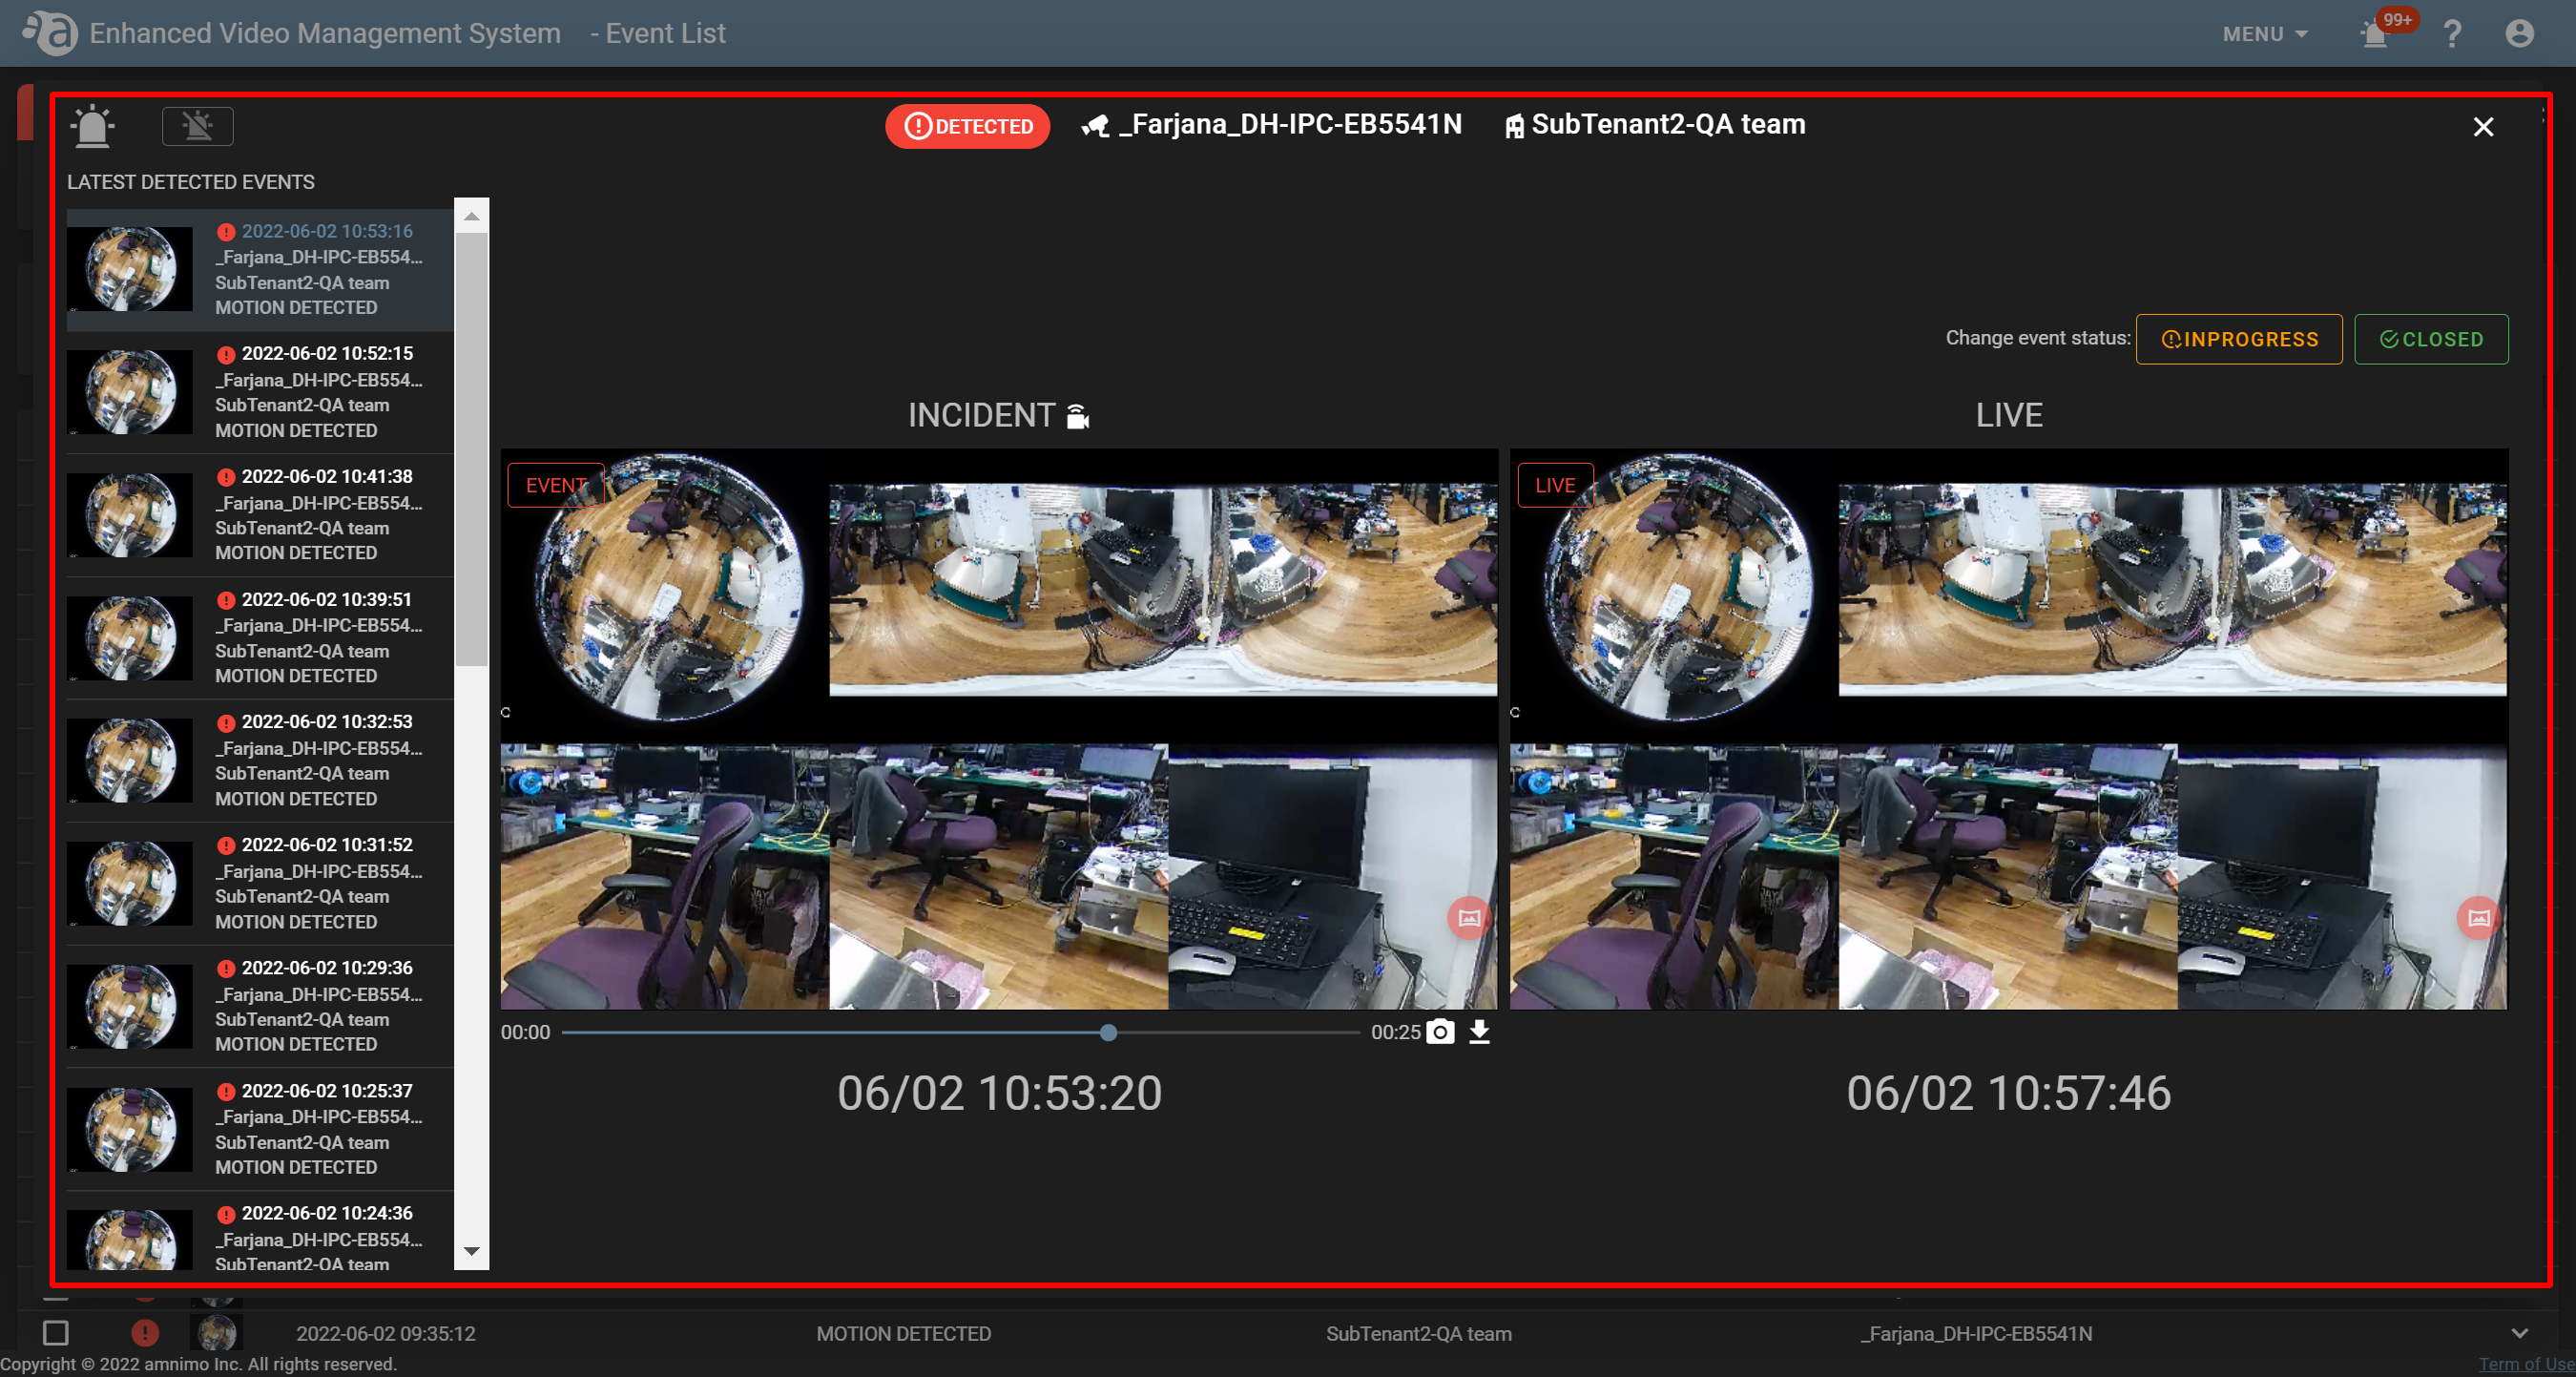
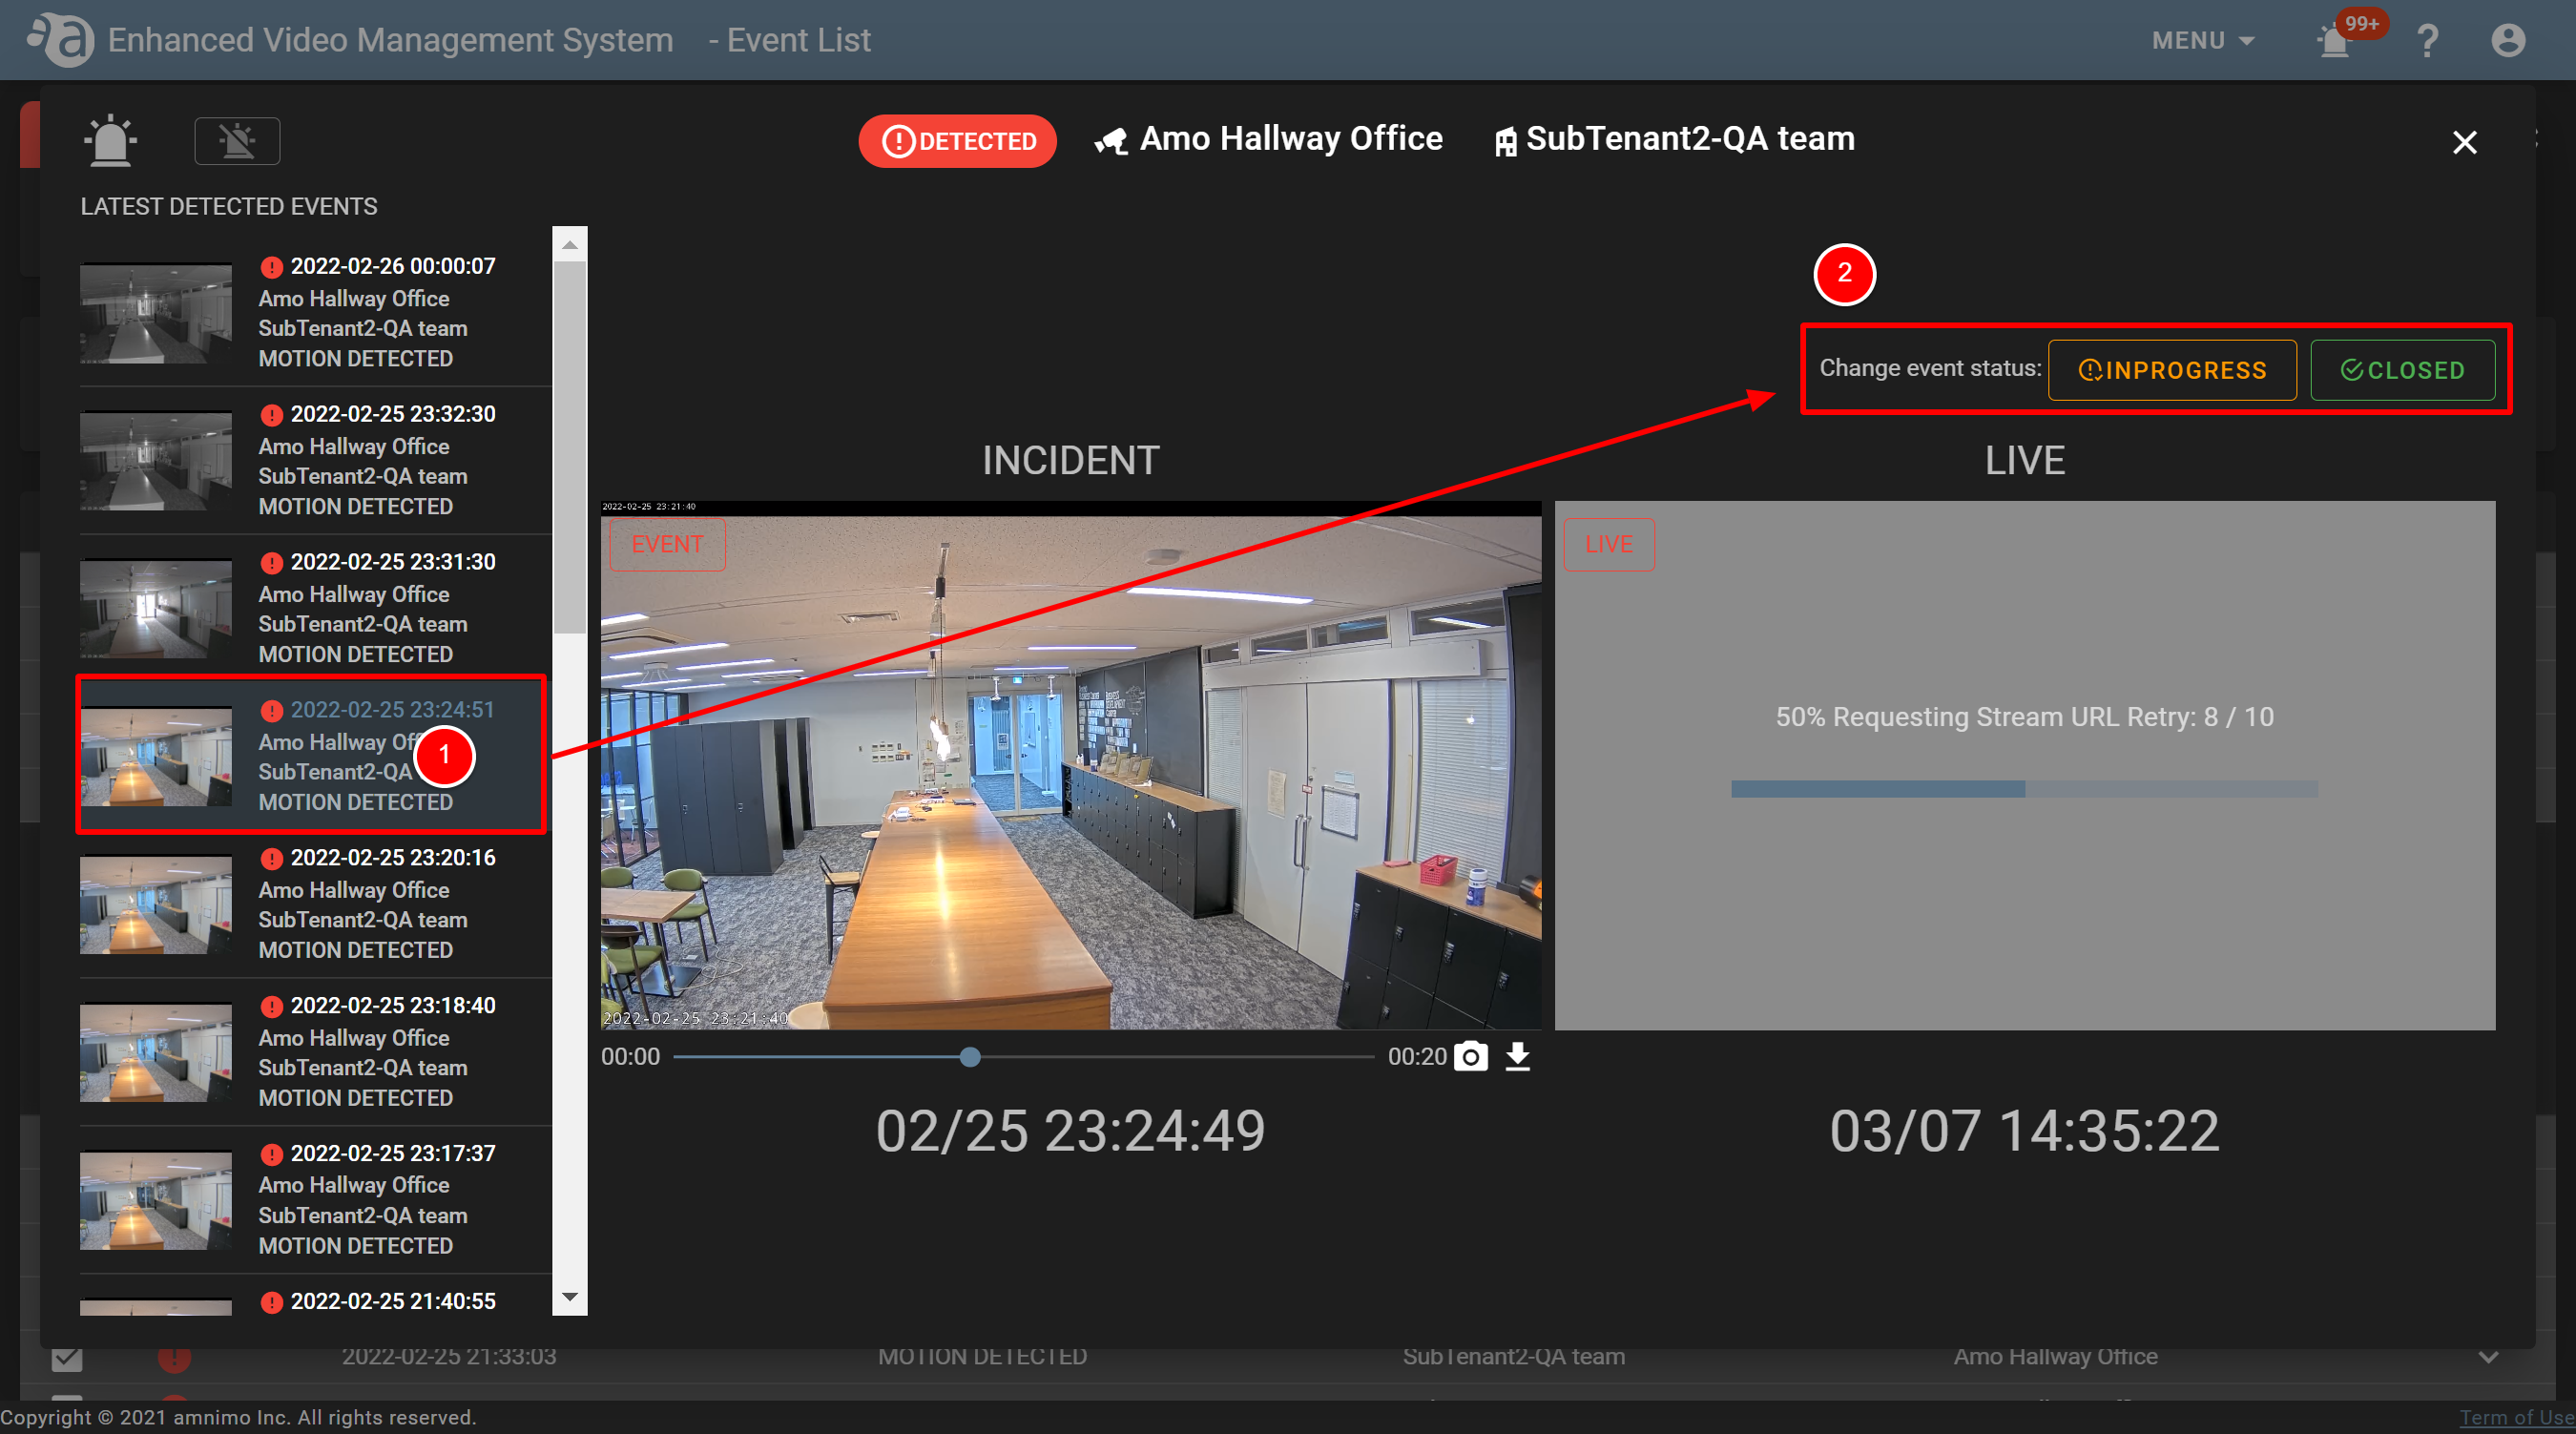
- If you click the event notification icon (), the following event notification page will be displayed. An event detected will be automatically played, and you can switch between the pause and play buttons by clicking on the image.
- If any events have not been detected, even if you click
 , the event notification screen will not open.
 - On the event notification screen, the latest 20 events will be displayed on a list. If there is one event, a list will not be displayed.
- If any events have not been detected, even if you click
- If "Enable Warning Buzzer" is set, a notification sound will continue beeping until the sound is stopped. If you click the
 icon, the sound will stop.

- After you check the event, click
 at the top right of the screen to close it. You will go back to the [ Event List ] screen.
After you change the status of the event, even if you click  , the event notification screen will not open.
- If events occur, the number of those detected will be displayed for the event notification icon (
-
Changing the event statusChanging the event status
You can change the event status on the event notification screen.
Select an event, and click "INPROGRESS" OR "CLOSED" from [ Change event status ].
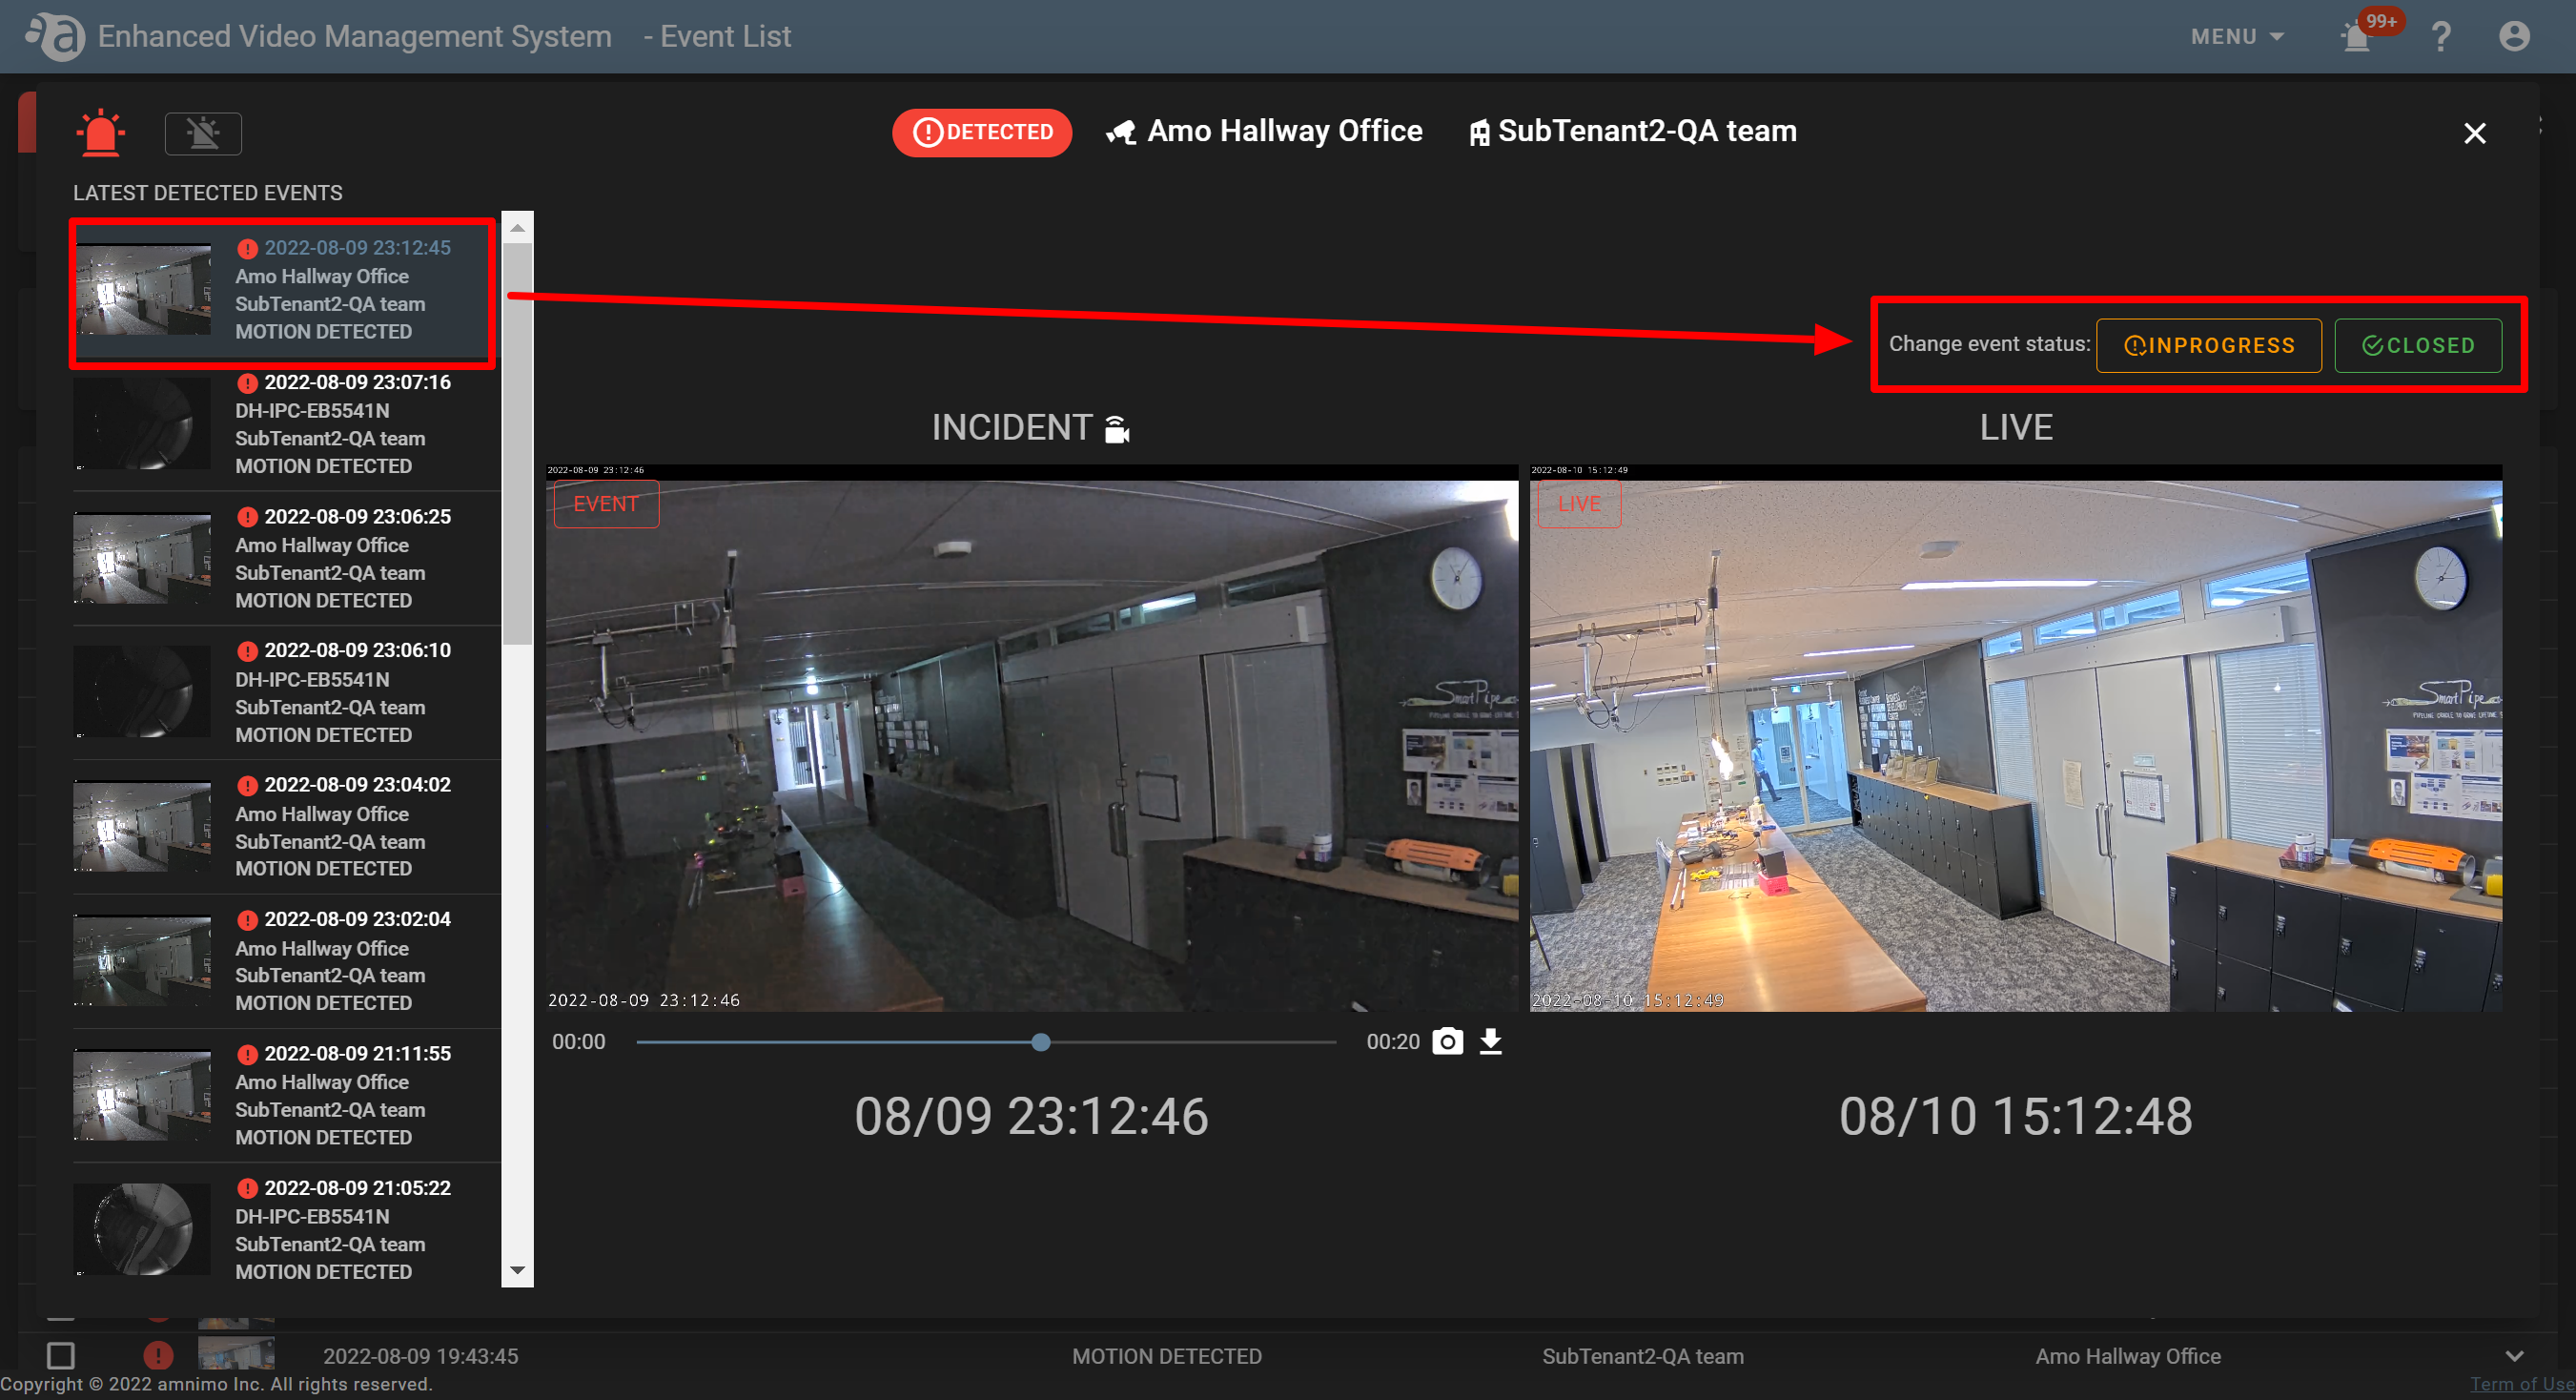
If you change the event status, the number displayed for the event notification icon (  ) will disappear.
 -
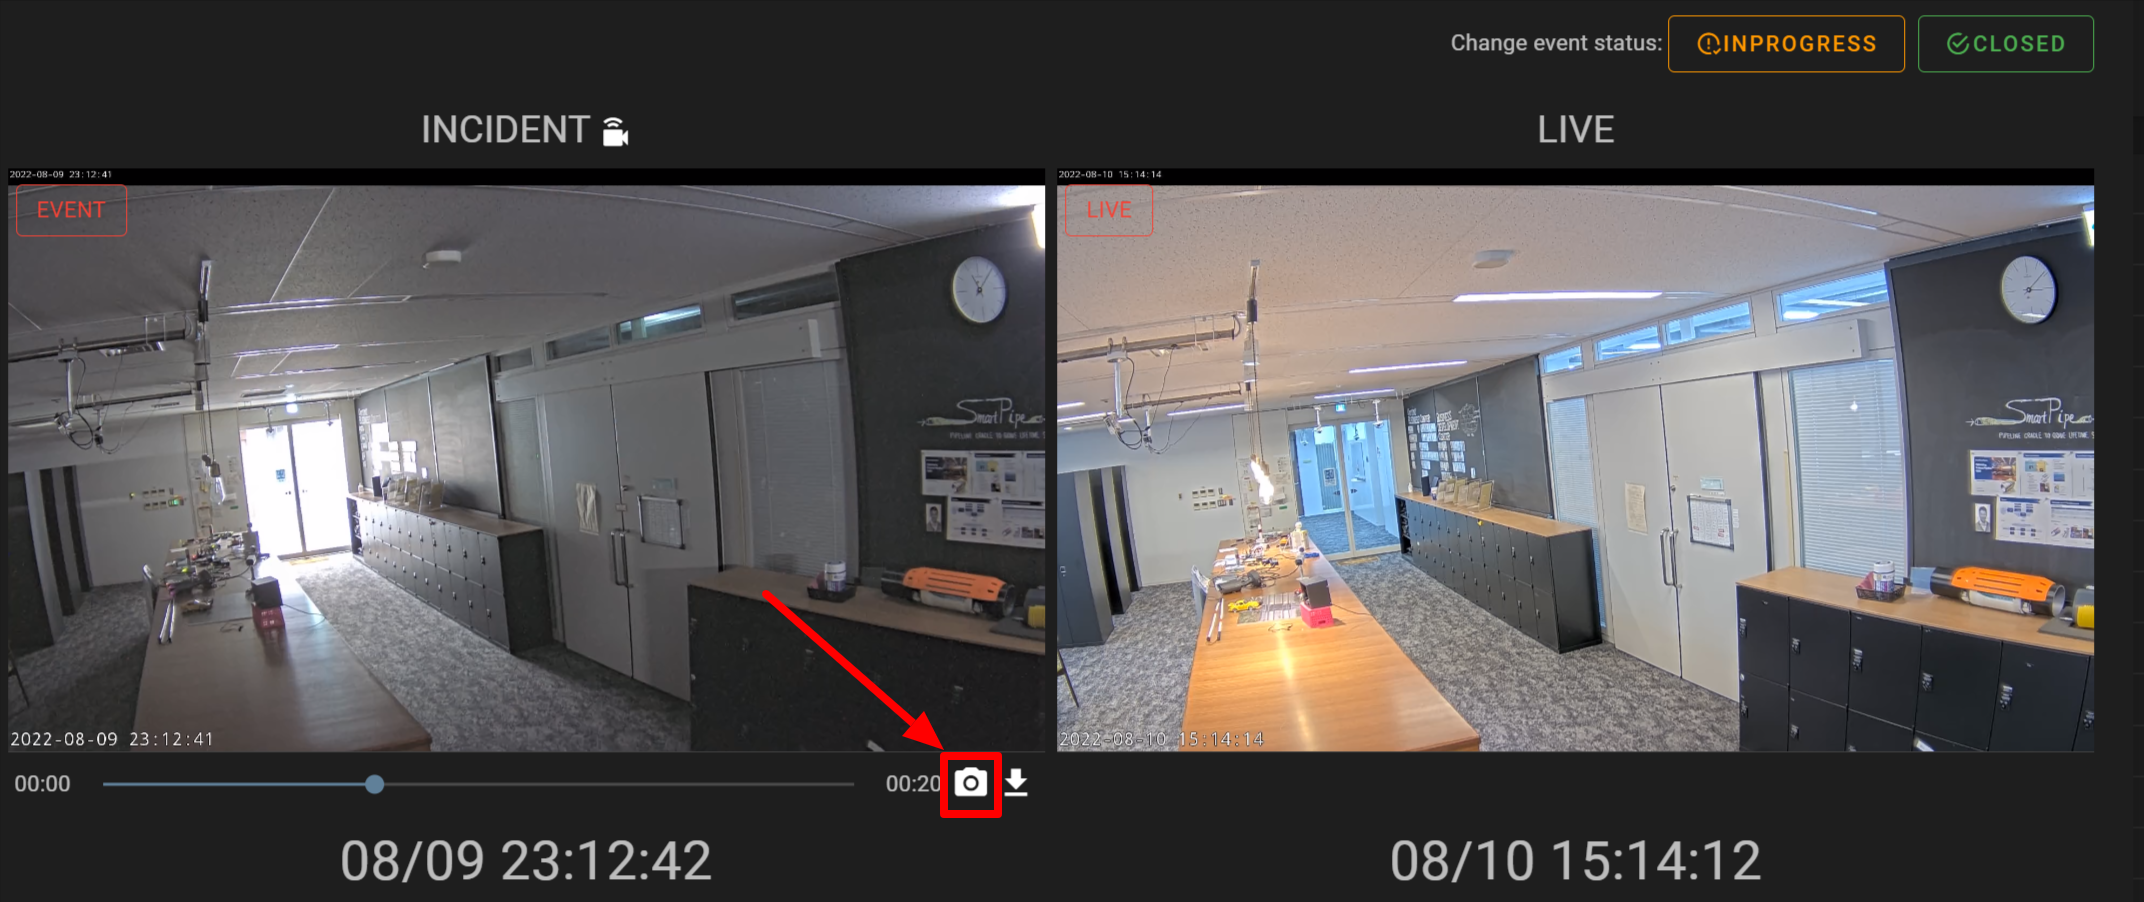
Taking a snapshot from a video recorded when an event occursTaking a snapshot from a video recorded when an event occurs
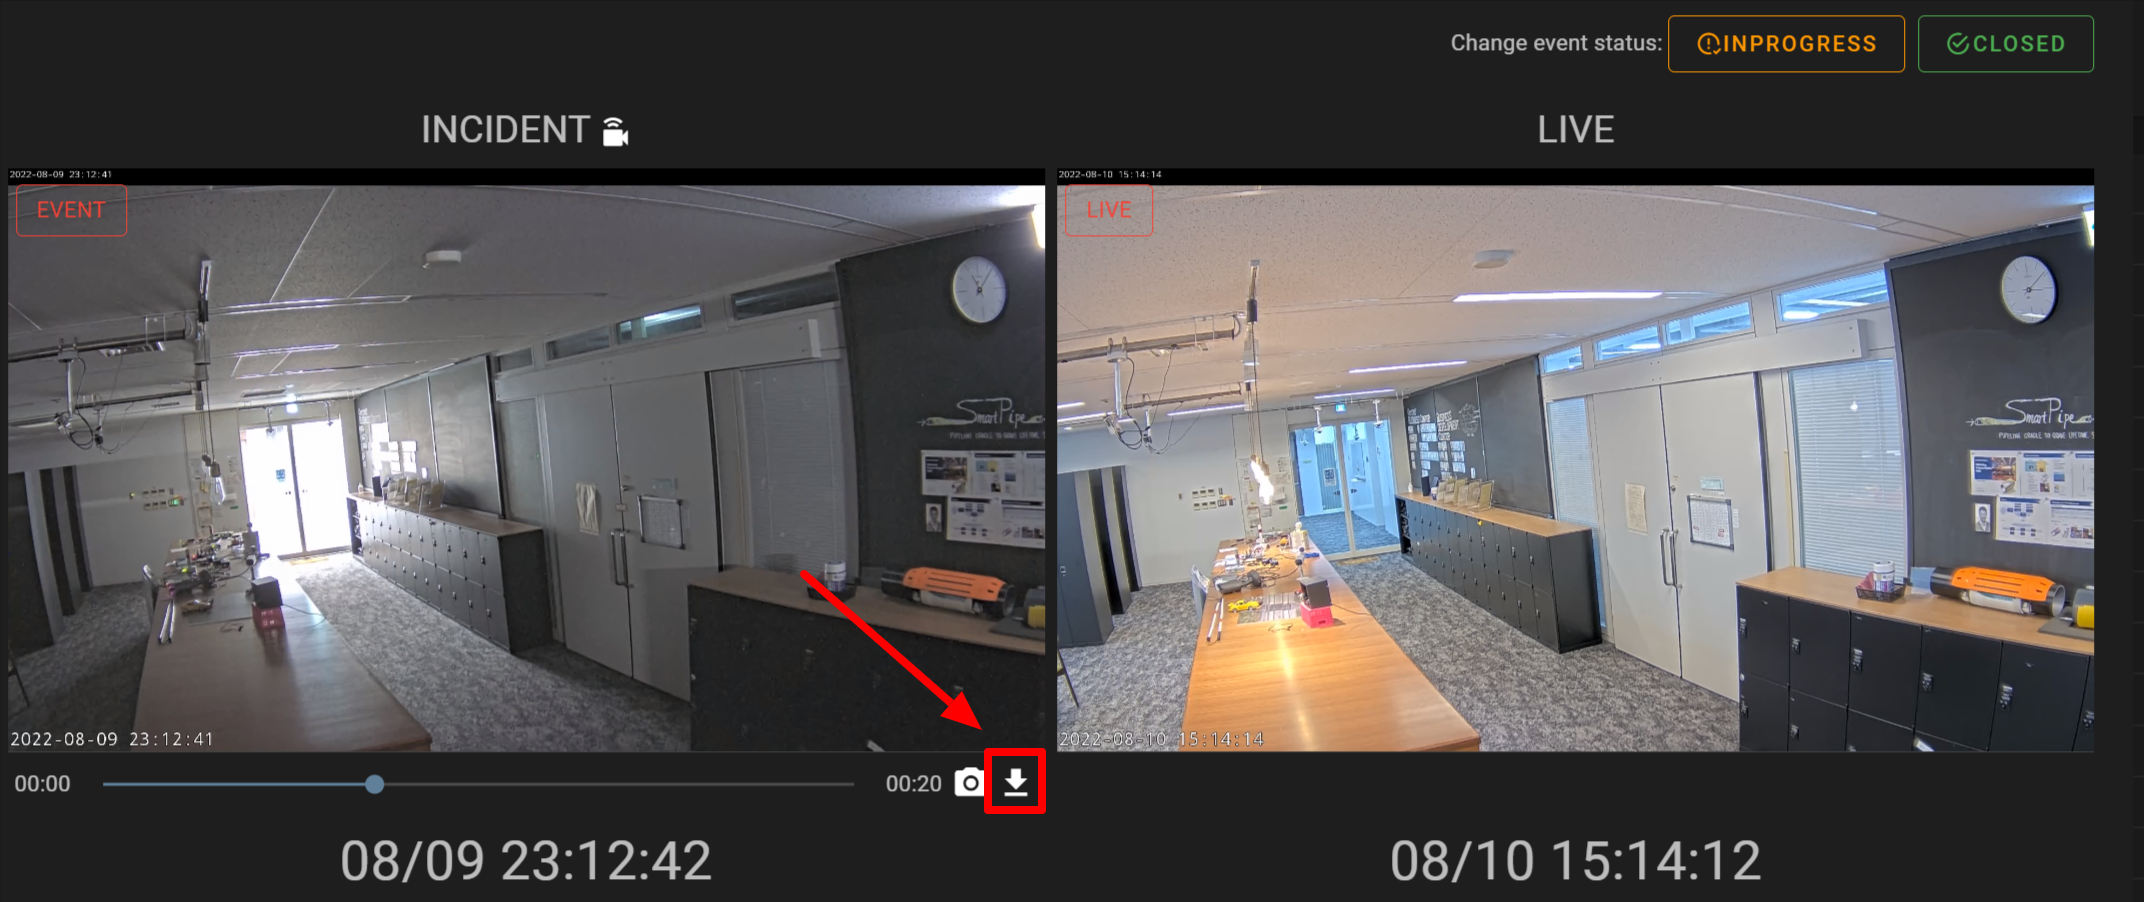
A video recorded when an event occurs can be saved as a snapshot (only on the event notification screen).
If you click the snapshot button ( ) while playing an event, a snapshot will be saved on the cloud, and you can check it on the [ Video and Image ] screen.
-
Downloading a video recorded when an event occursDownloading a video recorded when an event occurs
If you click (
 ) for the video displayed when an event occurs, it will be saved on your local PC.
-
Switching between the correction screen and the original screen (images corrected for fisheye distortion)Switching between the correction screen and the original screen (images corrected for fisheye distortion)
You can switch the display mode for events of images corrected for fisheye distortion to the other one. Also, by scrolling the screen, you can enlarge or shrink an image and can change the orientation.
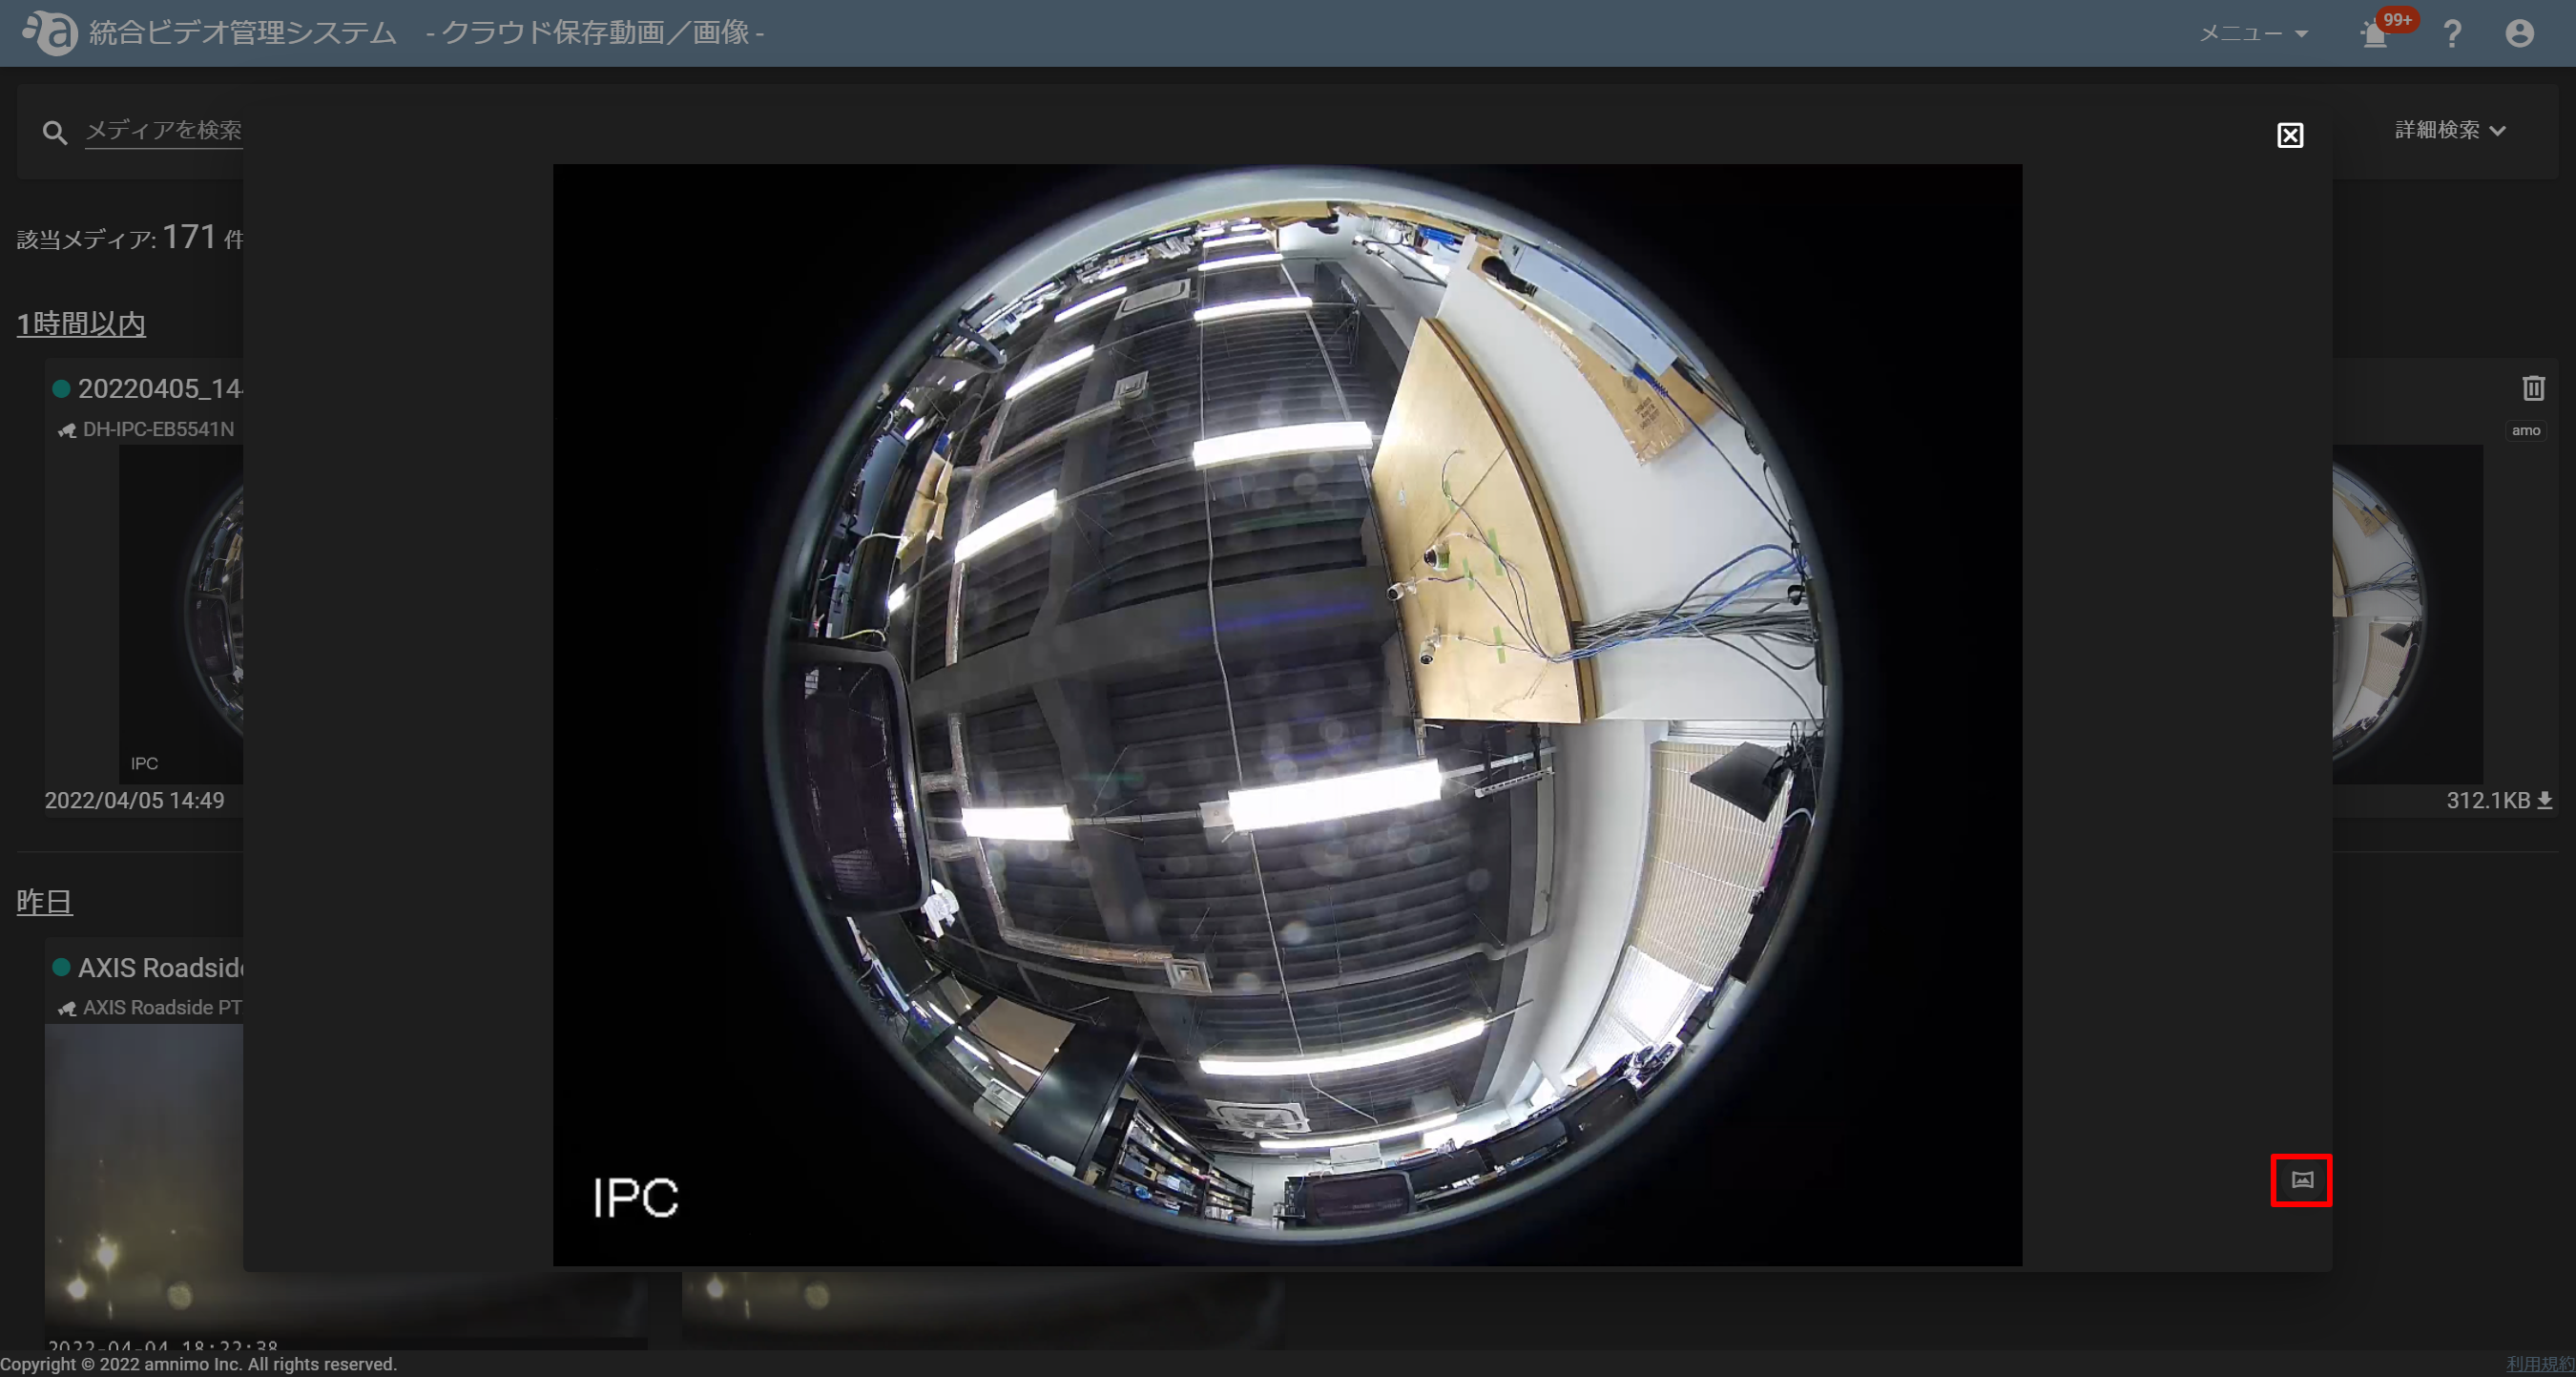
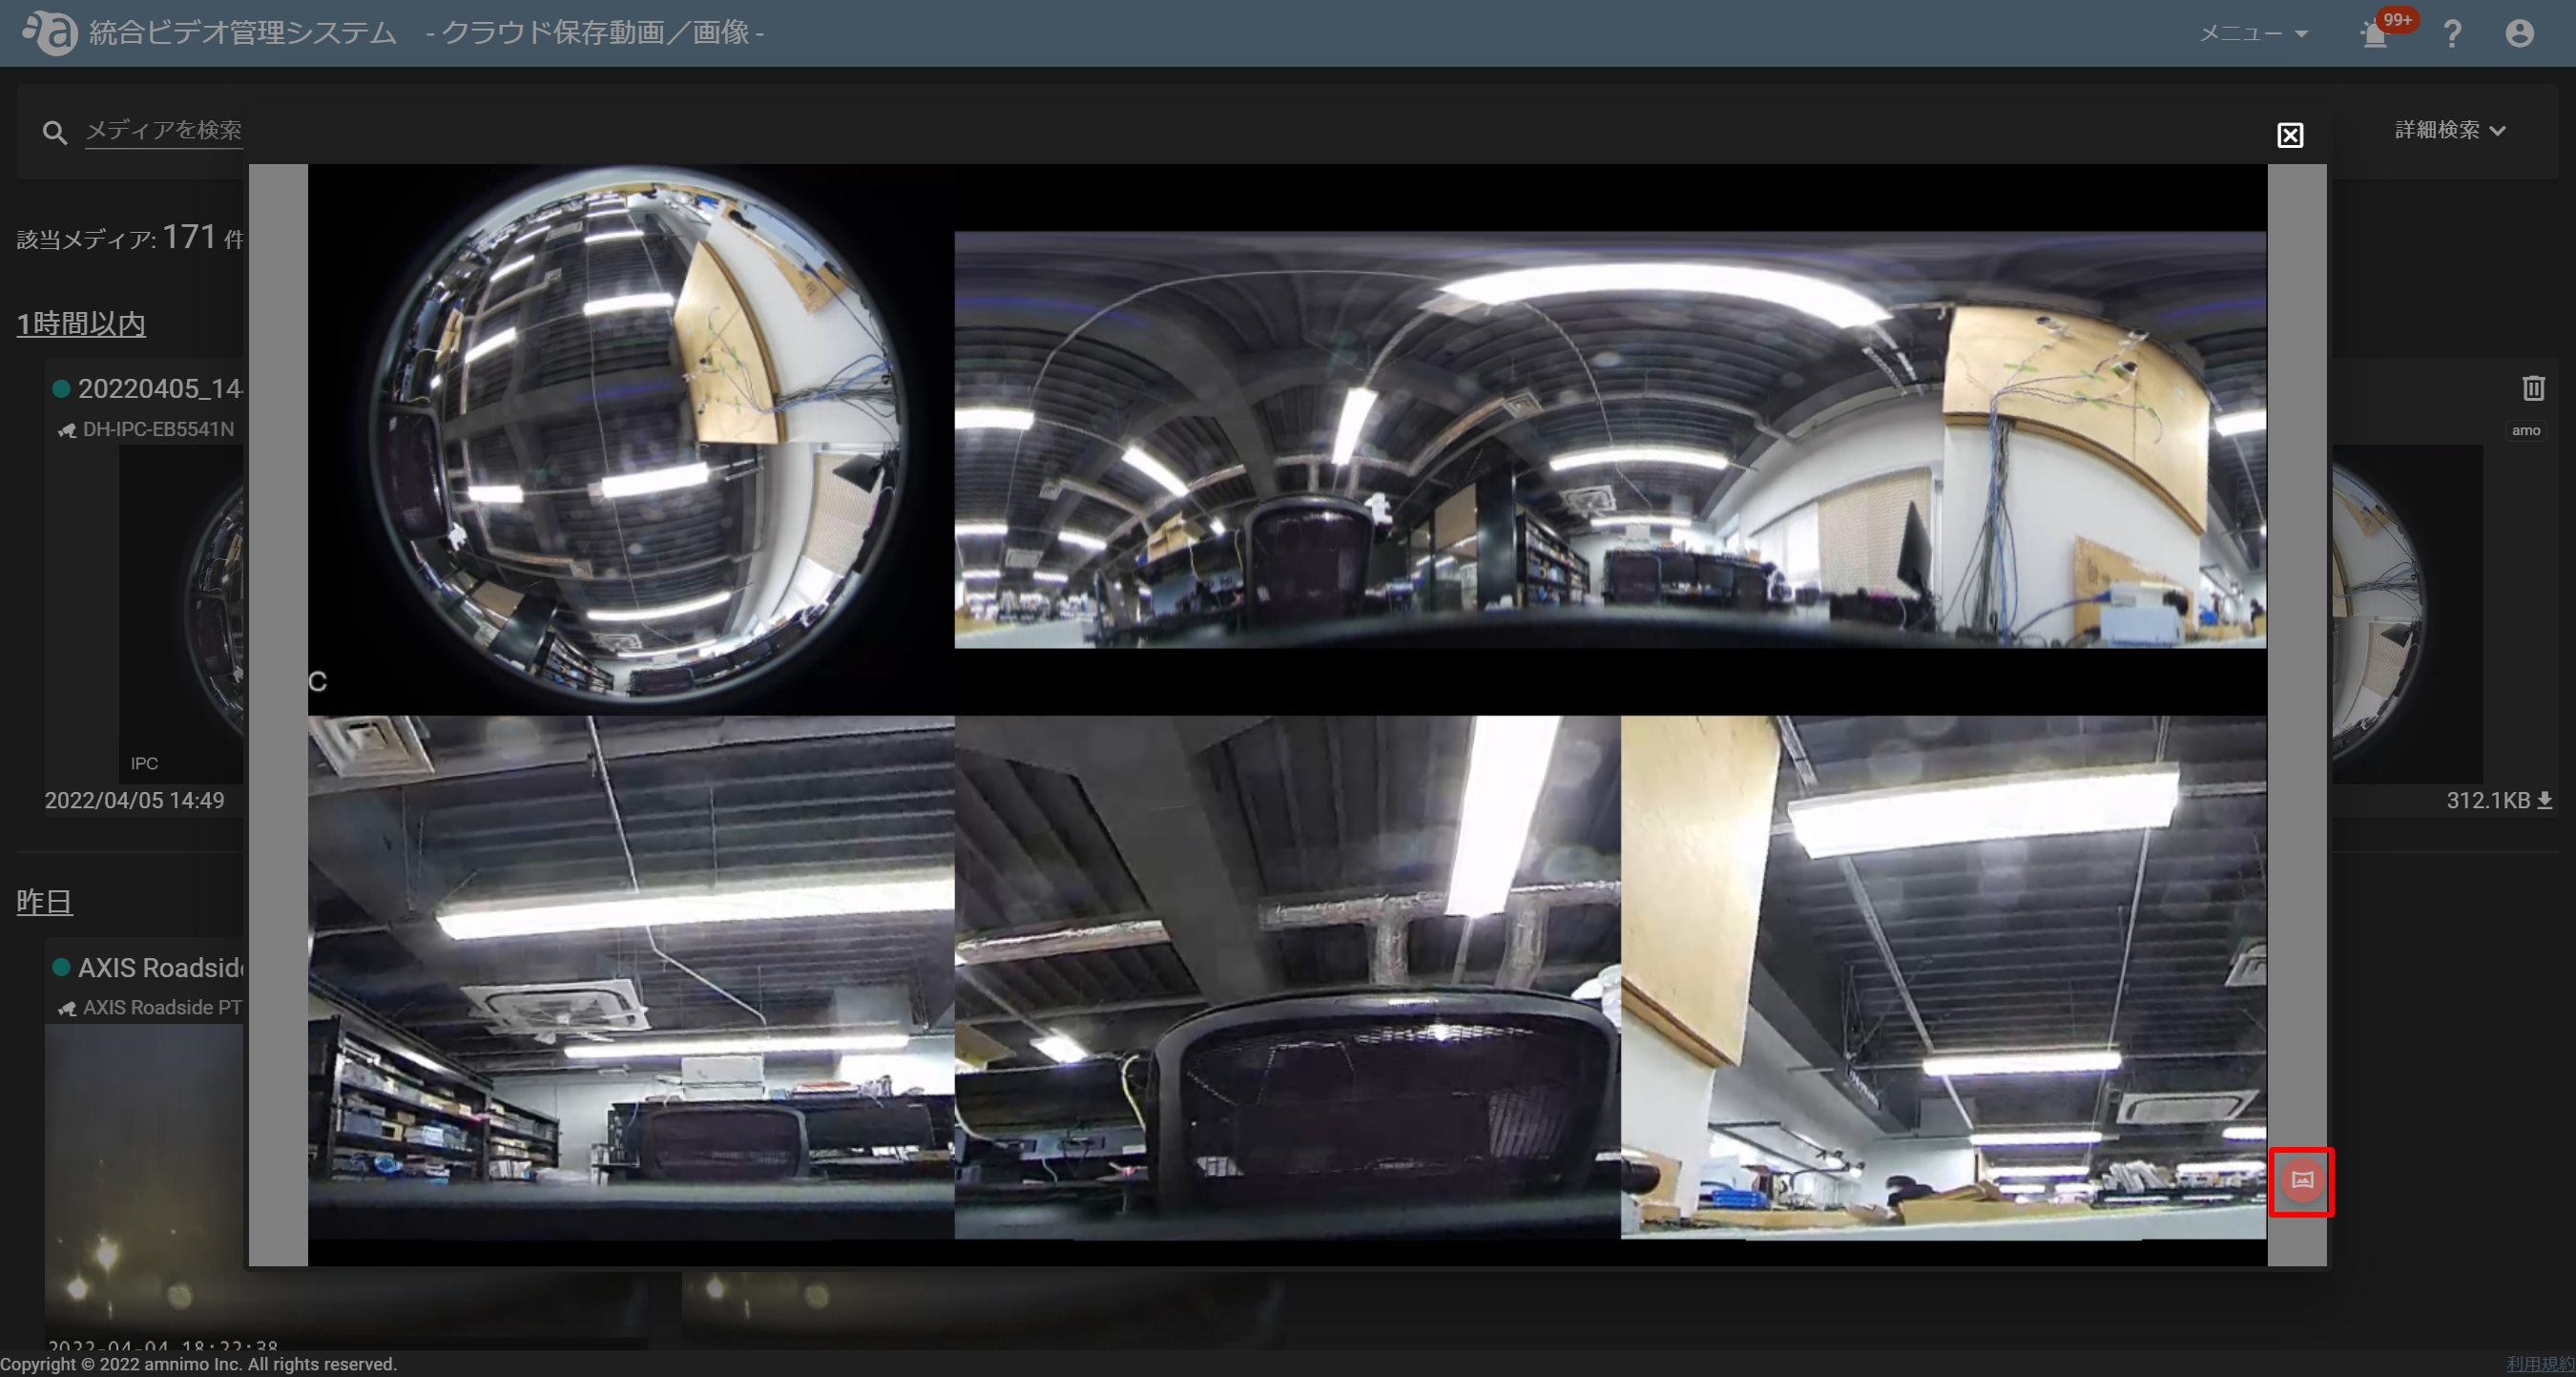
If you click an image and click the fisheye correction icon ( ), the layout corrected for fisheye distortion will replace the original (fisheye) image.
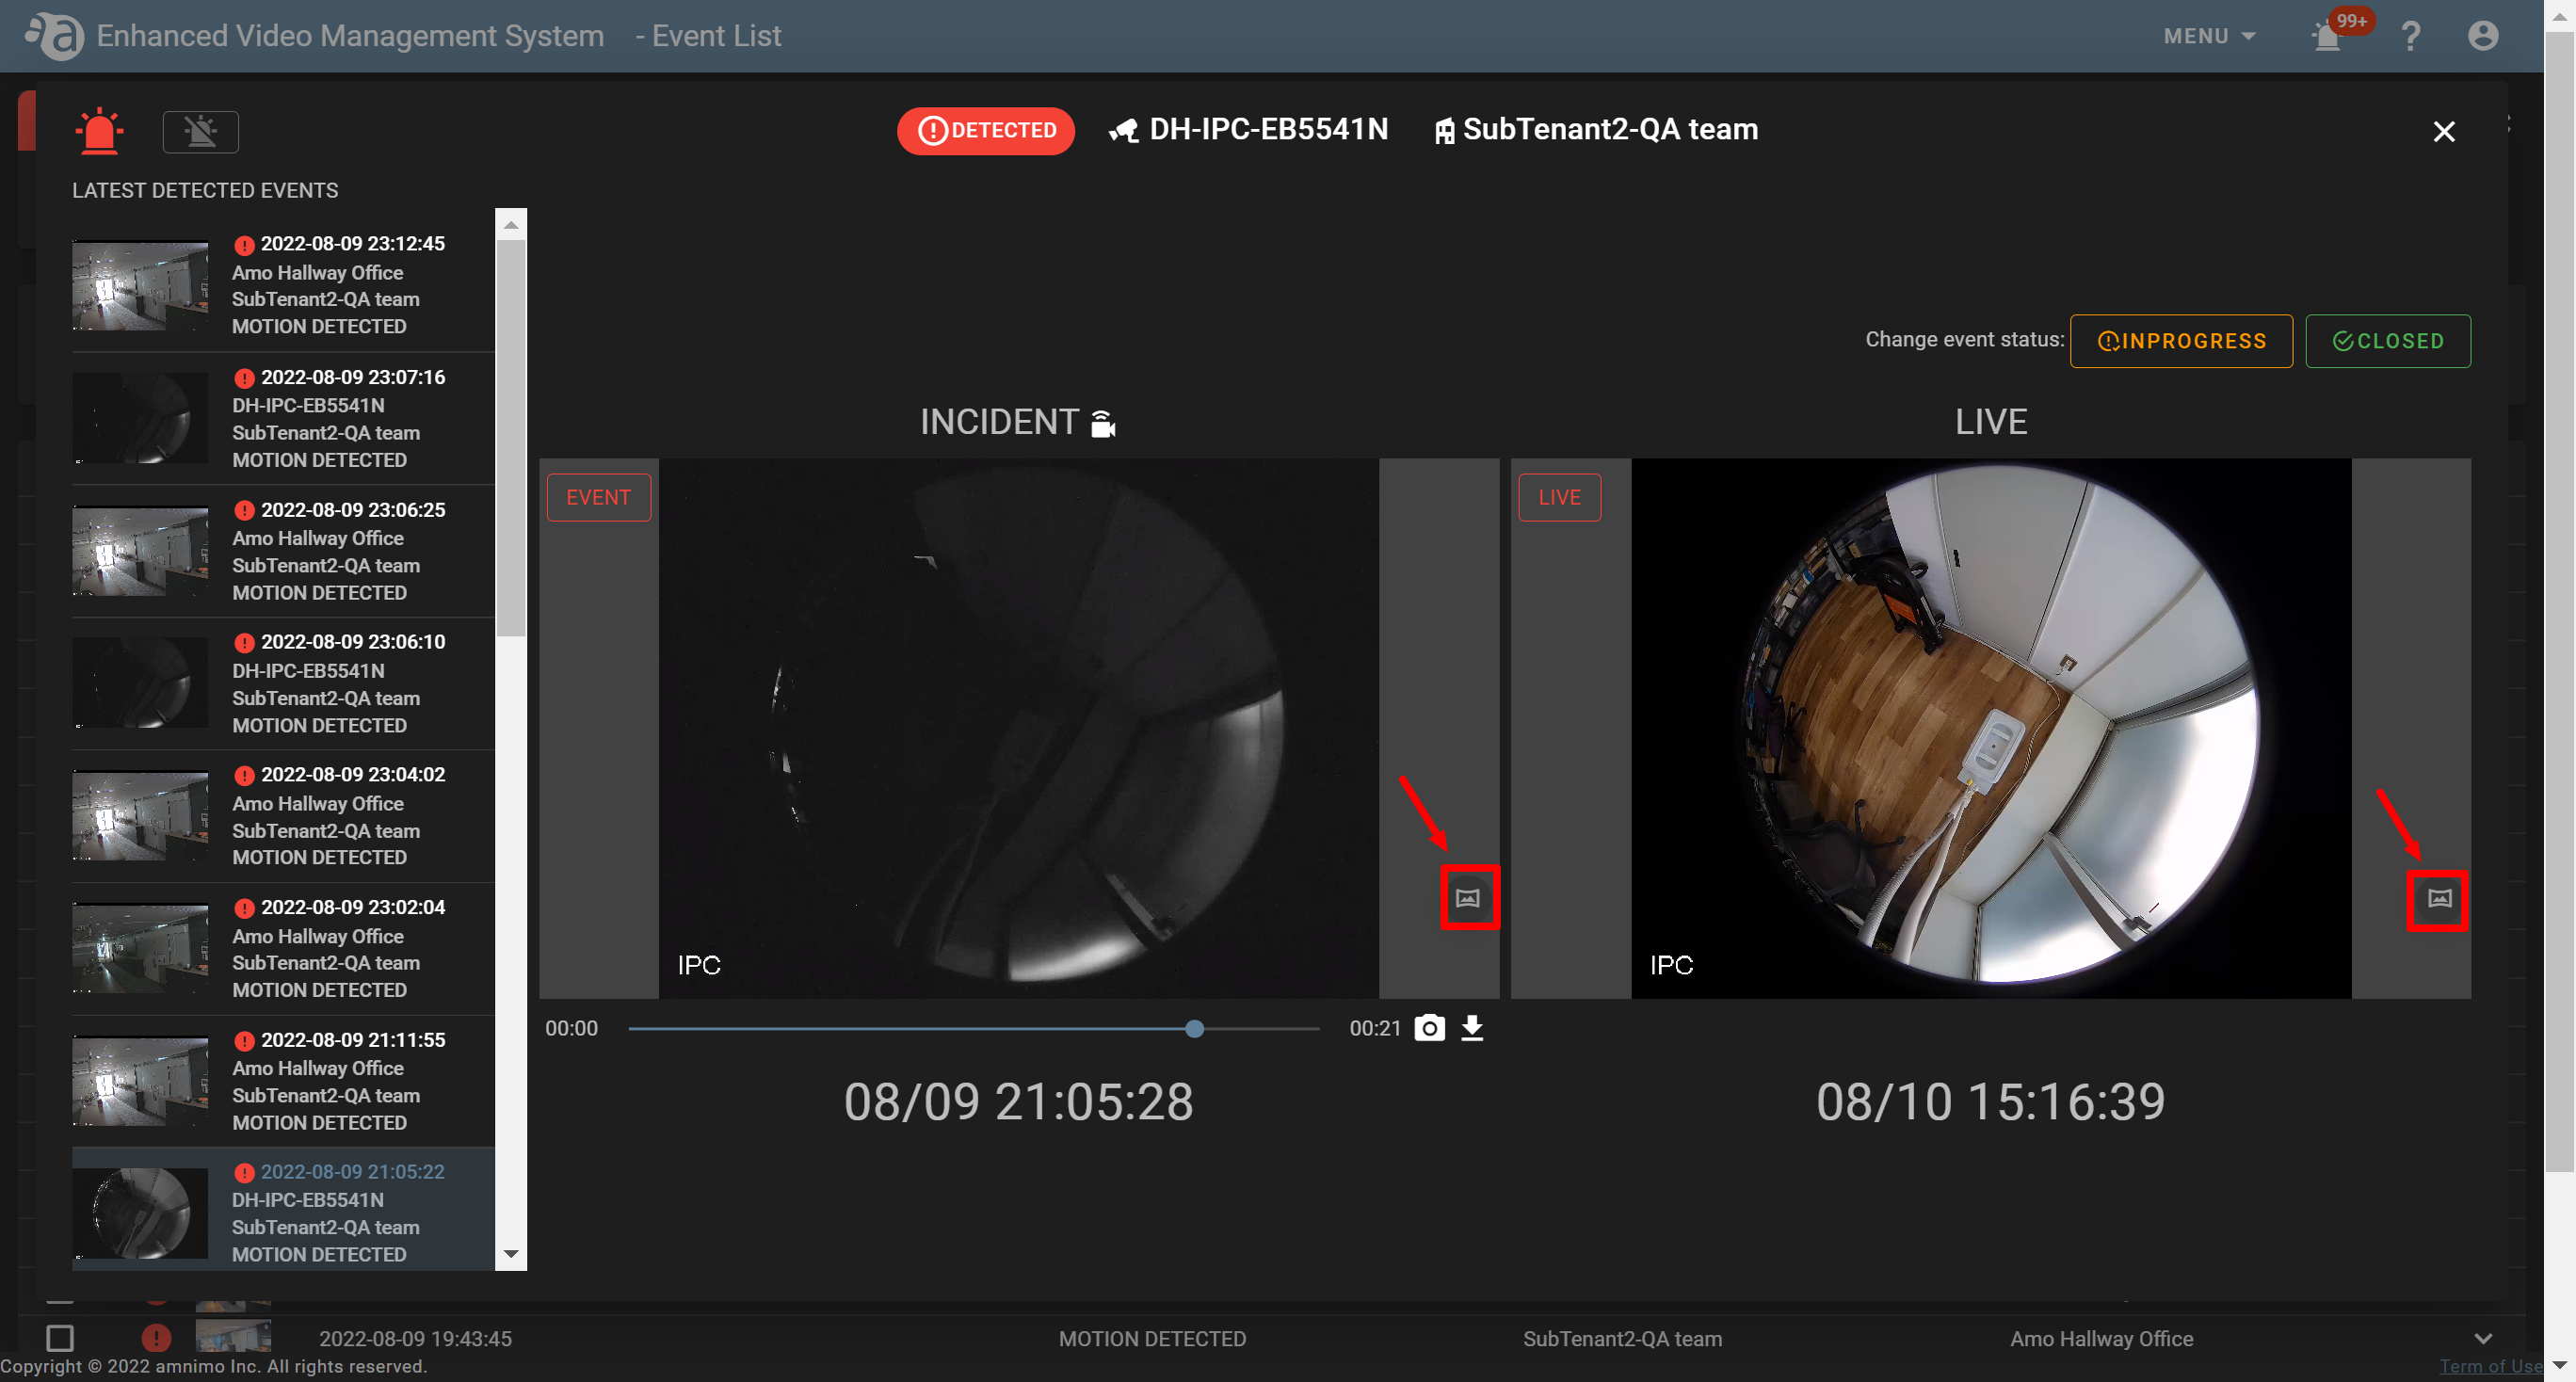
Original (fisheye) mode
Fisheye correction mode
-
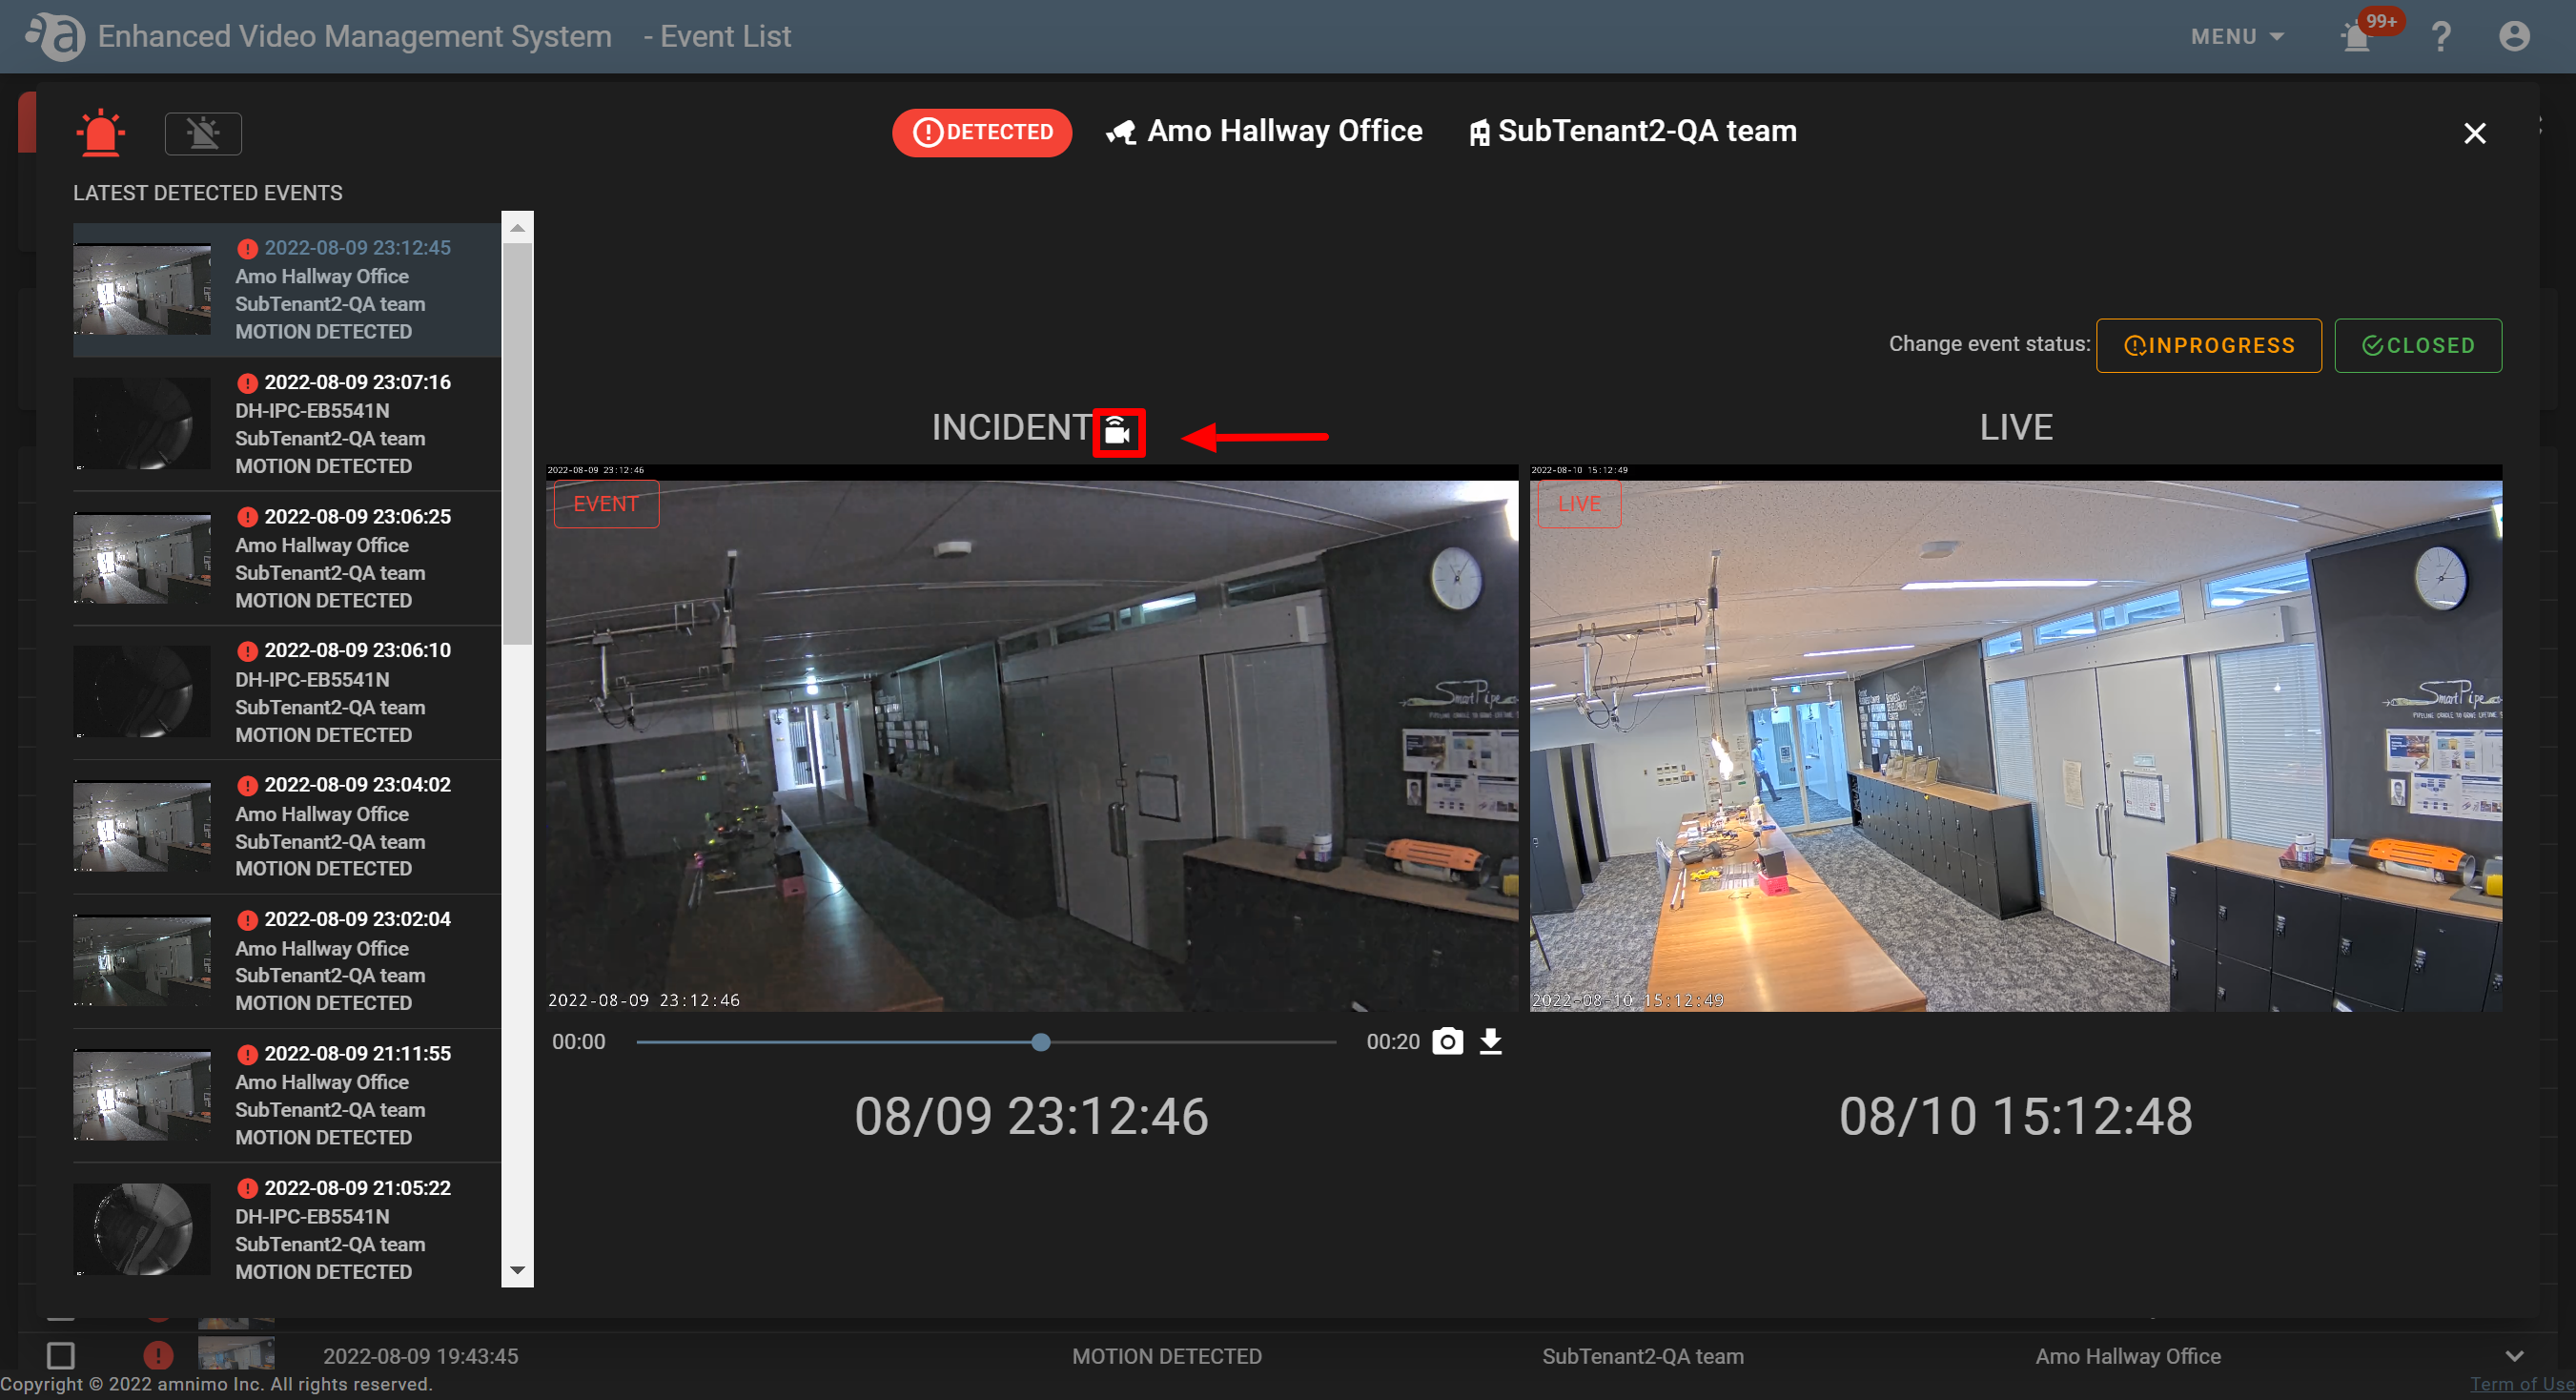
Playing a video on the event notification screen in Direct modePlaying a video on the event notification screen in Direct mode
You can play a video displayed on the event notification screen in Direct mode. This is a useful function when the length of an event is 10 seconds or longer.
- Click the camera icon (
 ) for the event you want to play.
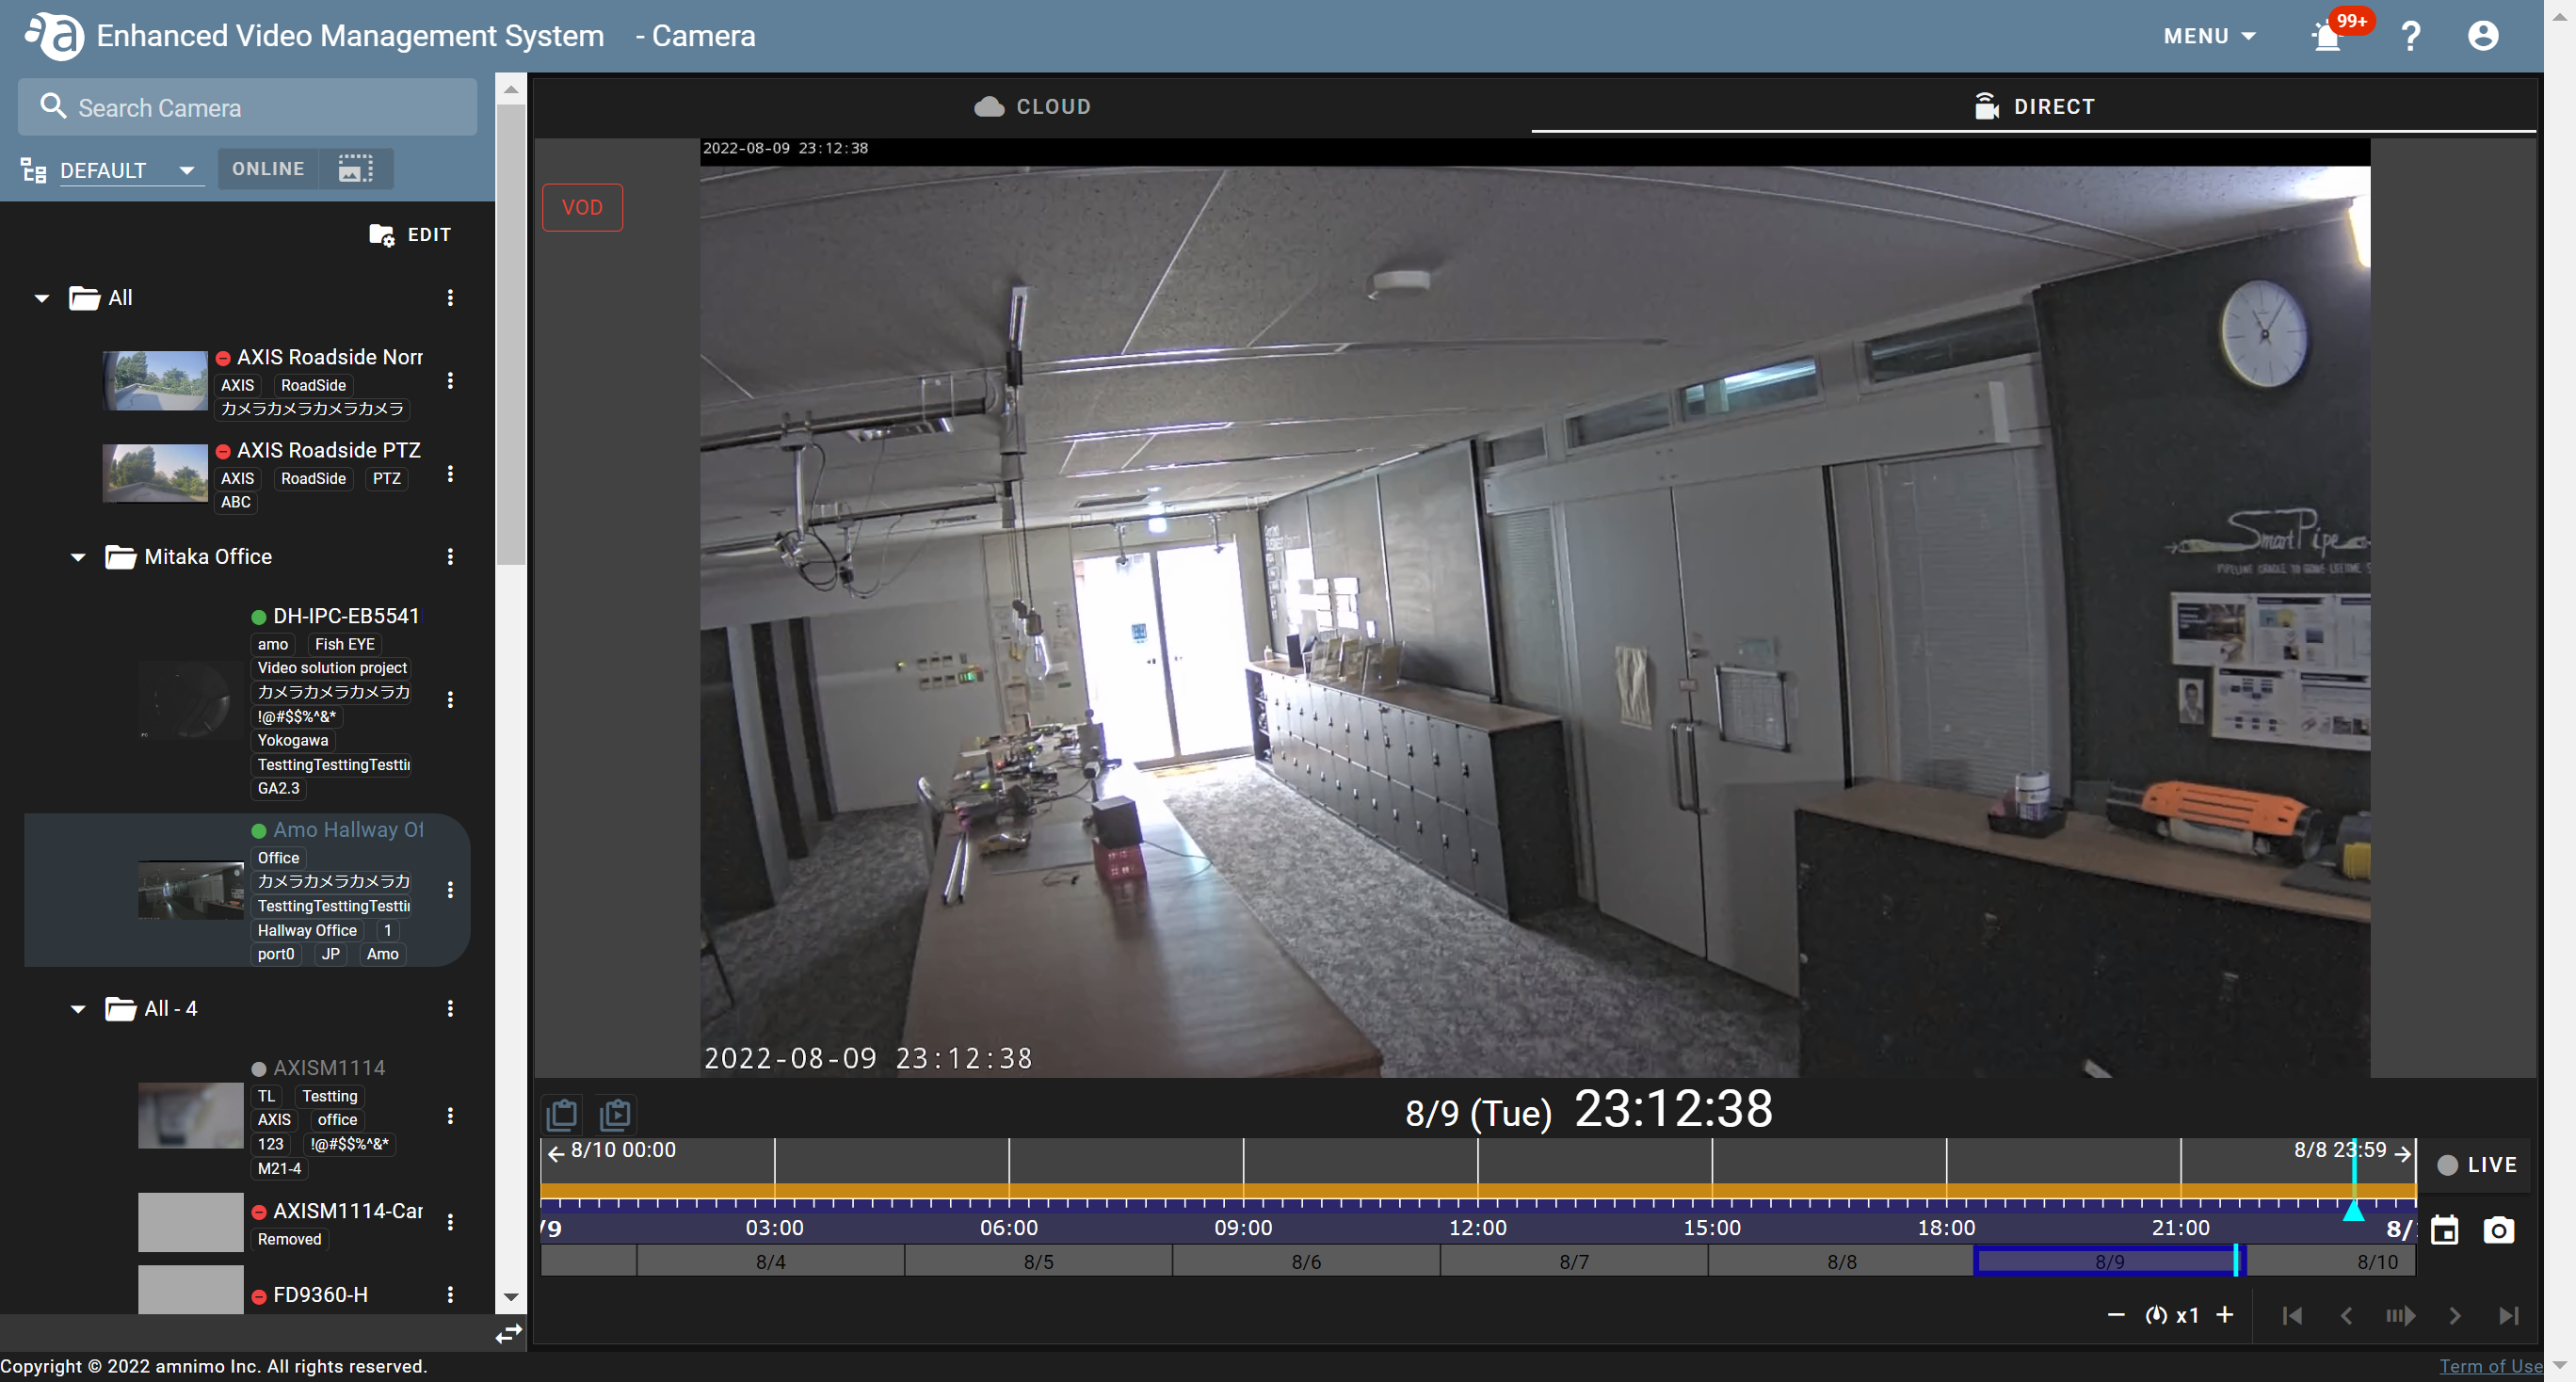
- You will transit to Direct mode on the [ Camera ] screen, and the video recorded during the time period when the event occurred will be played.
- Click the camera icon (
Operations performed on the [ Event List ] screen
-
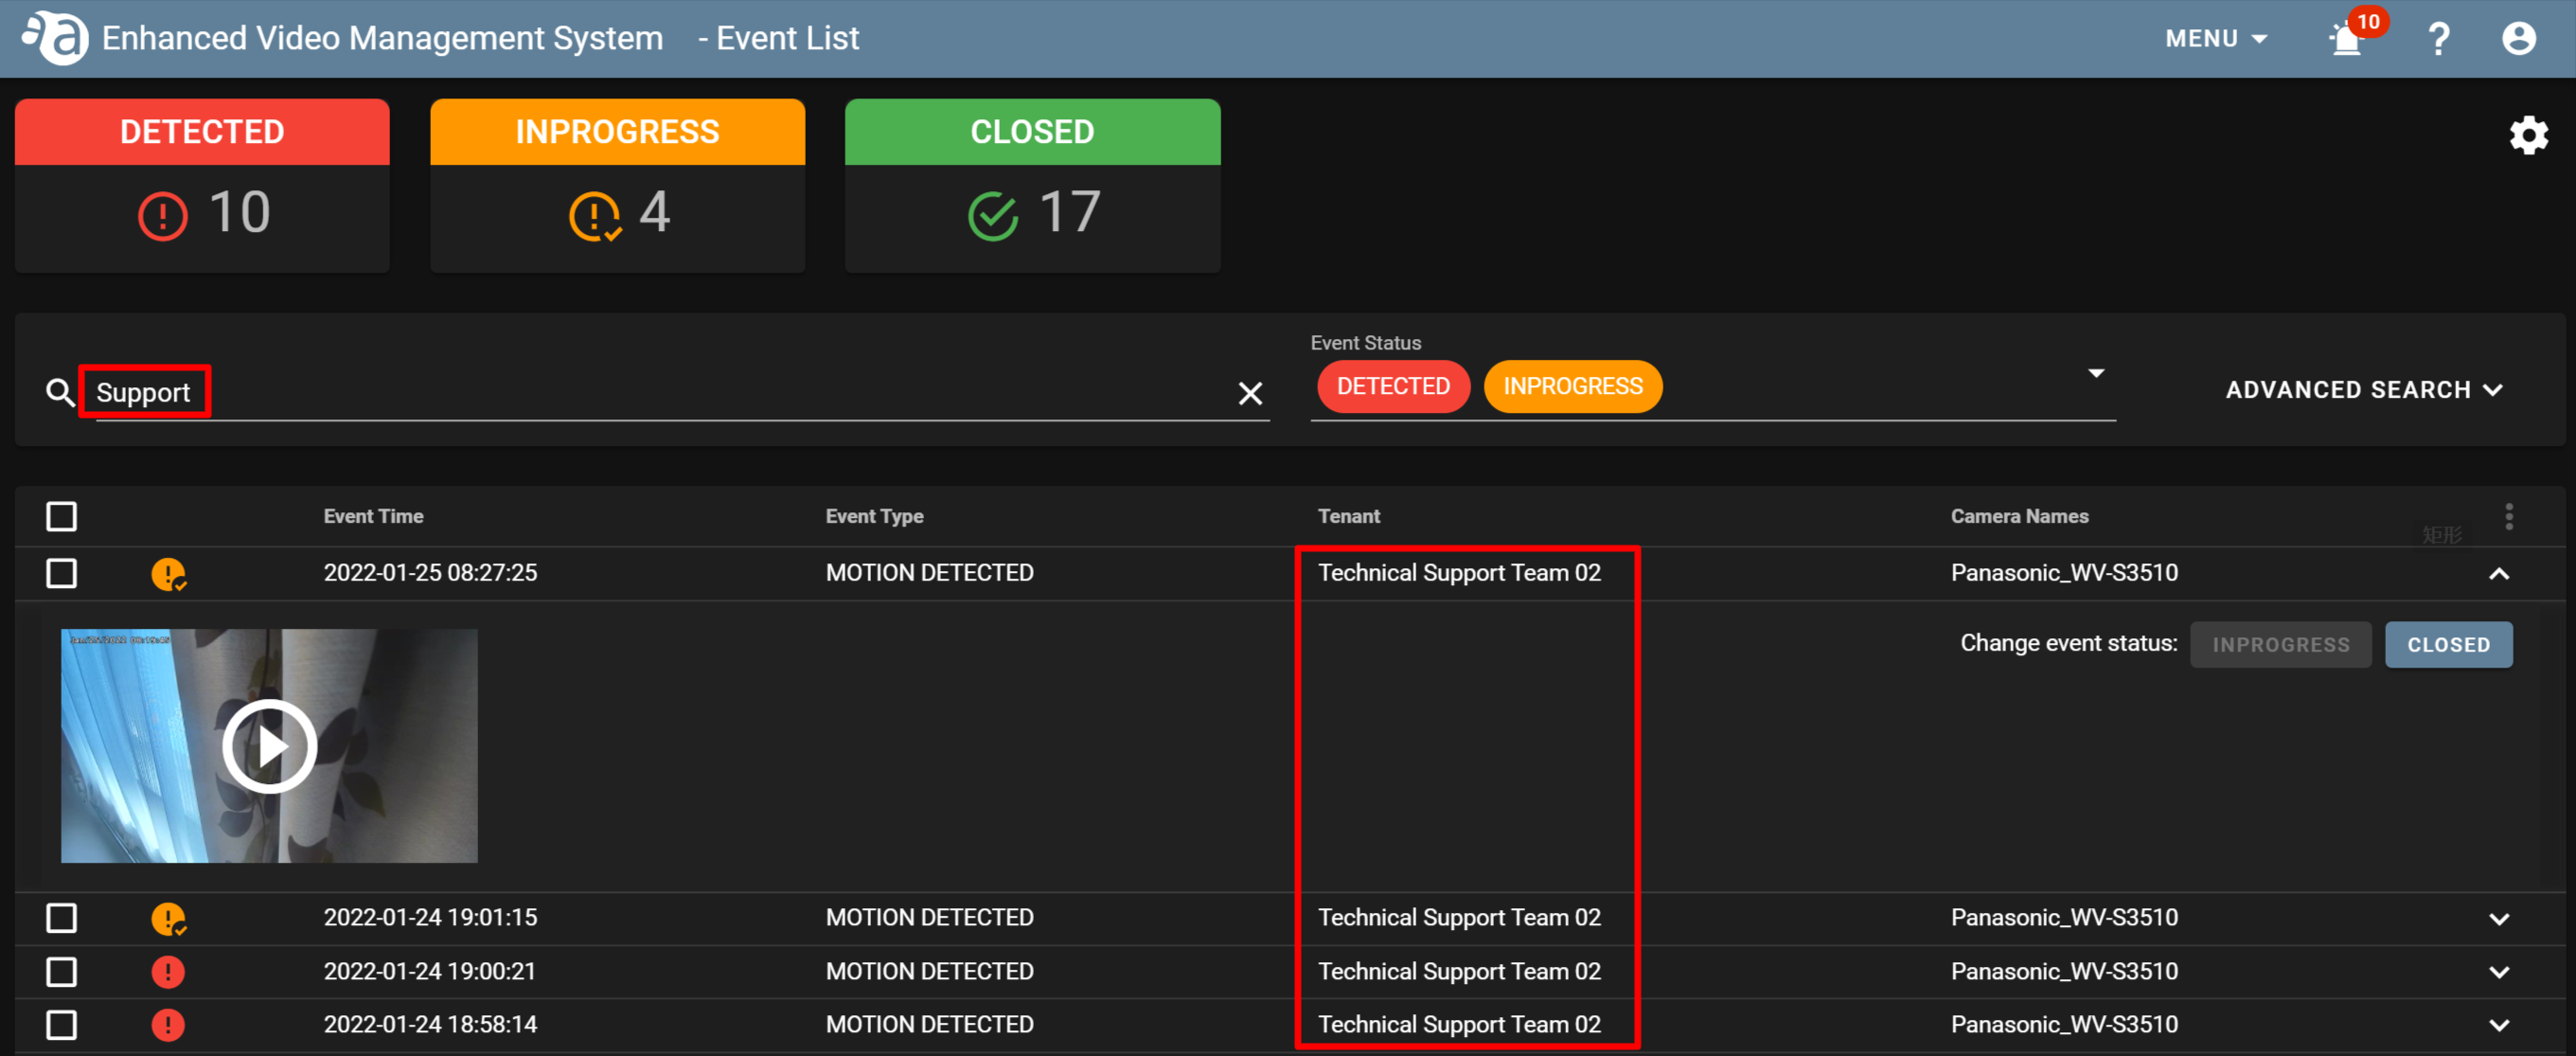
Searching eventsSearching events
On the event list screen, you can search for existing events by event type, tenant name, and event status (DETECTED/INPROGRESS/CLOSED).
e.g.) Searching by tenant name
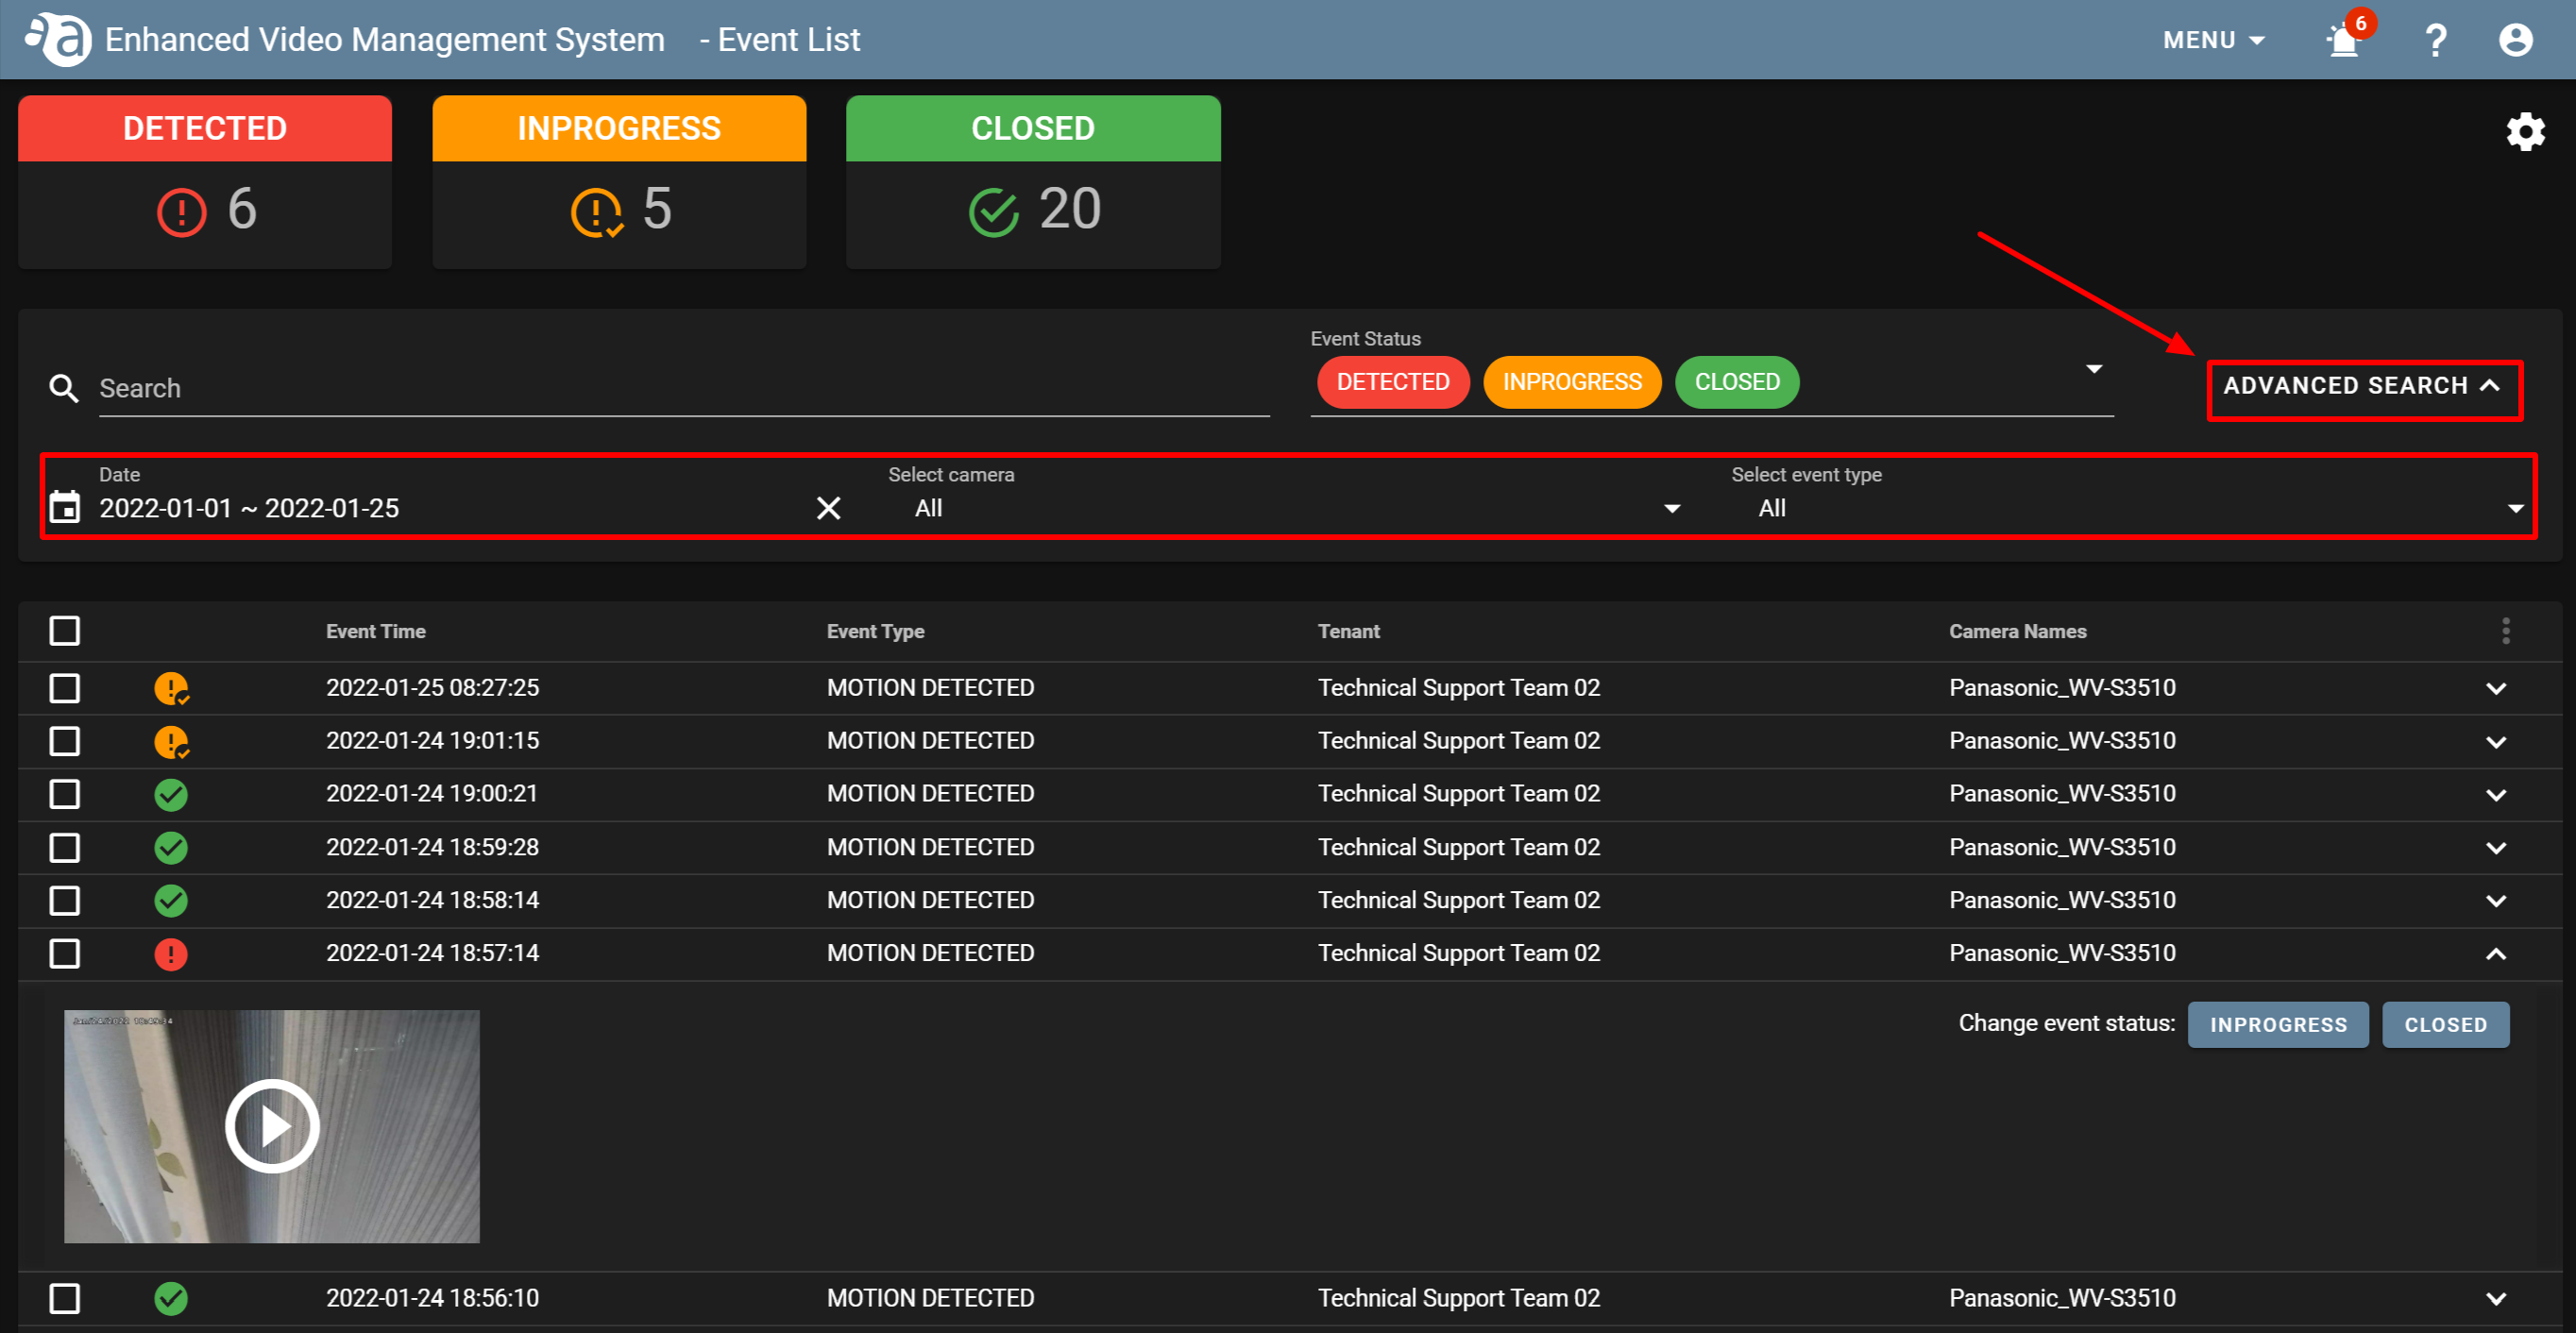
Also, if there are many events, you can narrow down the search by using the advanced search function.
By specifying each of the following fields, you can filter and display the events you want to check.
- Date
- Select camera
- Select event type
-
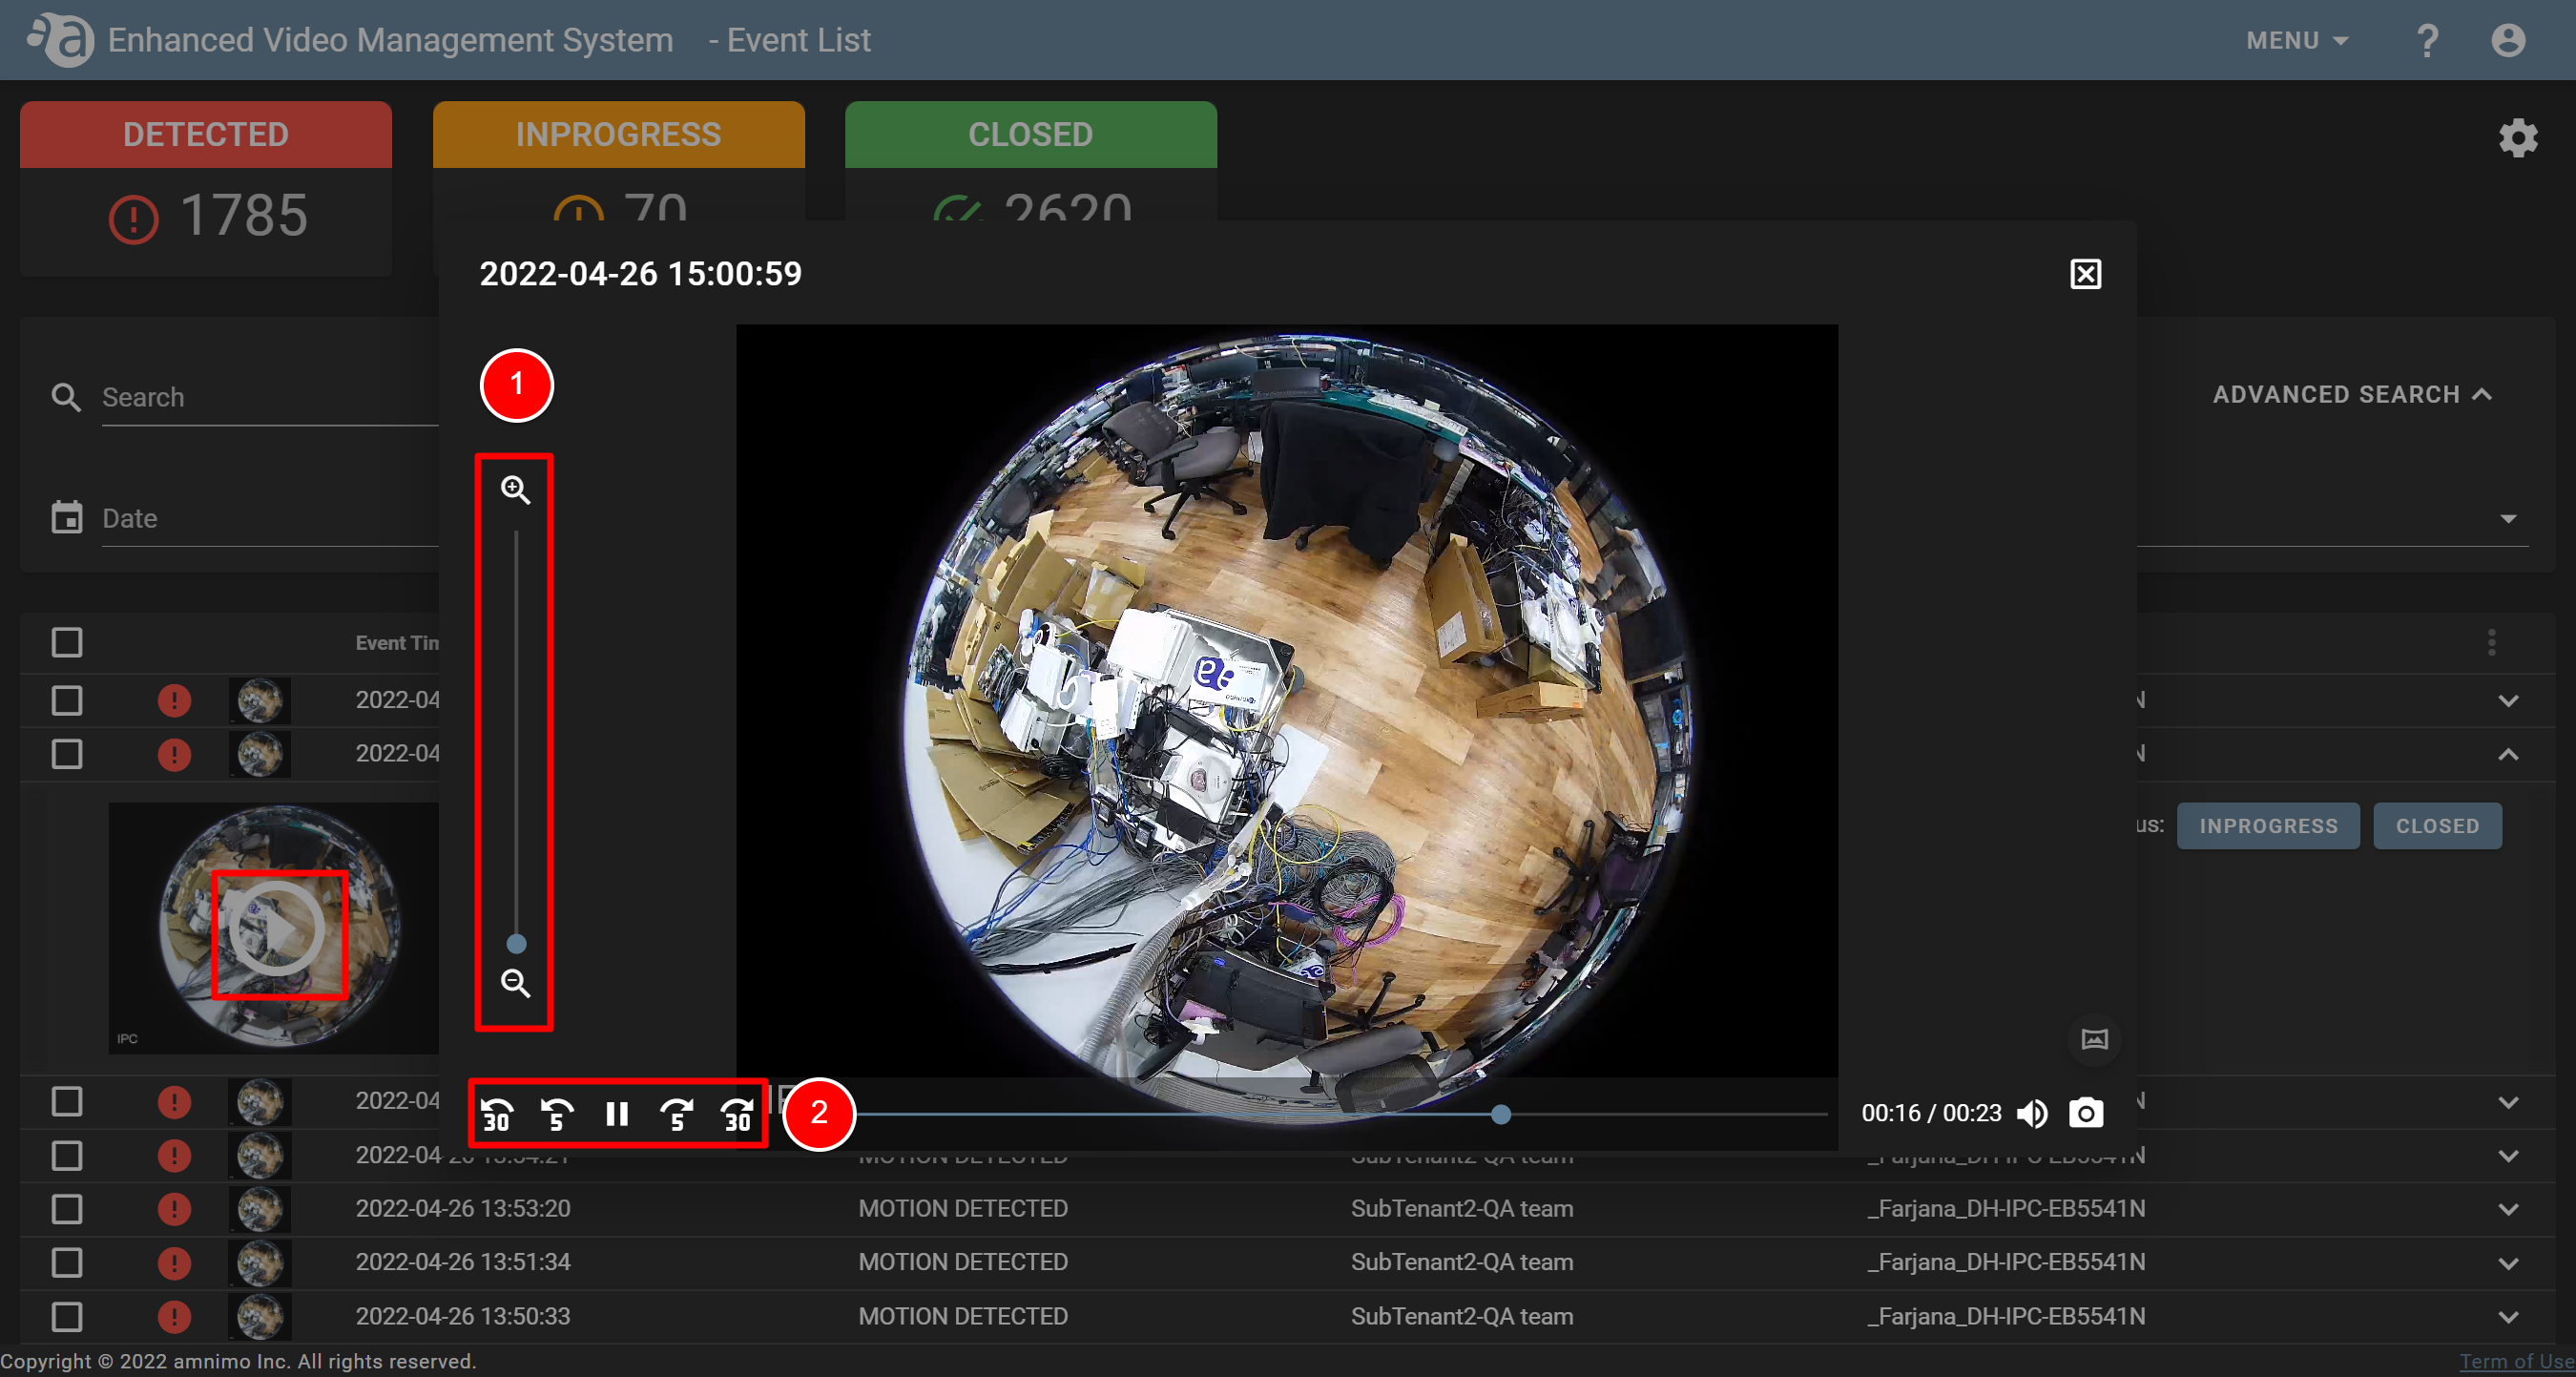
Playing eventsPlaying events
Detected events can be played by clicking the play button.
- Click
 for the event you want to play to expand it.
- Click the play button displayed for the thumbnail to play it.
① By moving the slider, you can enlarge or shrink an image.
② From the left, the video playback can be rewound 30 seconds, rewound 5 seconds, paused, advanced 5 seconds, and advanced 30 seconds.
- Click
-
Checking the location of the camera where the event occurred on the mapChecking the location of the camera where the event occurred on the map
If the camera has been registered to the Custom Map, the map icon will be displayed on the event notification screen as shown below. If you click the icon, the map will pop up.

When clicking on the map icon

-
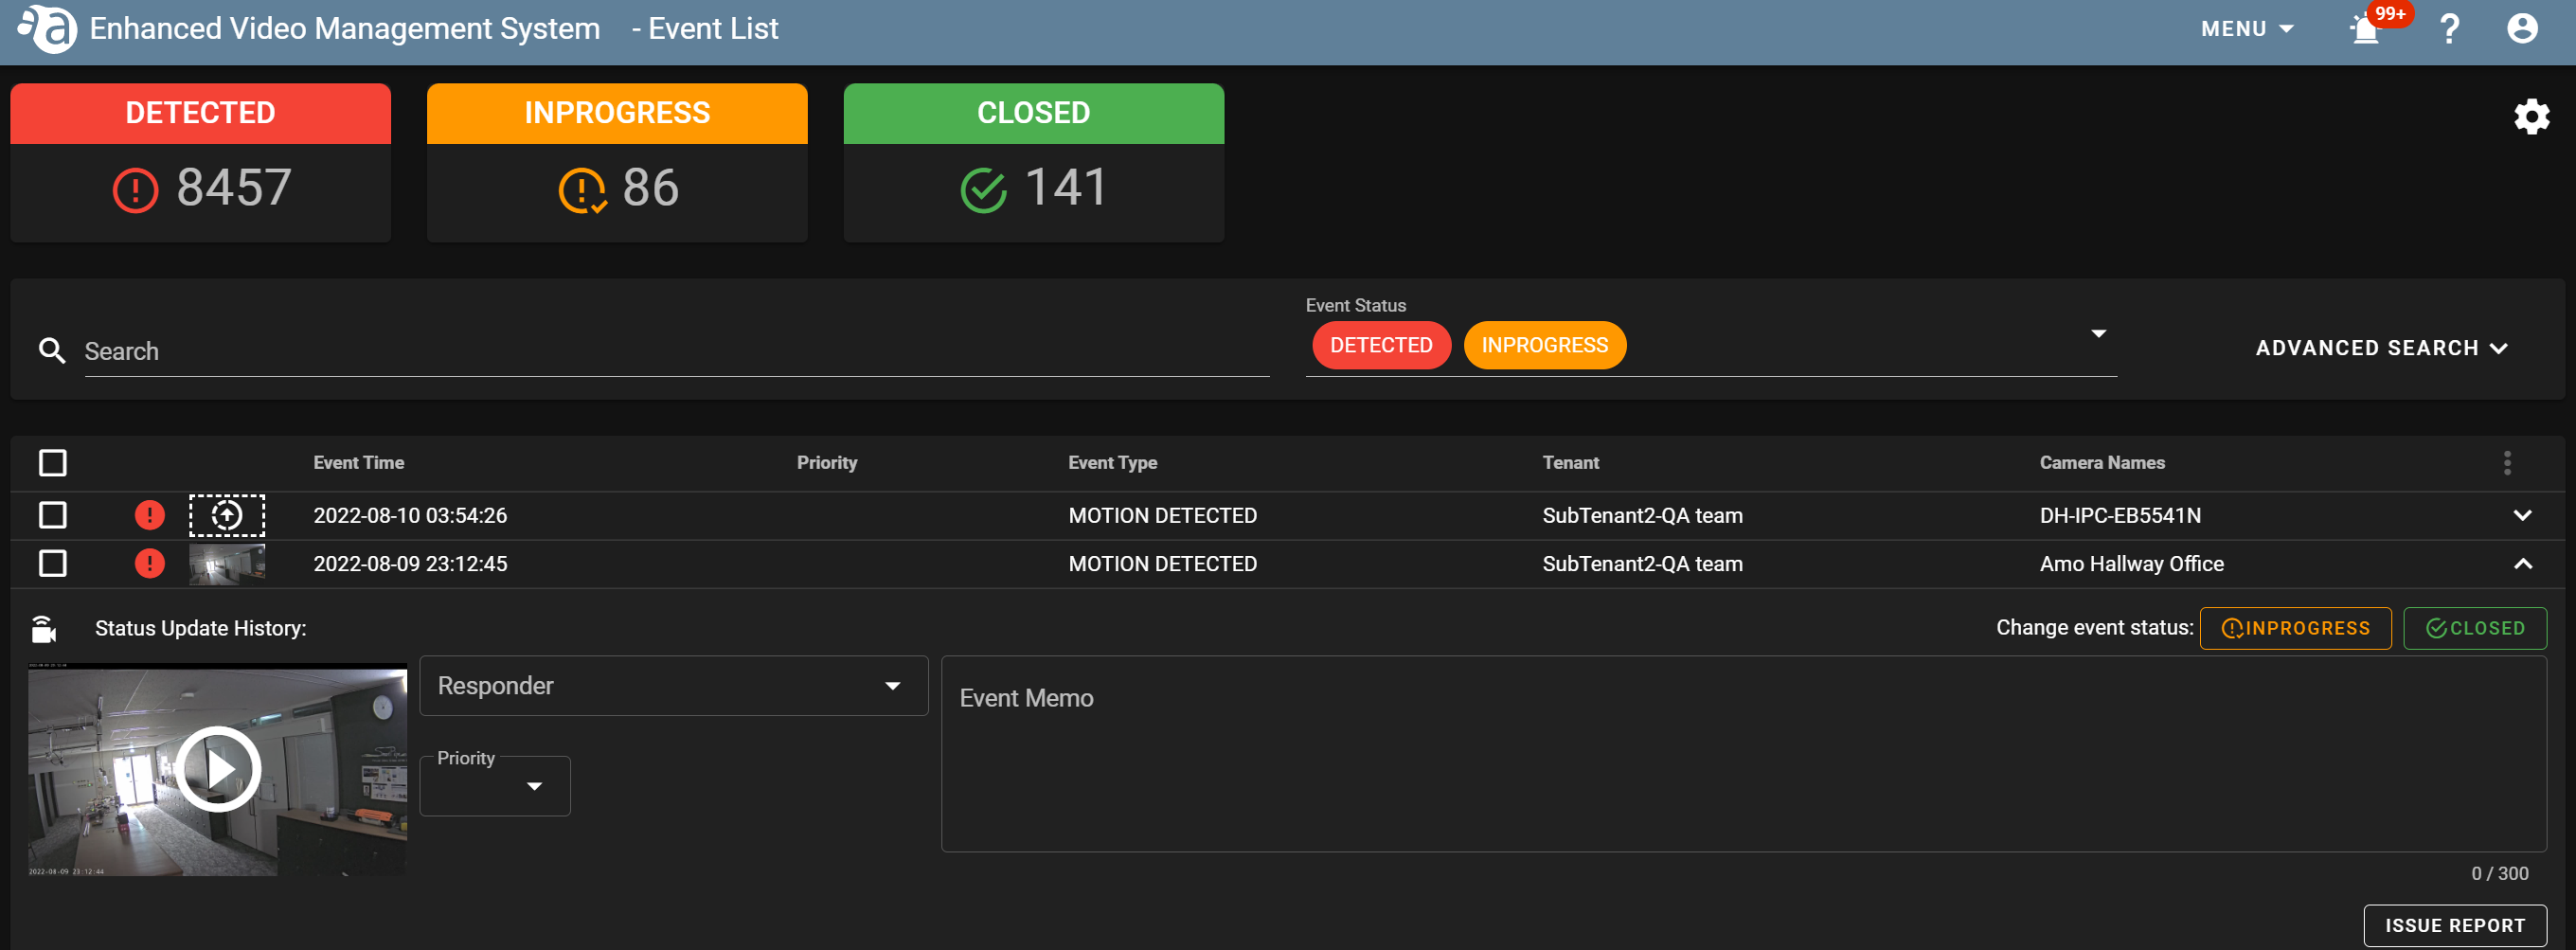
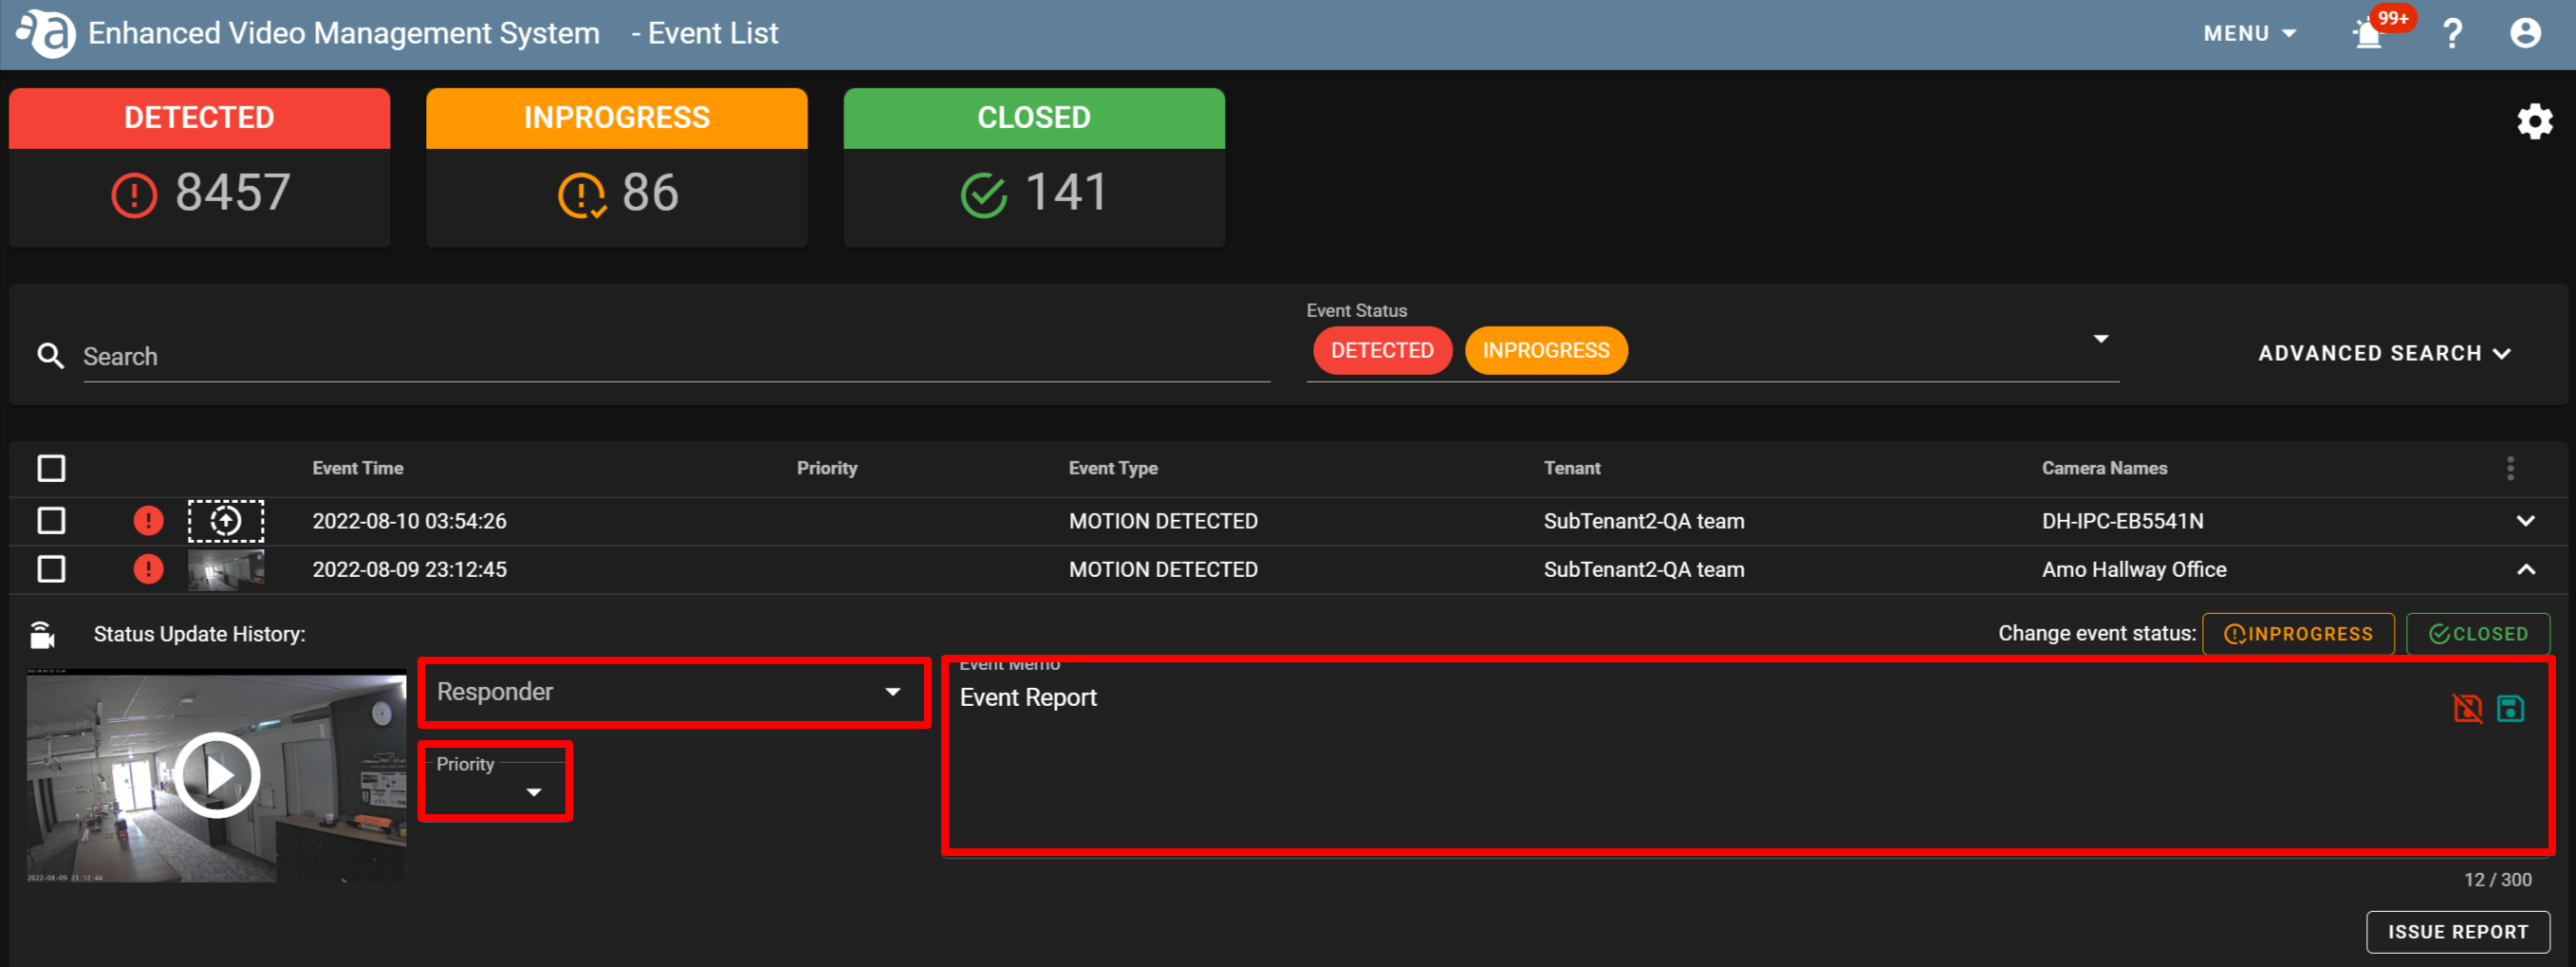
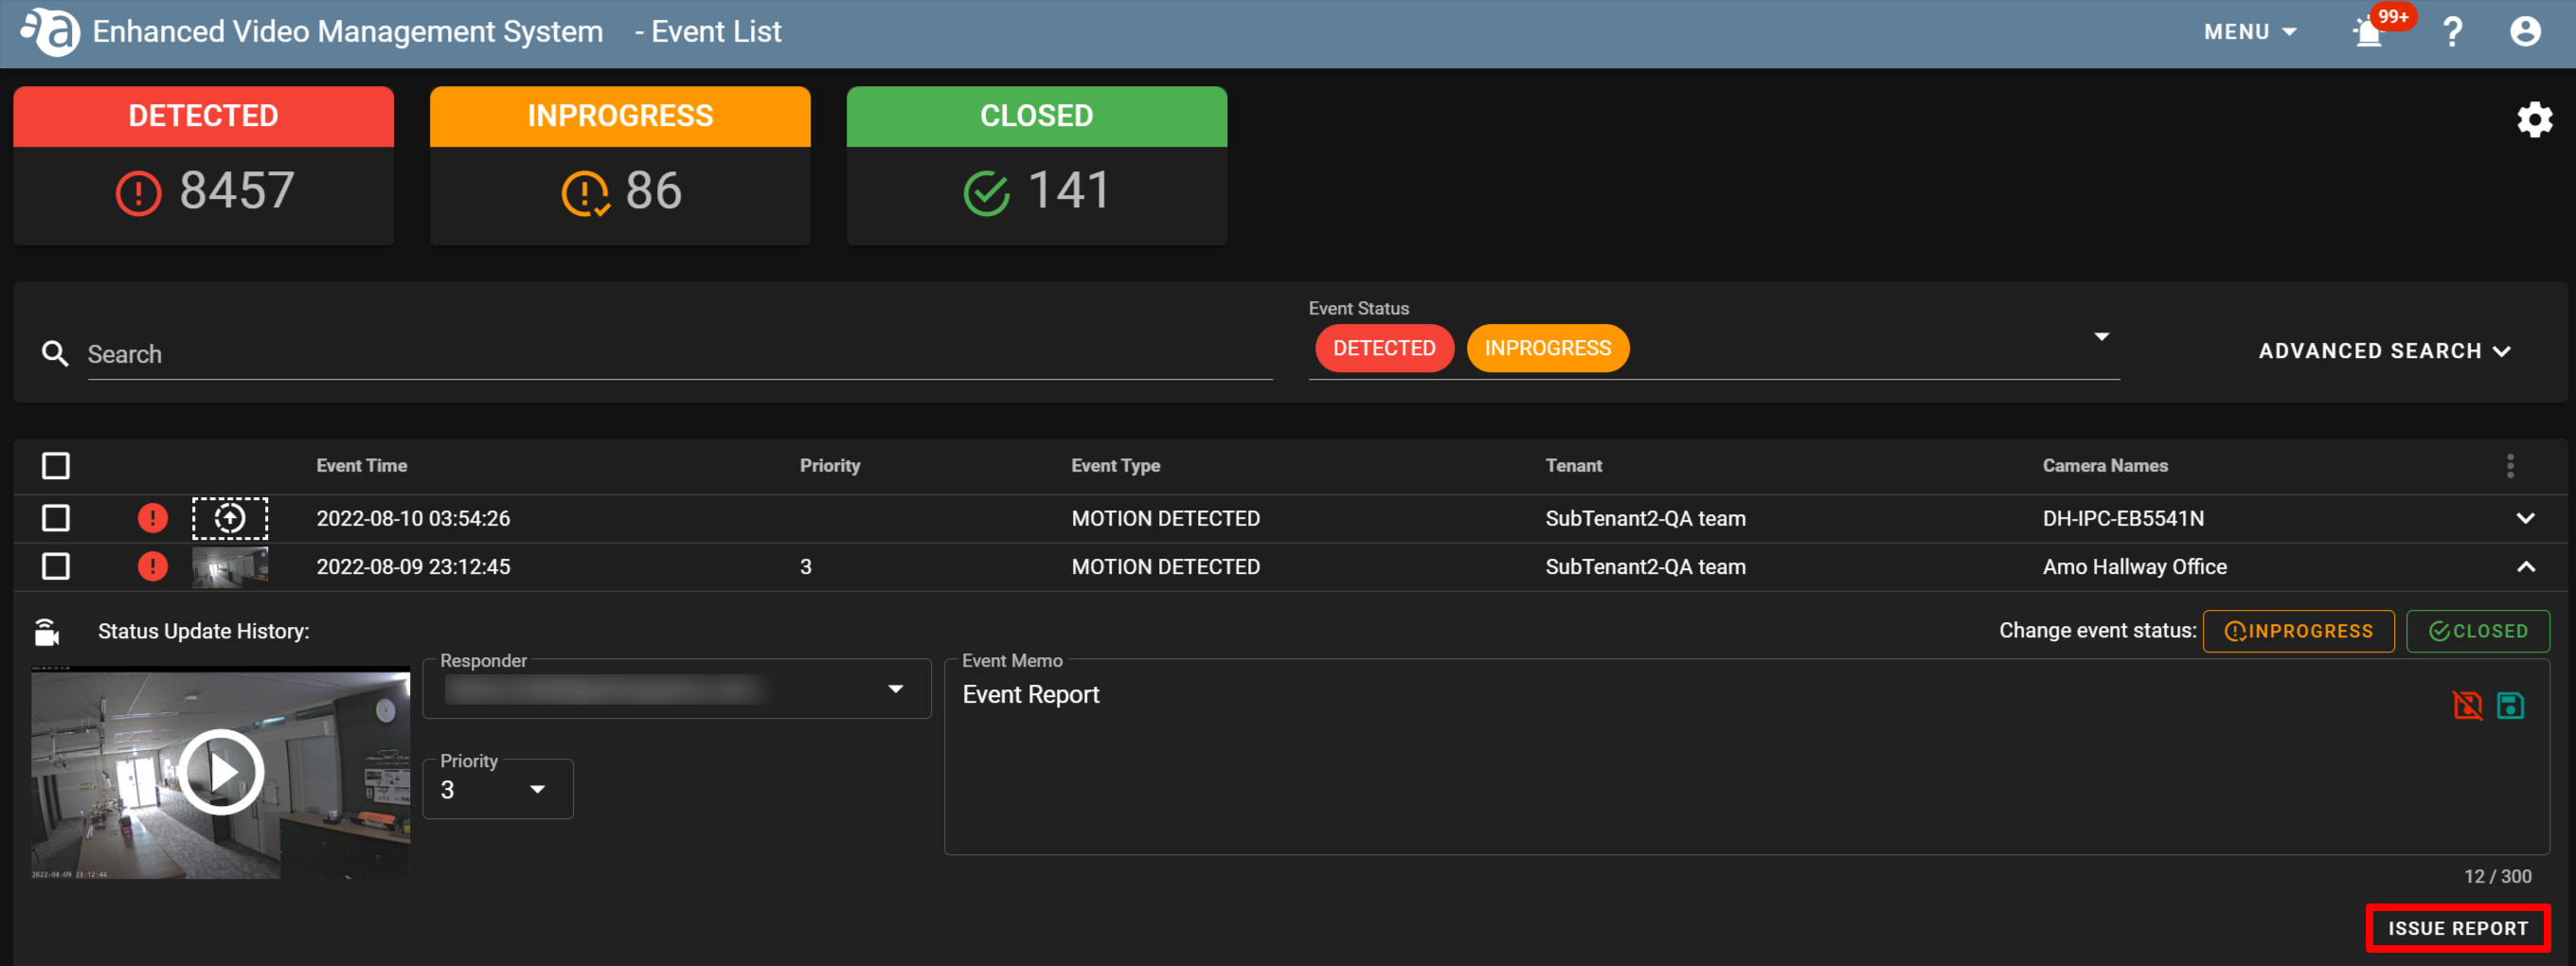
Entering details of handling an eventEntering details of handling an event
For each event on the event list, you can enter information for [ Responder ], [ Priority ], and [ Comment ], etc.
- From the list, click the event for which you want to create a report.
- The entry fields will be displayed as shown below. Select an option for [ Responder ] and [ Priority ] respectively from the drop box. Enter the event memo and click the save button (
 ).
).
You can select an option for [ Responder ] from the list or can directly enter it there.
- From the list, click the event for which you want to create a report.
-
Outputting the event information as a report (If you have applied for using this function)Outputting the event information as a report (If you have applied for using this function)
For each event, you can output a report. This function is the same one as "Creating reports".
- Refer to "Entering details of handling an event" to enter the information about the event for which you want to output a report.
- If you have completed filling in the required items, click [ ISSUE REPORT ].
-
For the subsequent operation, repeat the one described in Step 2 and beyond of "Creating reports" - "Creating a report for snapshot".
- Refer to "Entering details of handling an event" to enter the information about the event for which you want to output a report.
Changing the event status
-
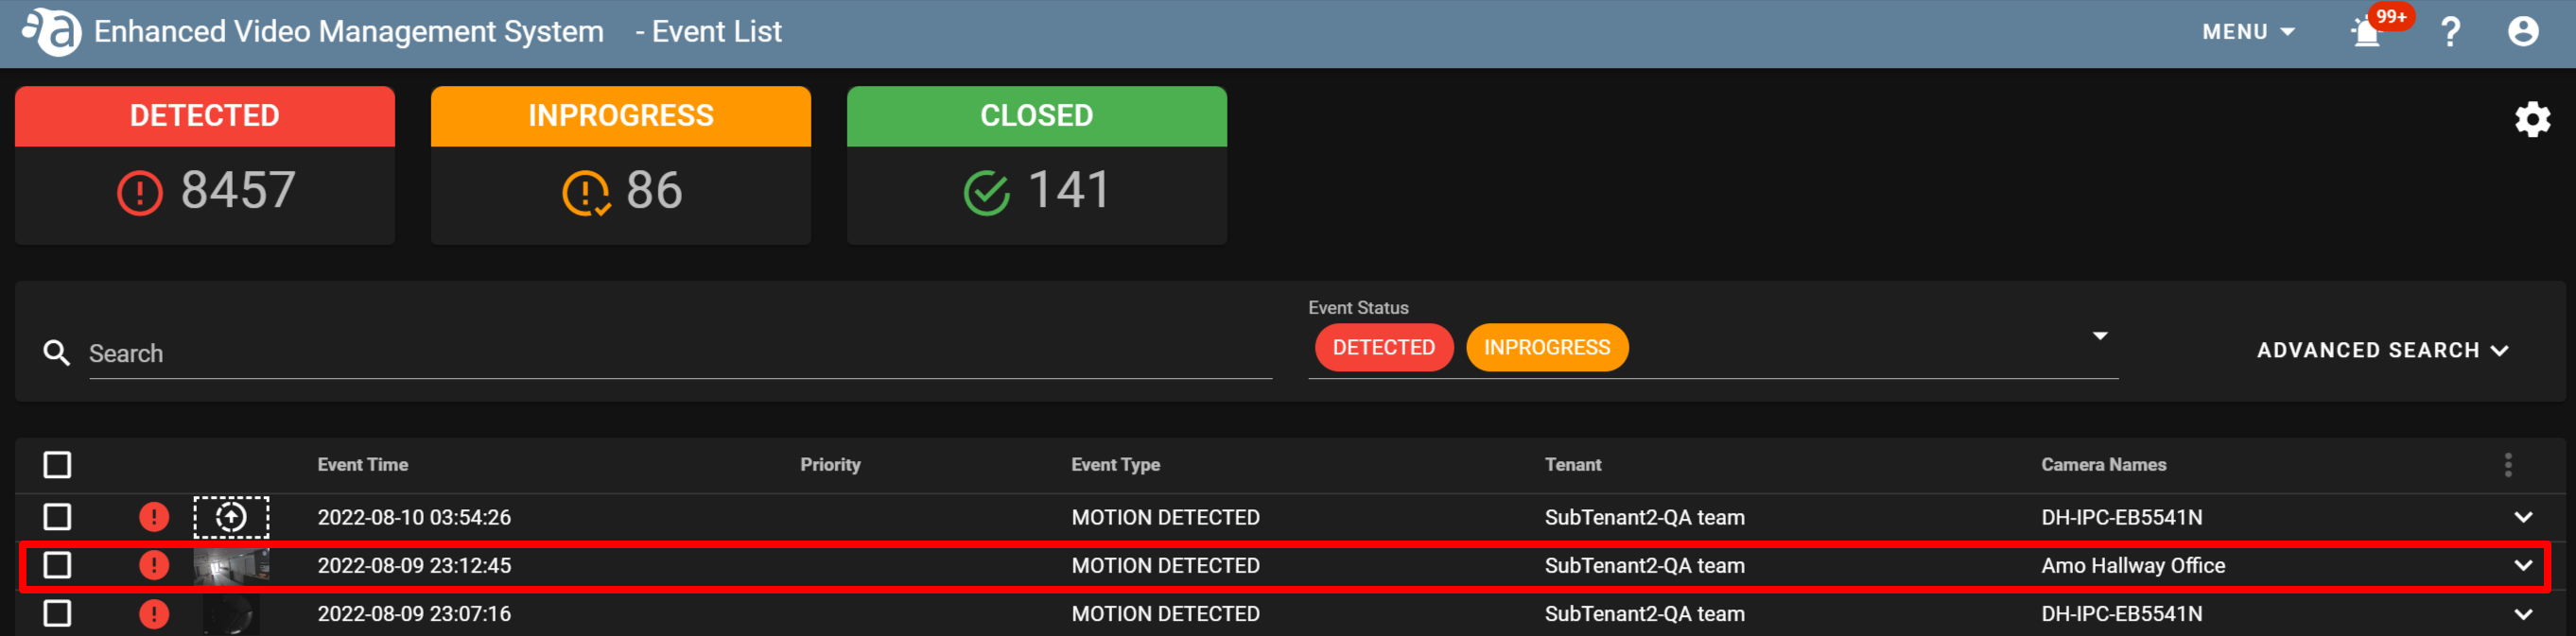
Changing the event status on the event list screenChanging the event status on the event list screen
Detected events can be changed their status on the event list screen.
Open [ MENU ] > [ EVENT LIST ] and click
 for the event whose status you want to change. The event status change button will be displayed.
Change the status depending on the event status.
 DETECTED
  INPROGRESS
  CLOSED
Once the event status is changed, it cannot be returned to the original one. 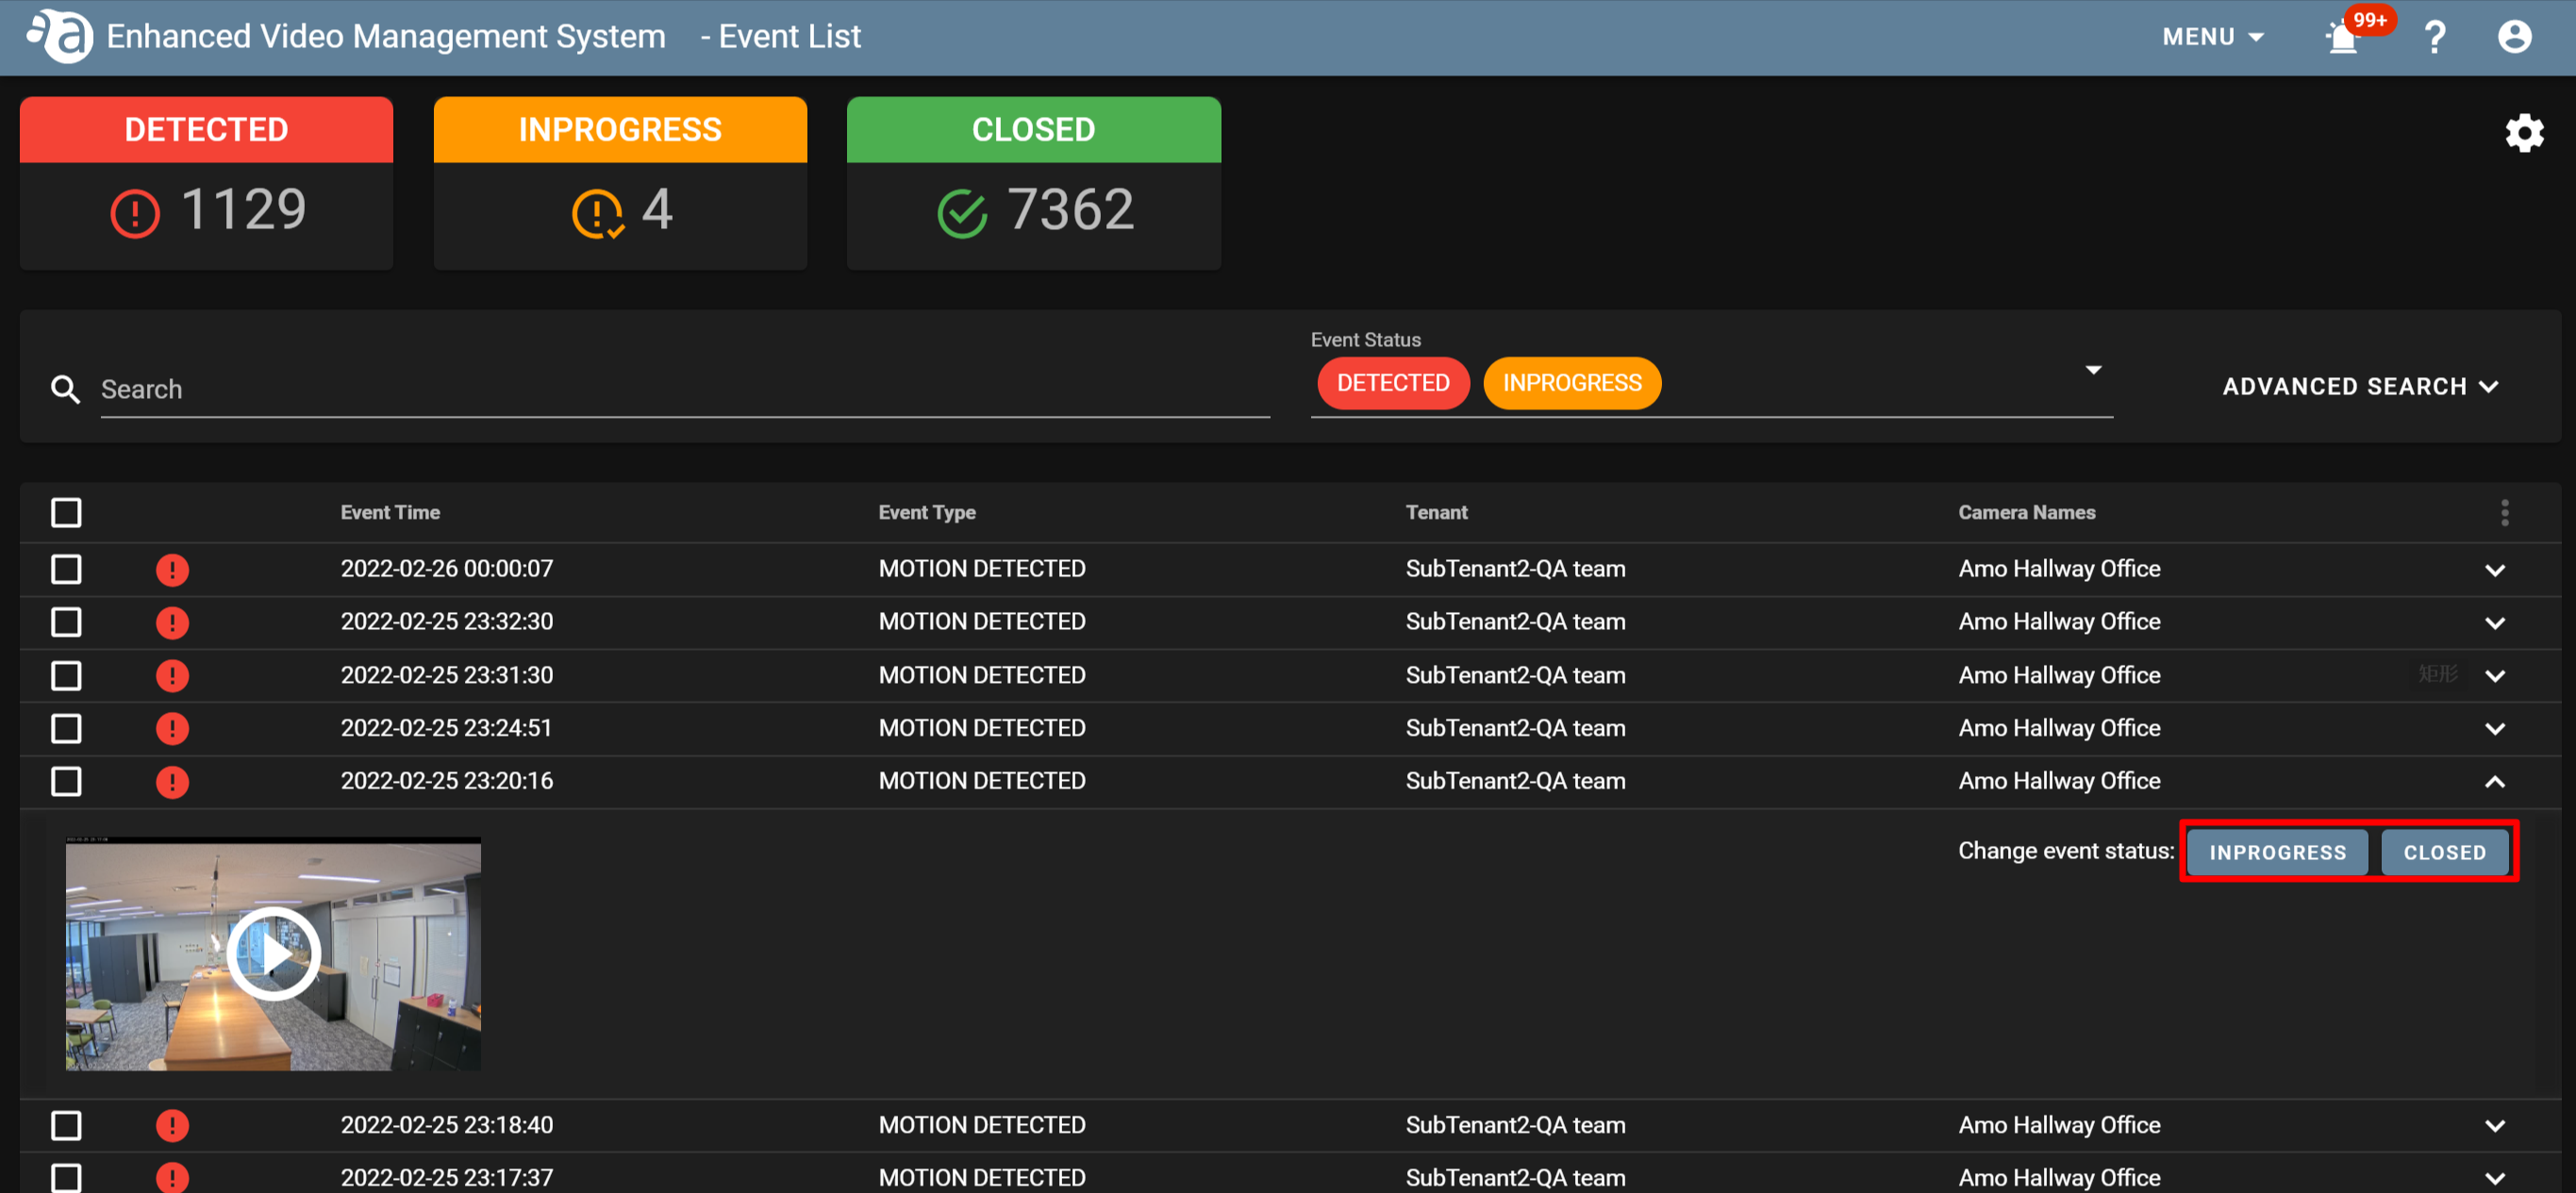
-
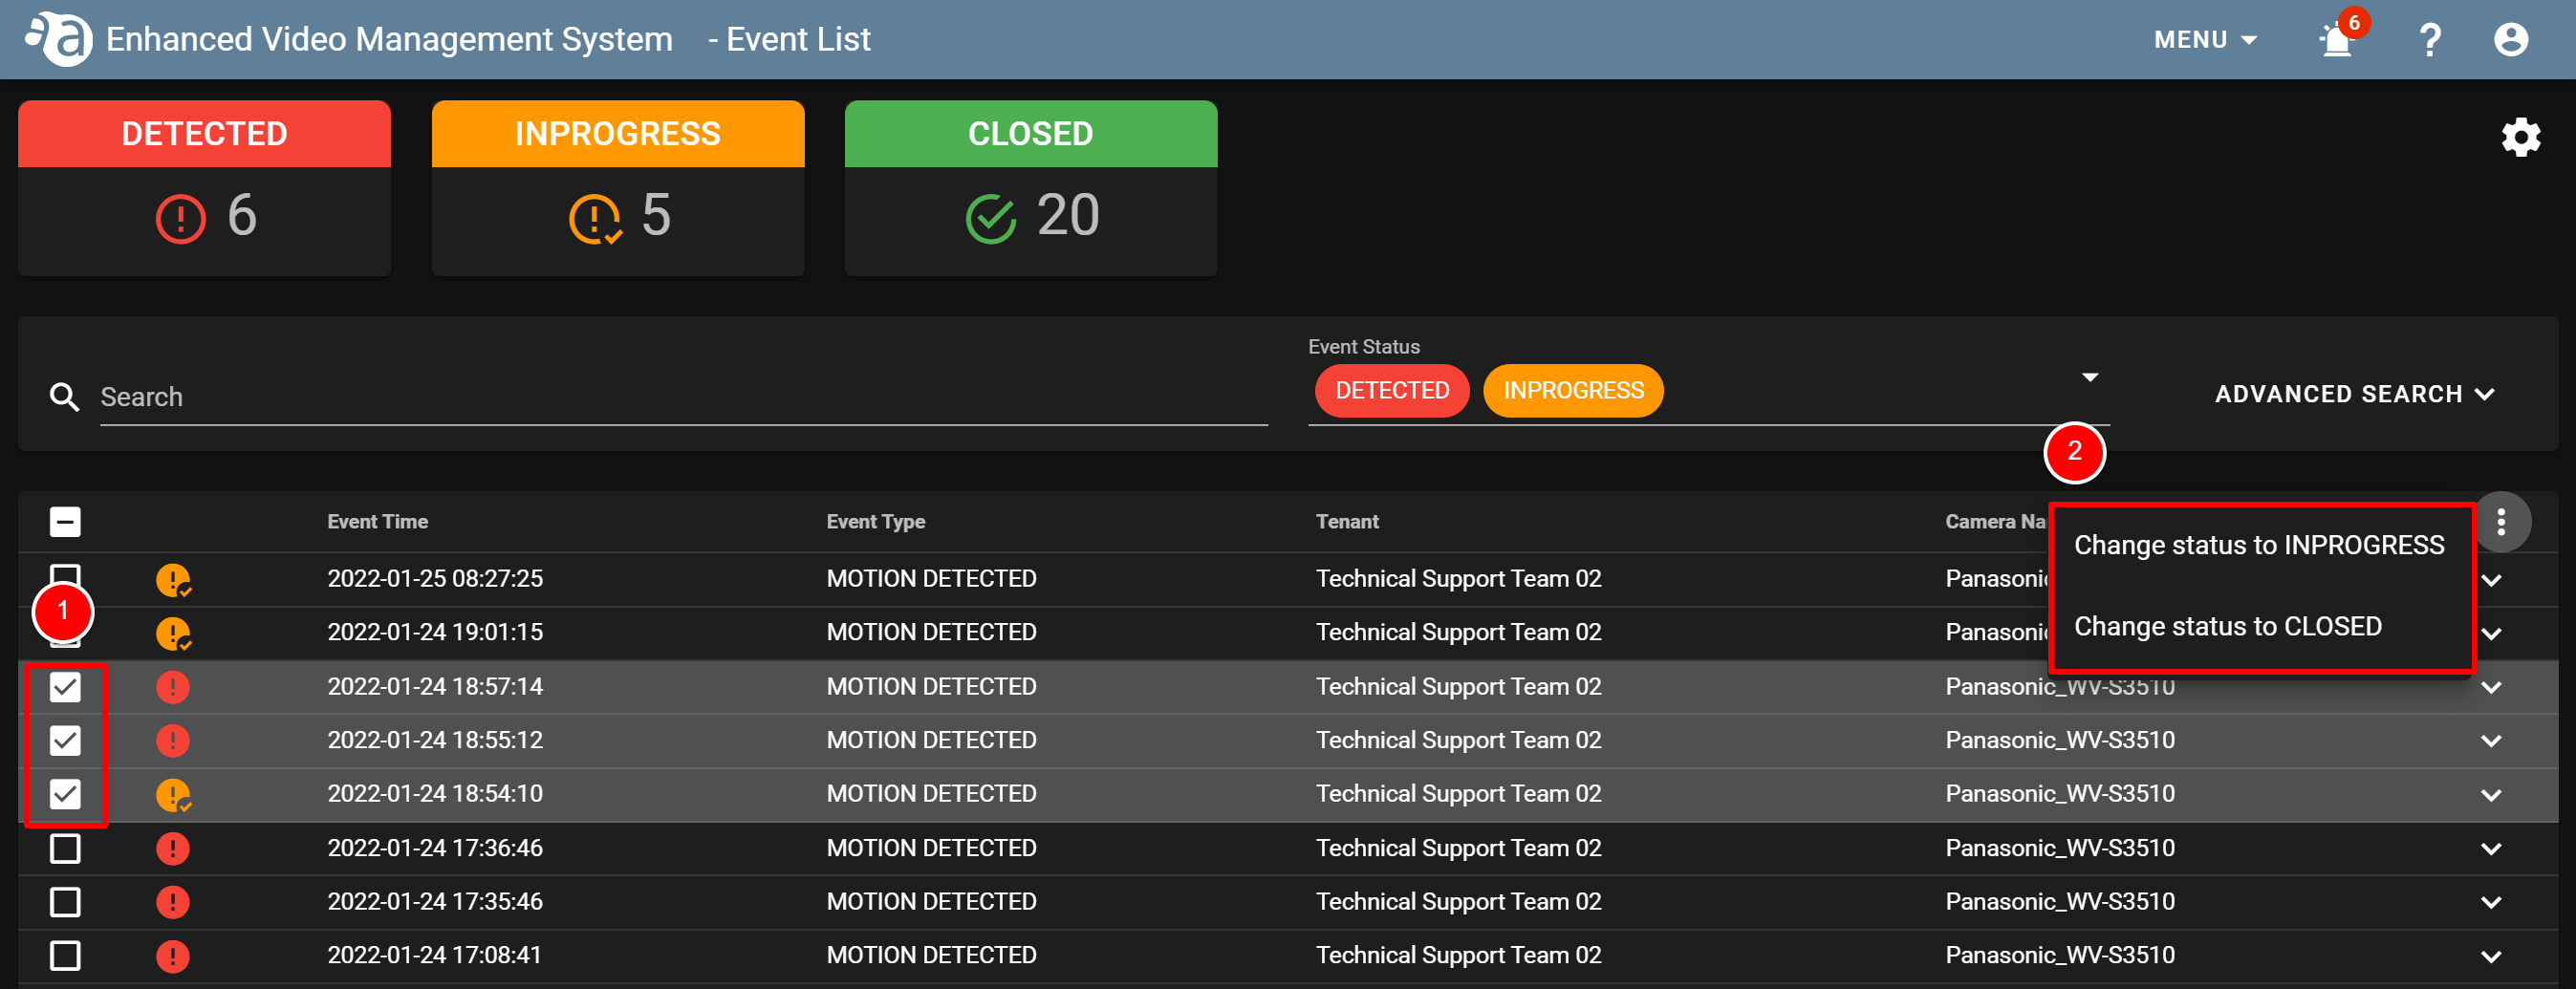
Changing multiple event statuses at onceChanging multiple event statuses at once
To change multiple event statuses at once, select the checkboxes for the ones you want change.
Even if you select "CHANGE status to CLOSED" for an event whose status is "CLOSED", its status will not change.
Even if you select "Change status to INPROGRESS" for an event whose status is "INPROGRESS", its status will not change.
Selecting some events
Open [ MENU ] > [ EVENT LIST ] and click
for the event whose status you want to change (①), and click  to change the status.(②)
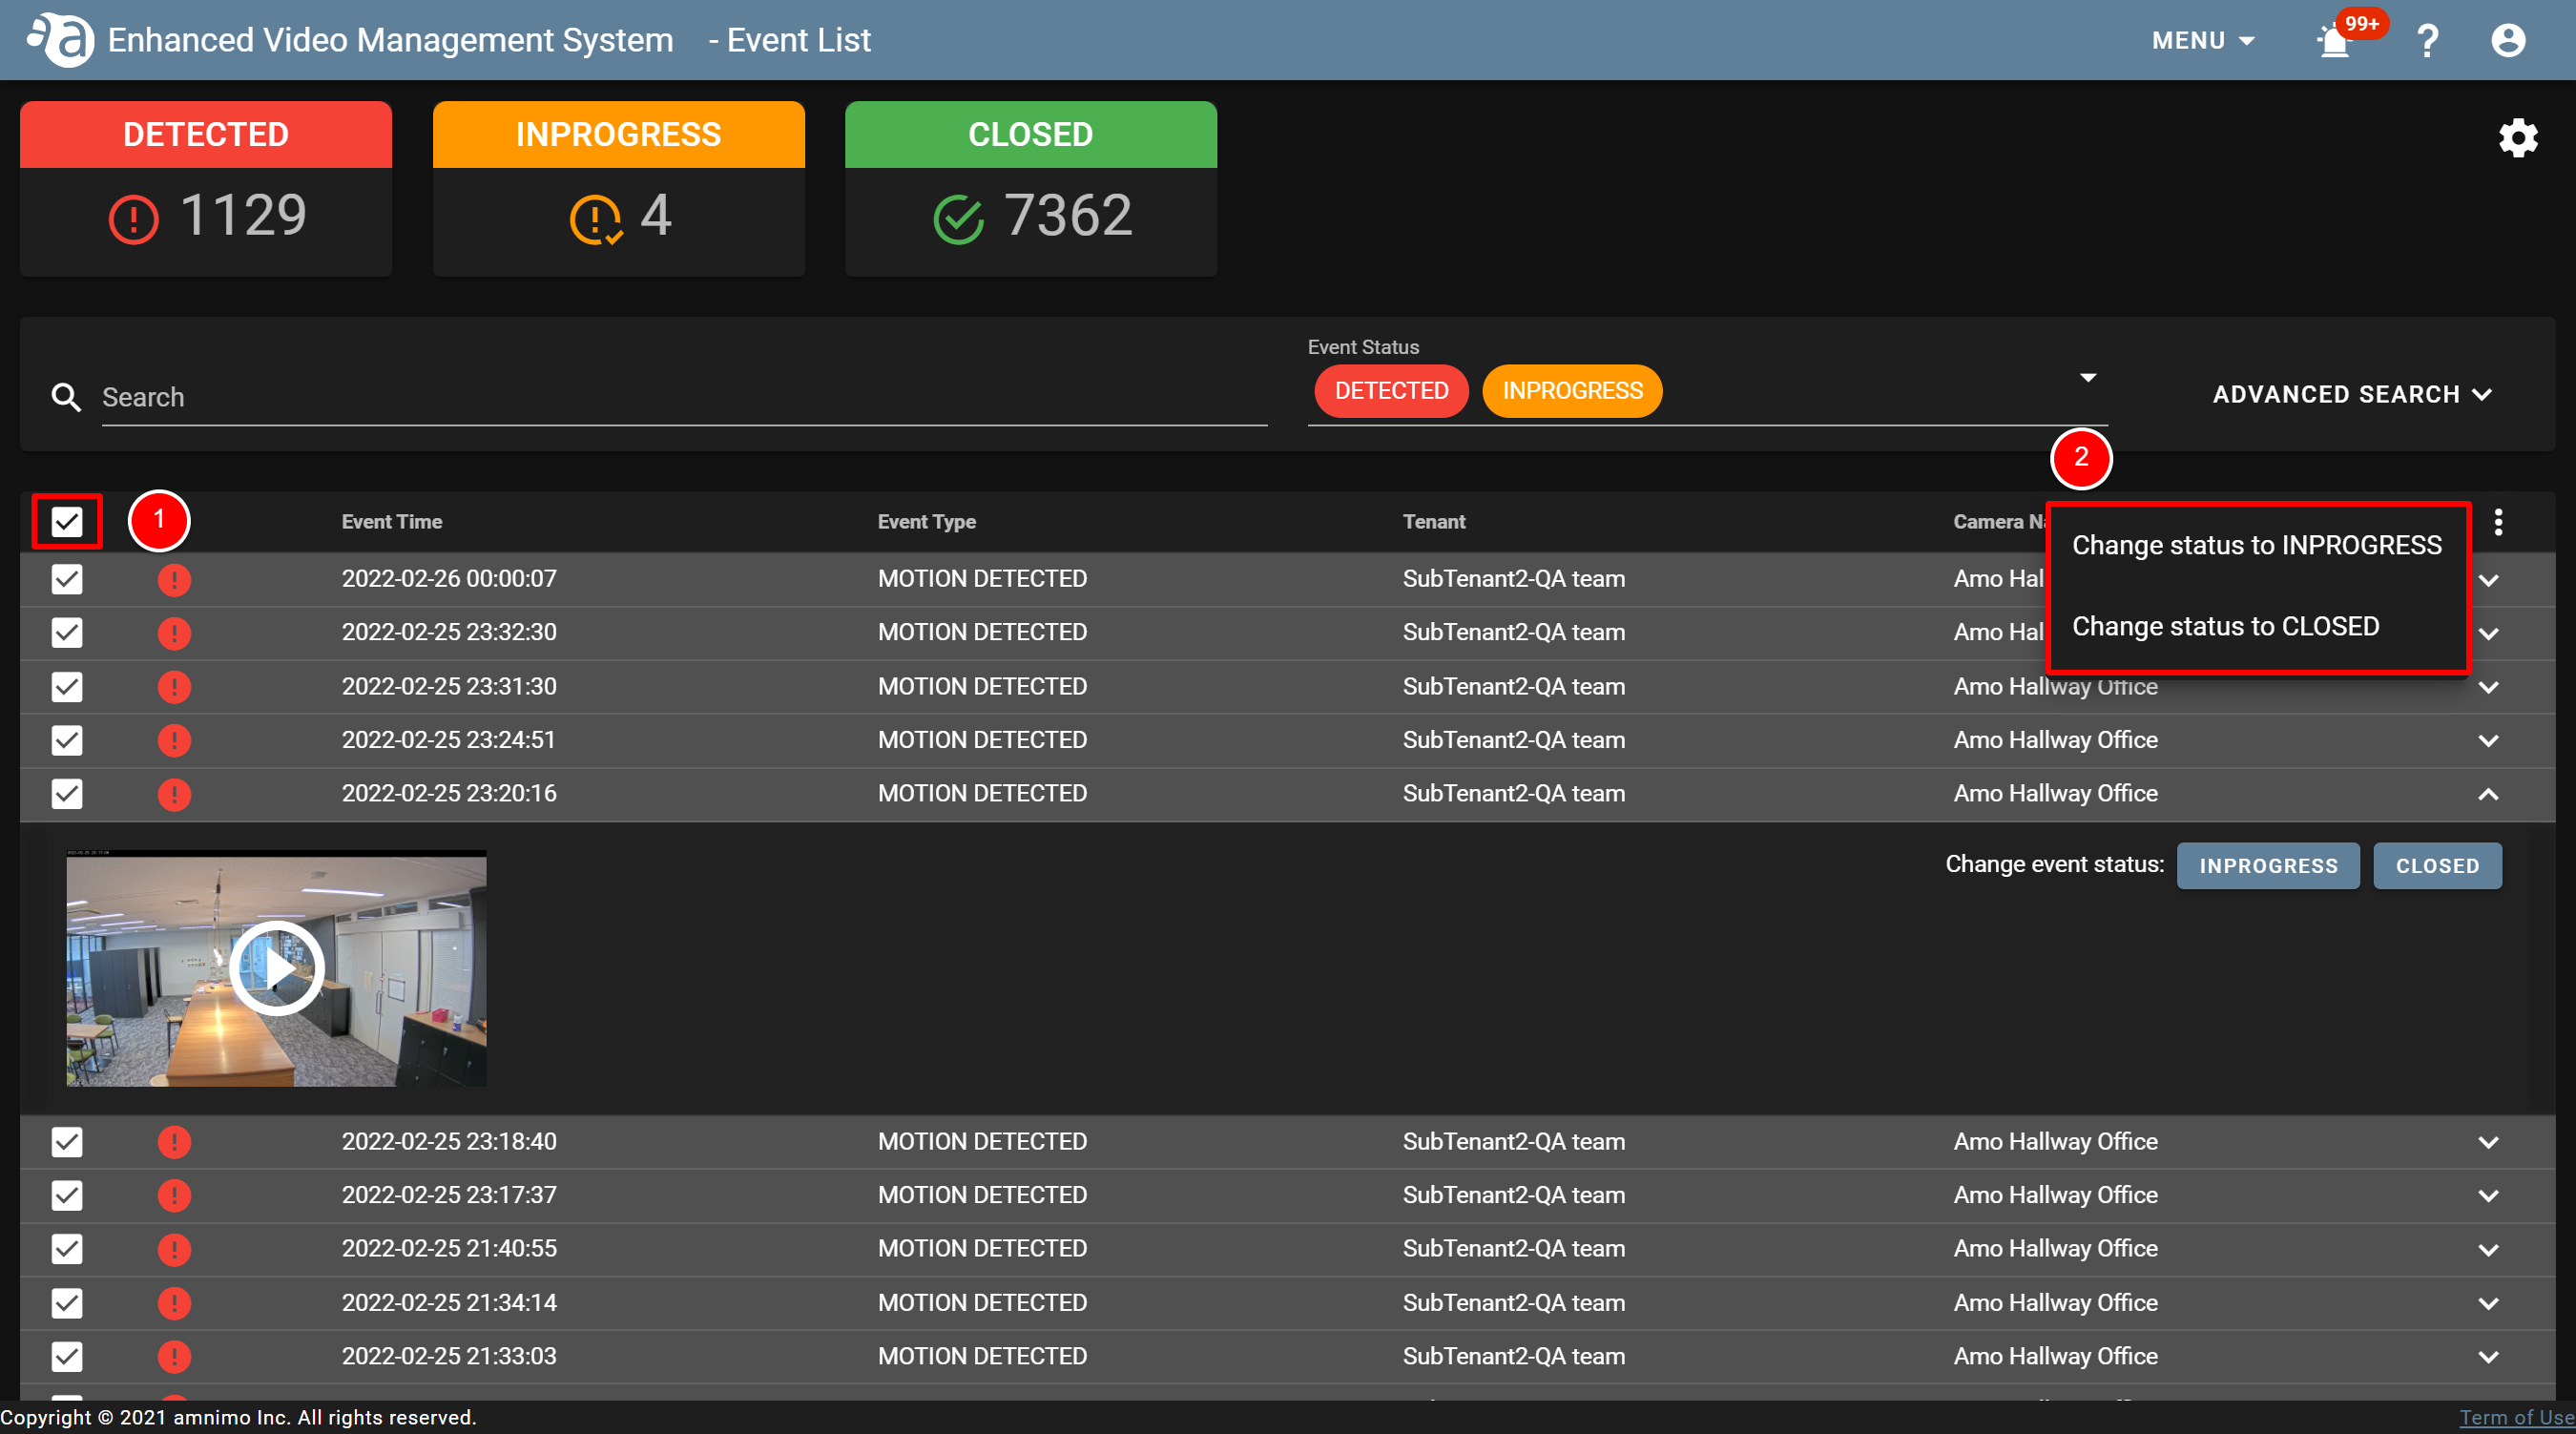
Selecting all events
Select the checkboxes in the figure below(①), and click
to change their status (②).
-
Changing the event status on the event notification screenChanging the event status on the event notification screen
If [ Event Notification Settings ] has been set, you can change the status on the event notification screen as well.
- Click the event notification icon (
 ) to display the event notification screen.

- Click each of the events (①), and change the event status to ”INPROGRESS” or ”CLOSED” (②).
If the event statuses are changed, the number displayed for the event notification icon will disappear (  ).
).
- On the [ Event List ] screen, check that the number displayed for each status has been changed.
- Click the event notification icon (