Automatic Kitting
Automatic kidding is a function for automatically downloading the specified firmware and configuration files from the Device Management System to multiple devices.
This function allows those multiple devices to operate with the same firmware revision and settings and to connect to the cloud.
This function is effective when collectively standardizing the firmware revision and settings for multiple devices in the initial setup.
The procedure for performing automatic kitting is as follows. (Click each item to display the procedure.)
 |
|
-
Uploading the filesUploading the files
Upload the firmware image and configuration files that you want to download to the device by the automatic kitting function to Storage Explorer.
-
First, upload the firmware image file.
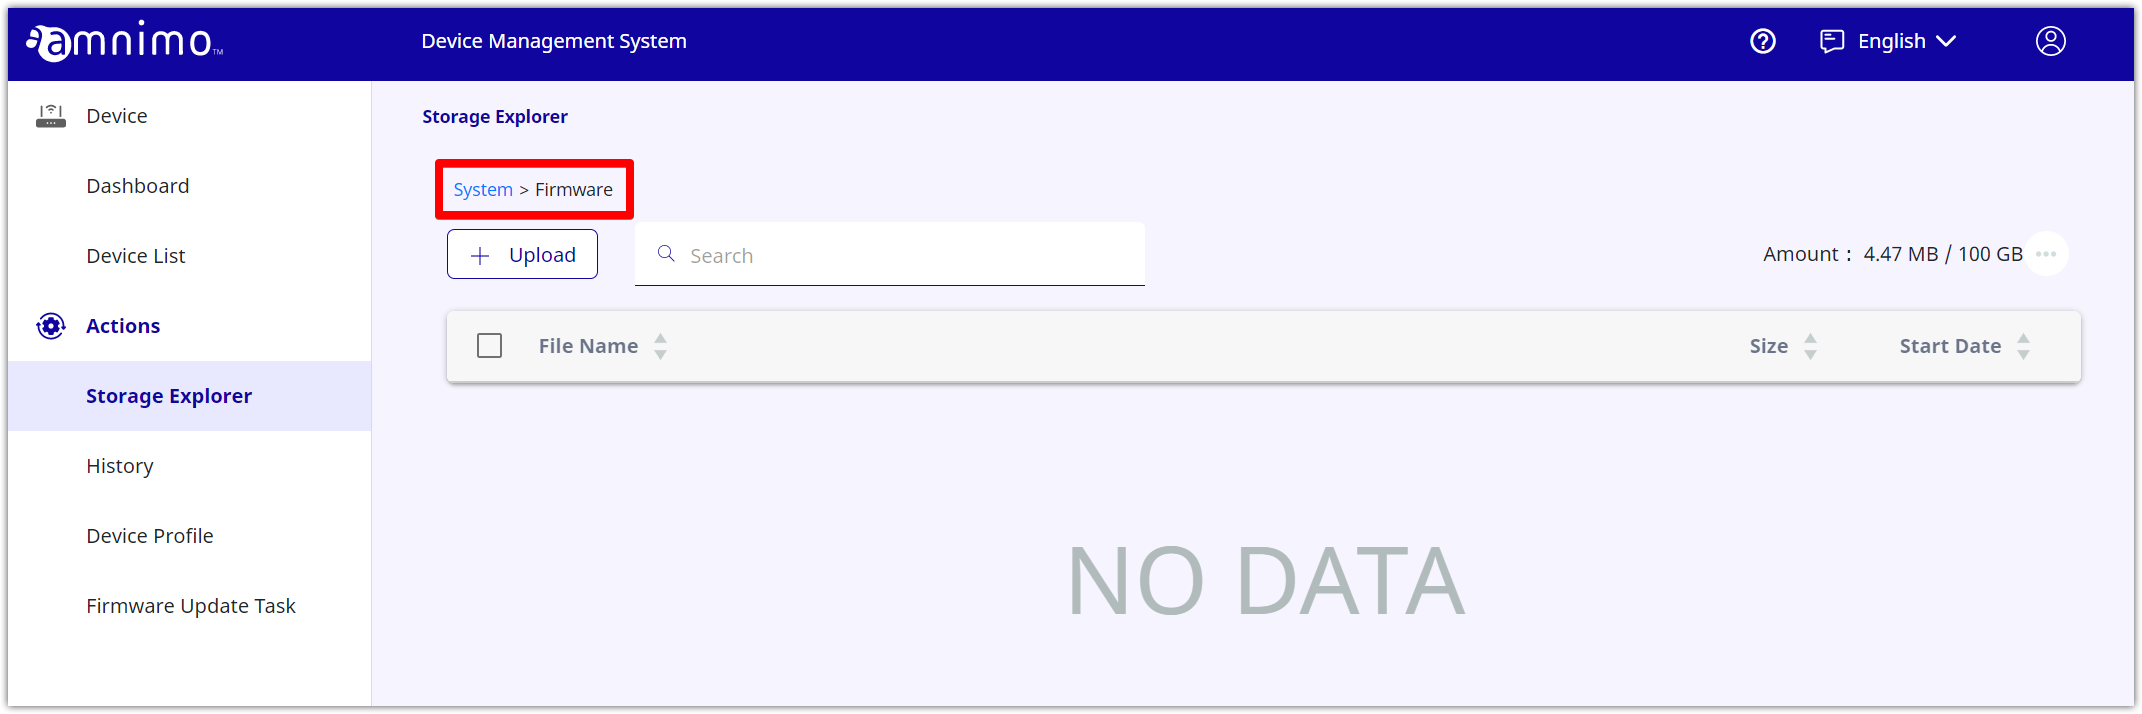
With Storage Explorer, navigate to the "Firmware" folder.
*The firmware image file can be downloaded from the following URL.
To access it, the account name and password will be required. If you do not know the account name and password, please contact our Support.
*Please use a browser that can access an FTP server such as Internet Explorer.
< Edge Gateway Latest version Firmware image file >
ftp://(Account name):(Password)@package.amnimo.com/firmware/ag10.amf
< IoT Router Latest version Firmware image file >
ftp://(Account name):(Password)@package.amnimo.com/firmware/ar10.amf
If you want to download the previous firmware image file, refer to the following FAQ.
https://support.amnimo.com/hc/en-us/articles/360053300174
-
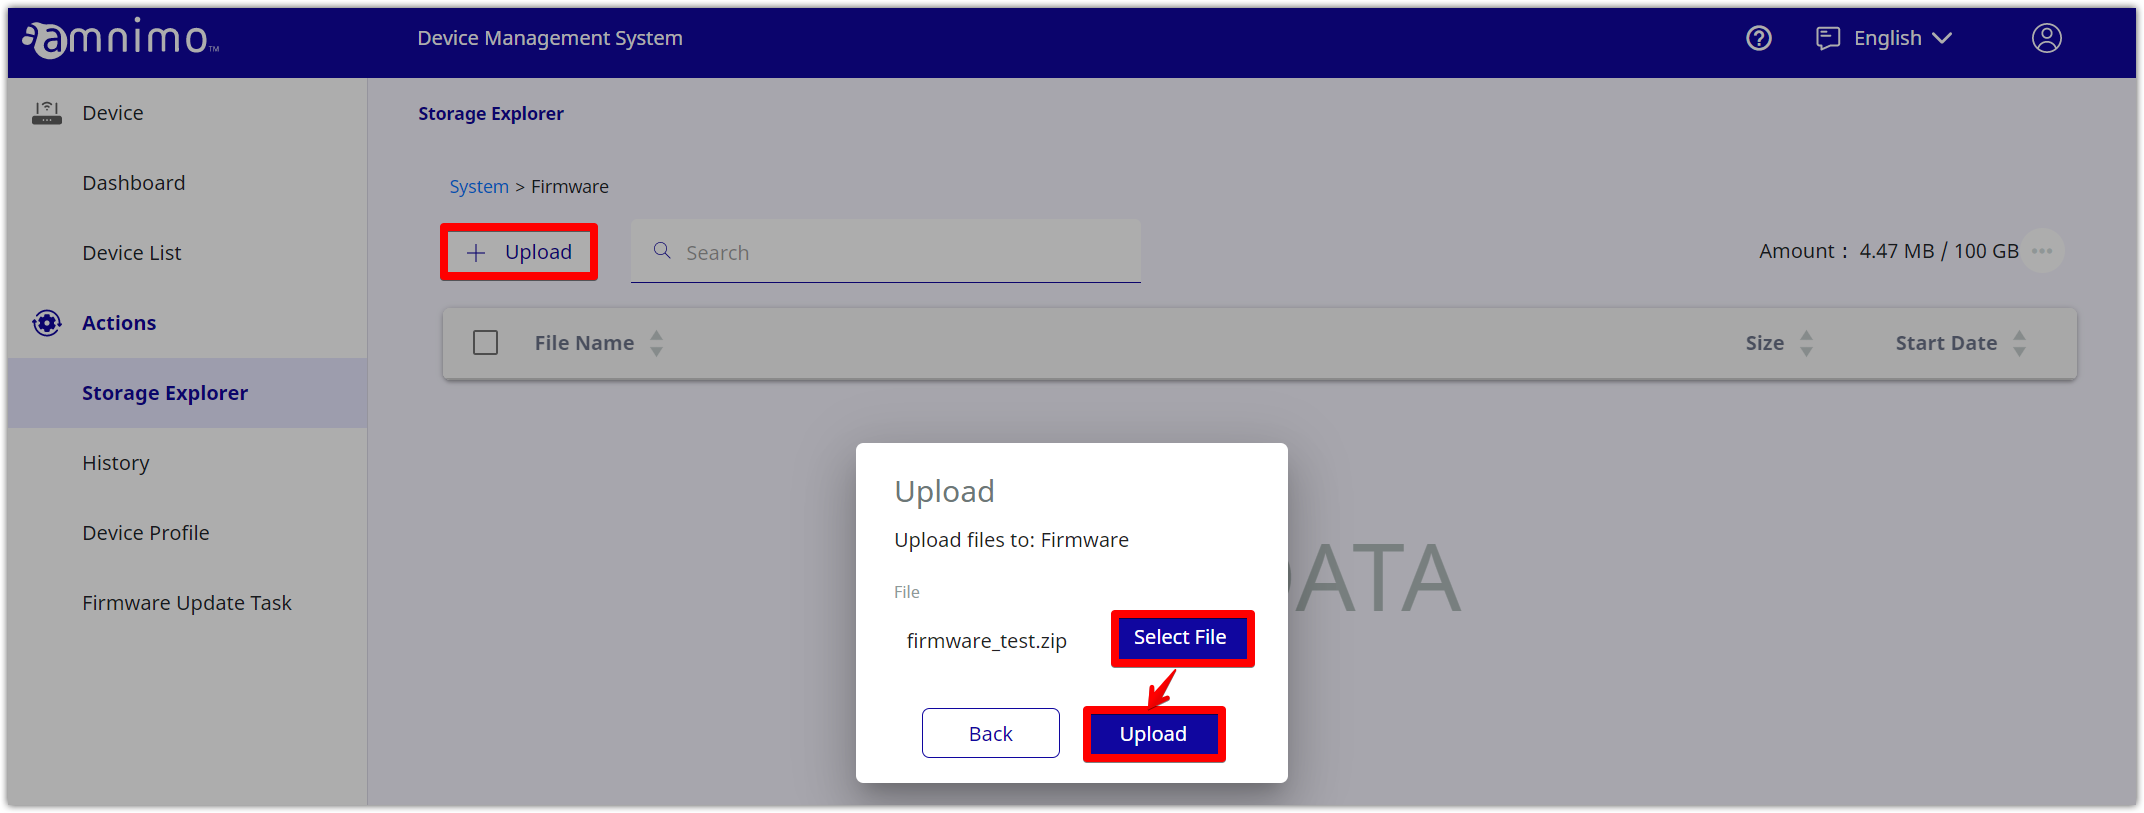
Click [ Upload ], and upload the target image file (Zip file) to the "Firmware" folder.
-
Uploading the image file has been completed.

-
Next, upload the configuration file.
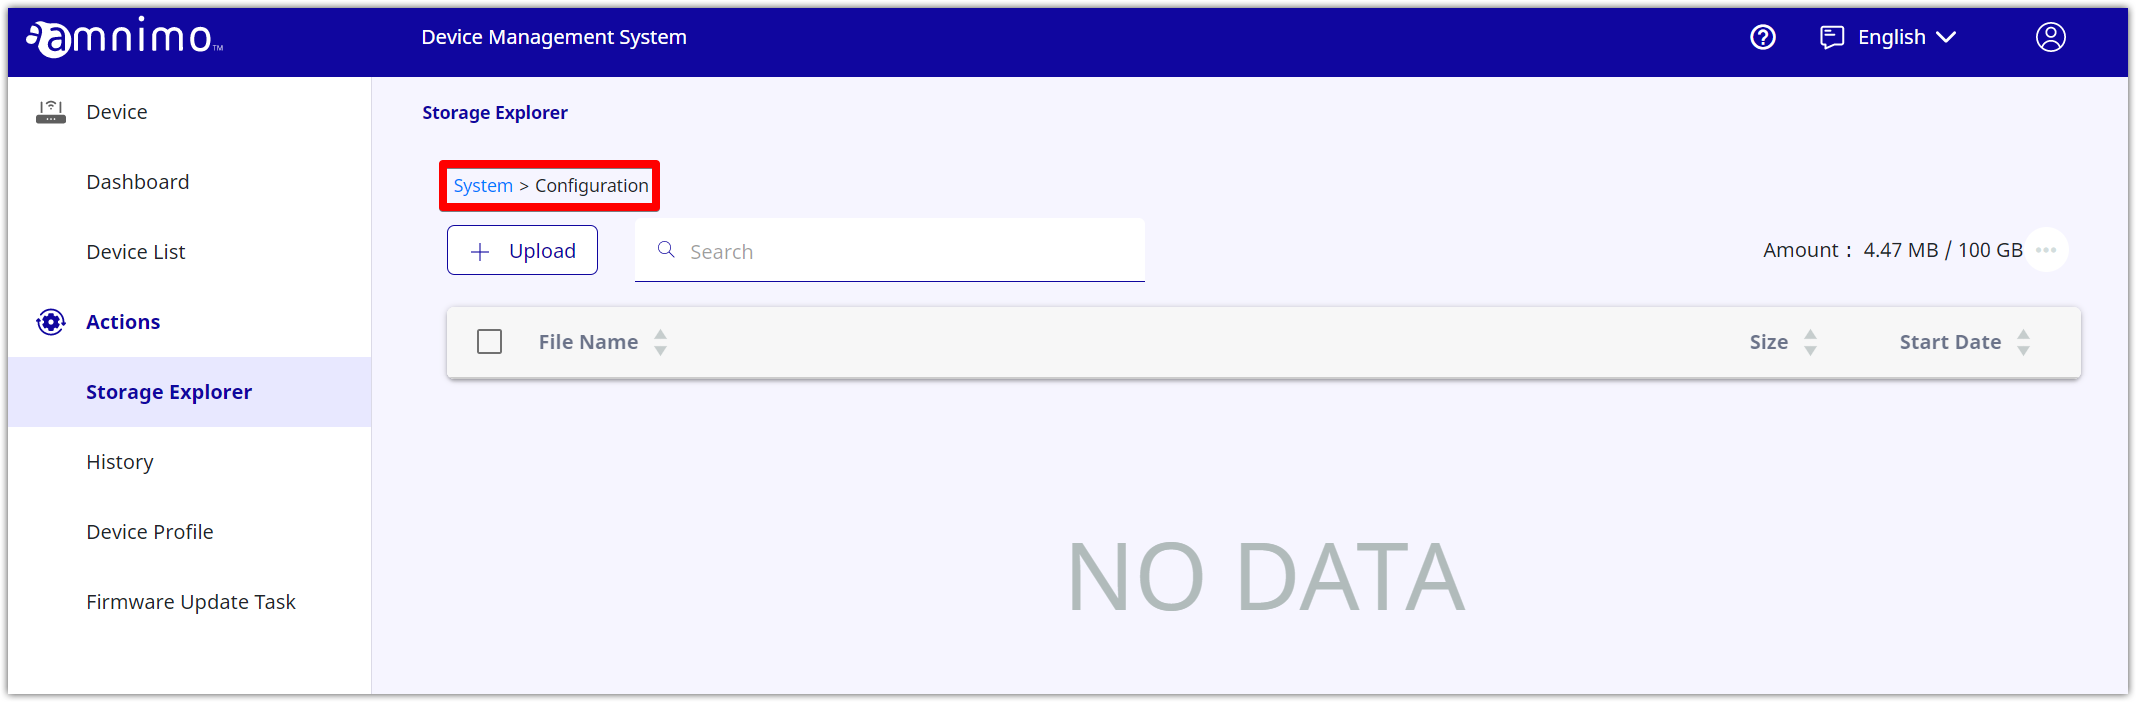
With Storage Explorer, navigate to the "Configuraiton" folder.
-
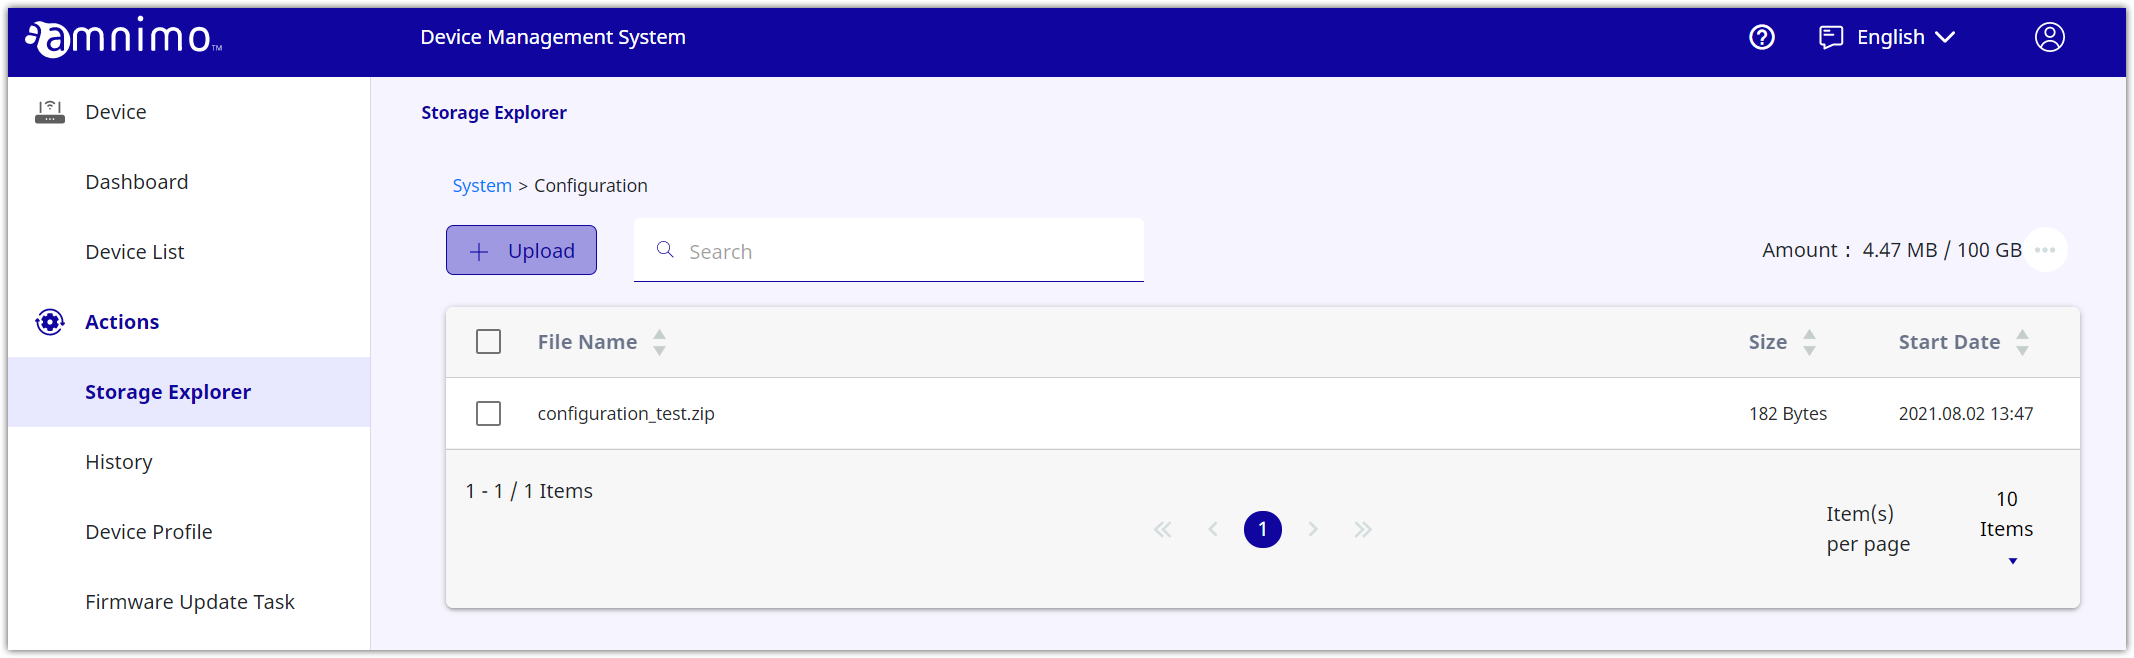
Click [ Upload ] and upload the target configuration file (Zip file) to the "Configuration" folder.

-
Uploading the configuration file has been completed.
-
-
Creating a device profileCreating a device profile
Next, create a device profile required for performing automatic kitting.
For how to create a device profile, refer to the following.
-
Assigning the device profileAssigning the device profile
Assign the device profile you created to the target device.
-
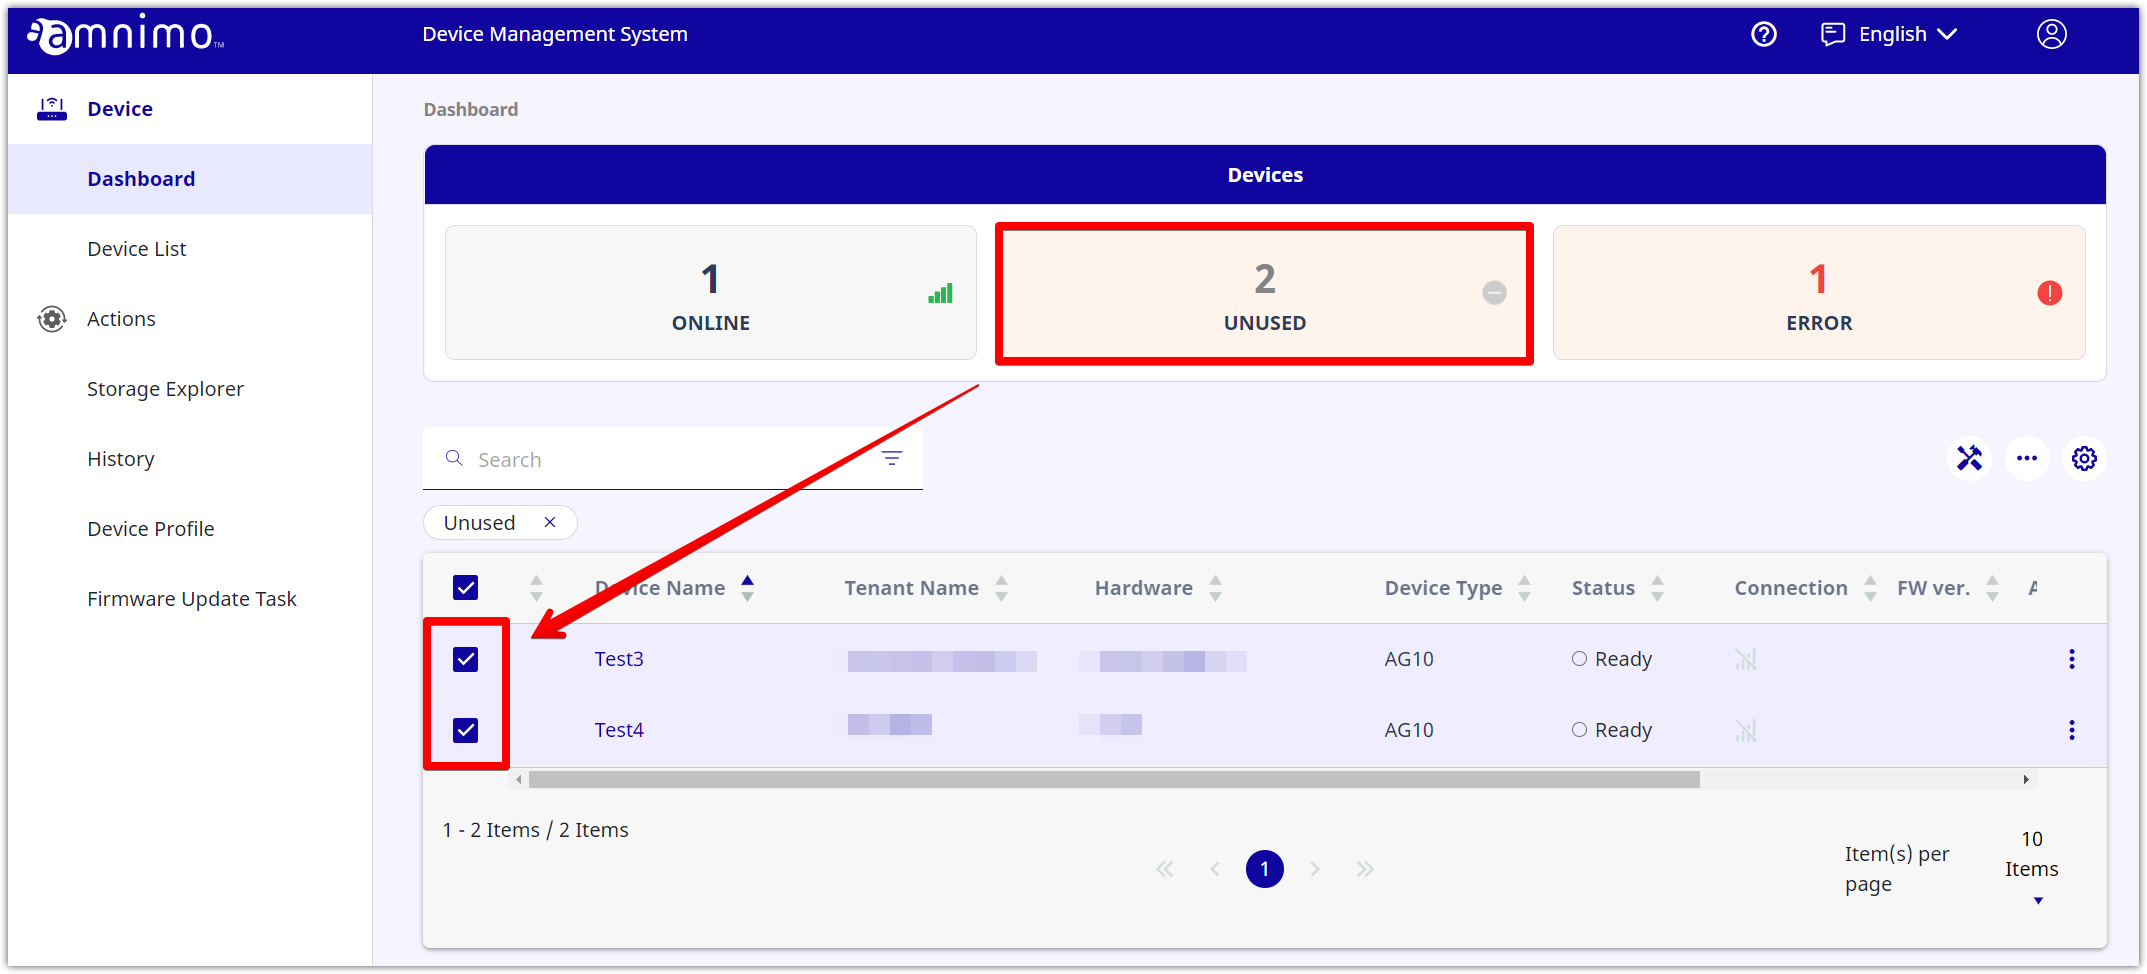
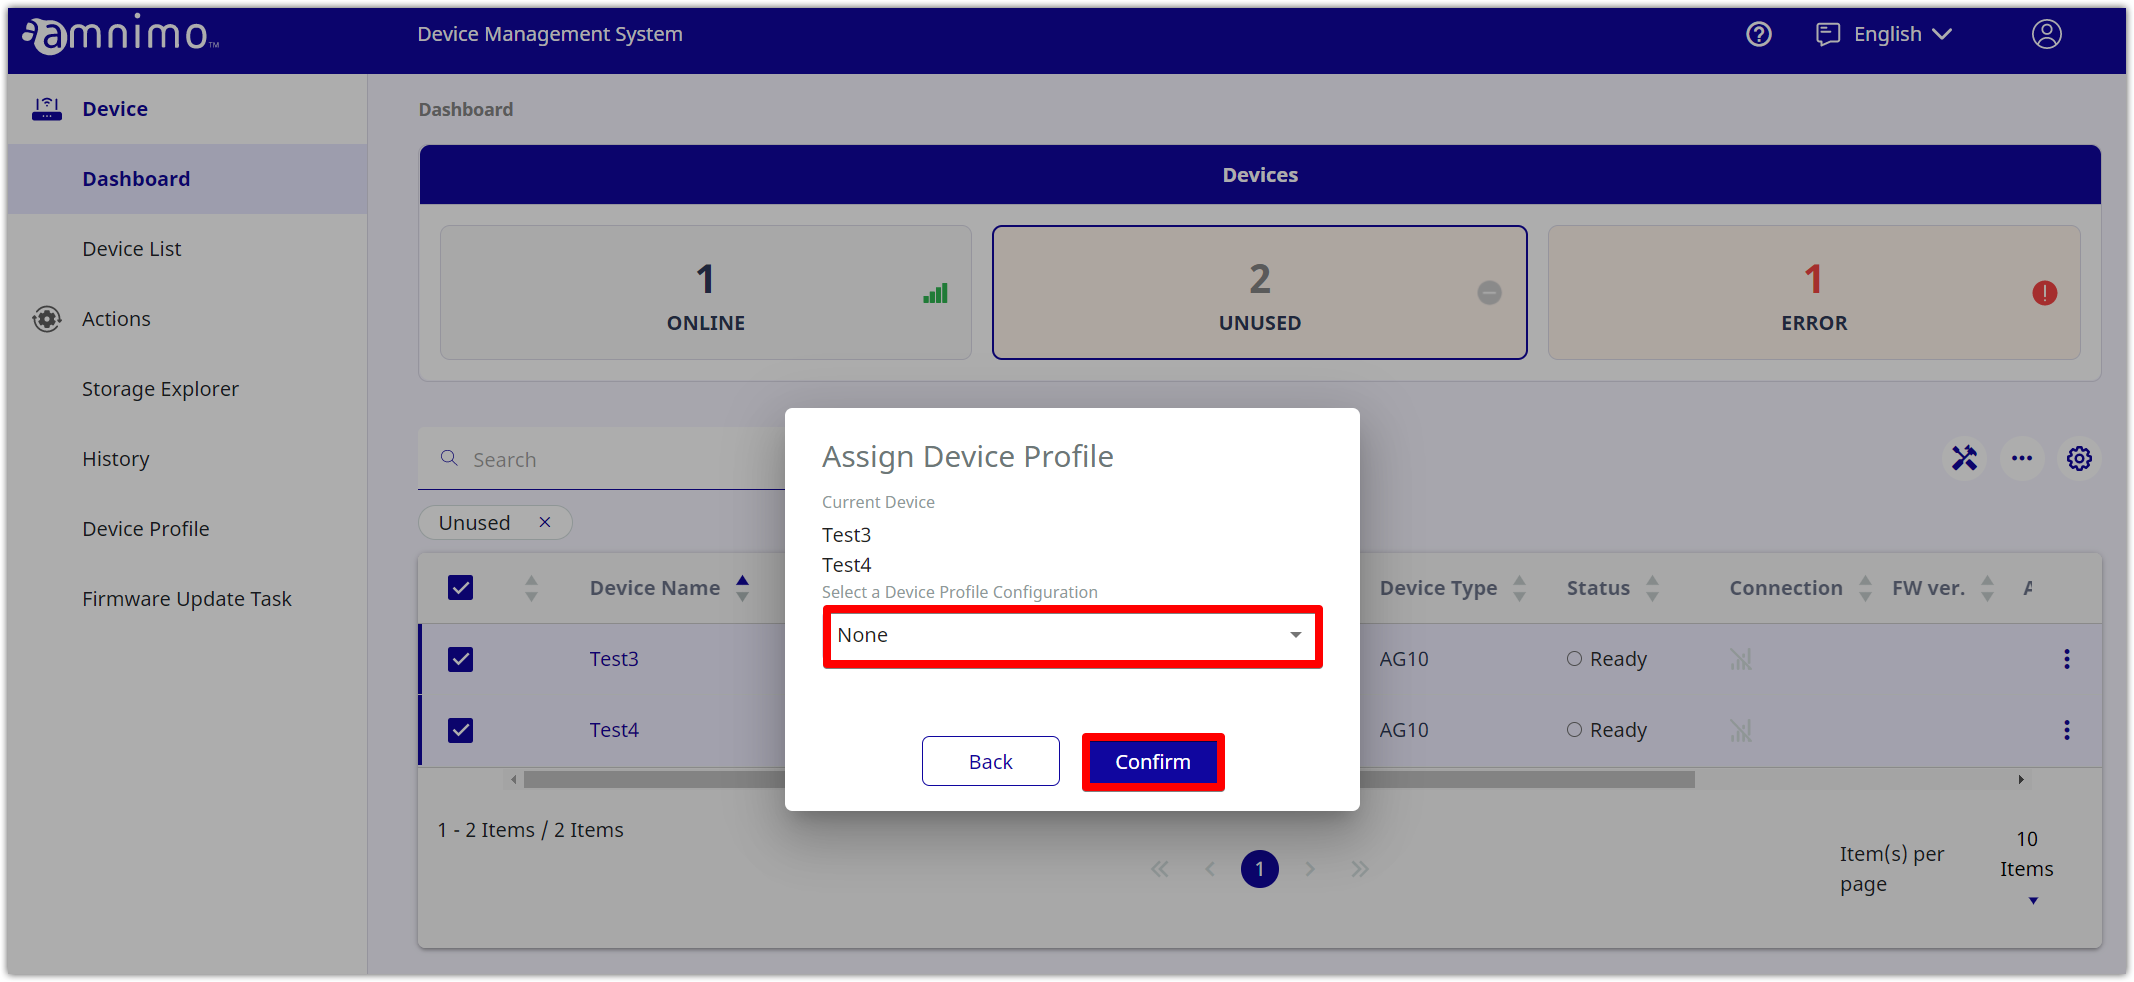
On the [ Dashboard ] page, select [ Unused ] under the [ Devices ] section, and select the device to which the device profile will be assigned.
-
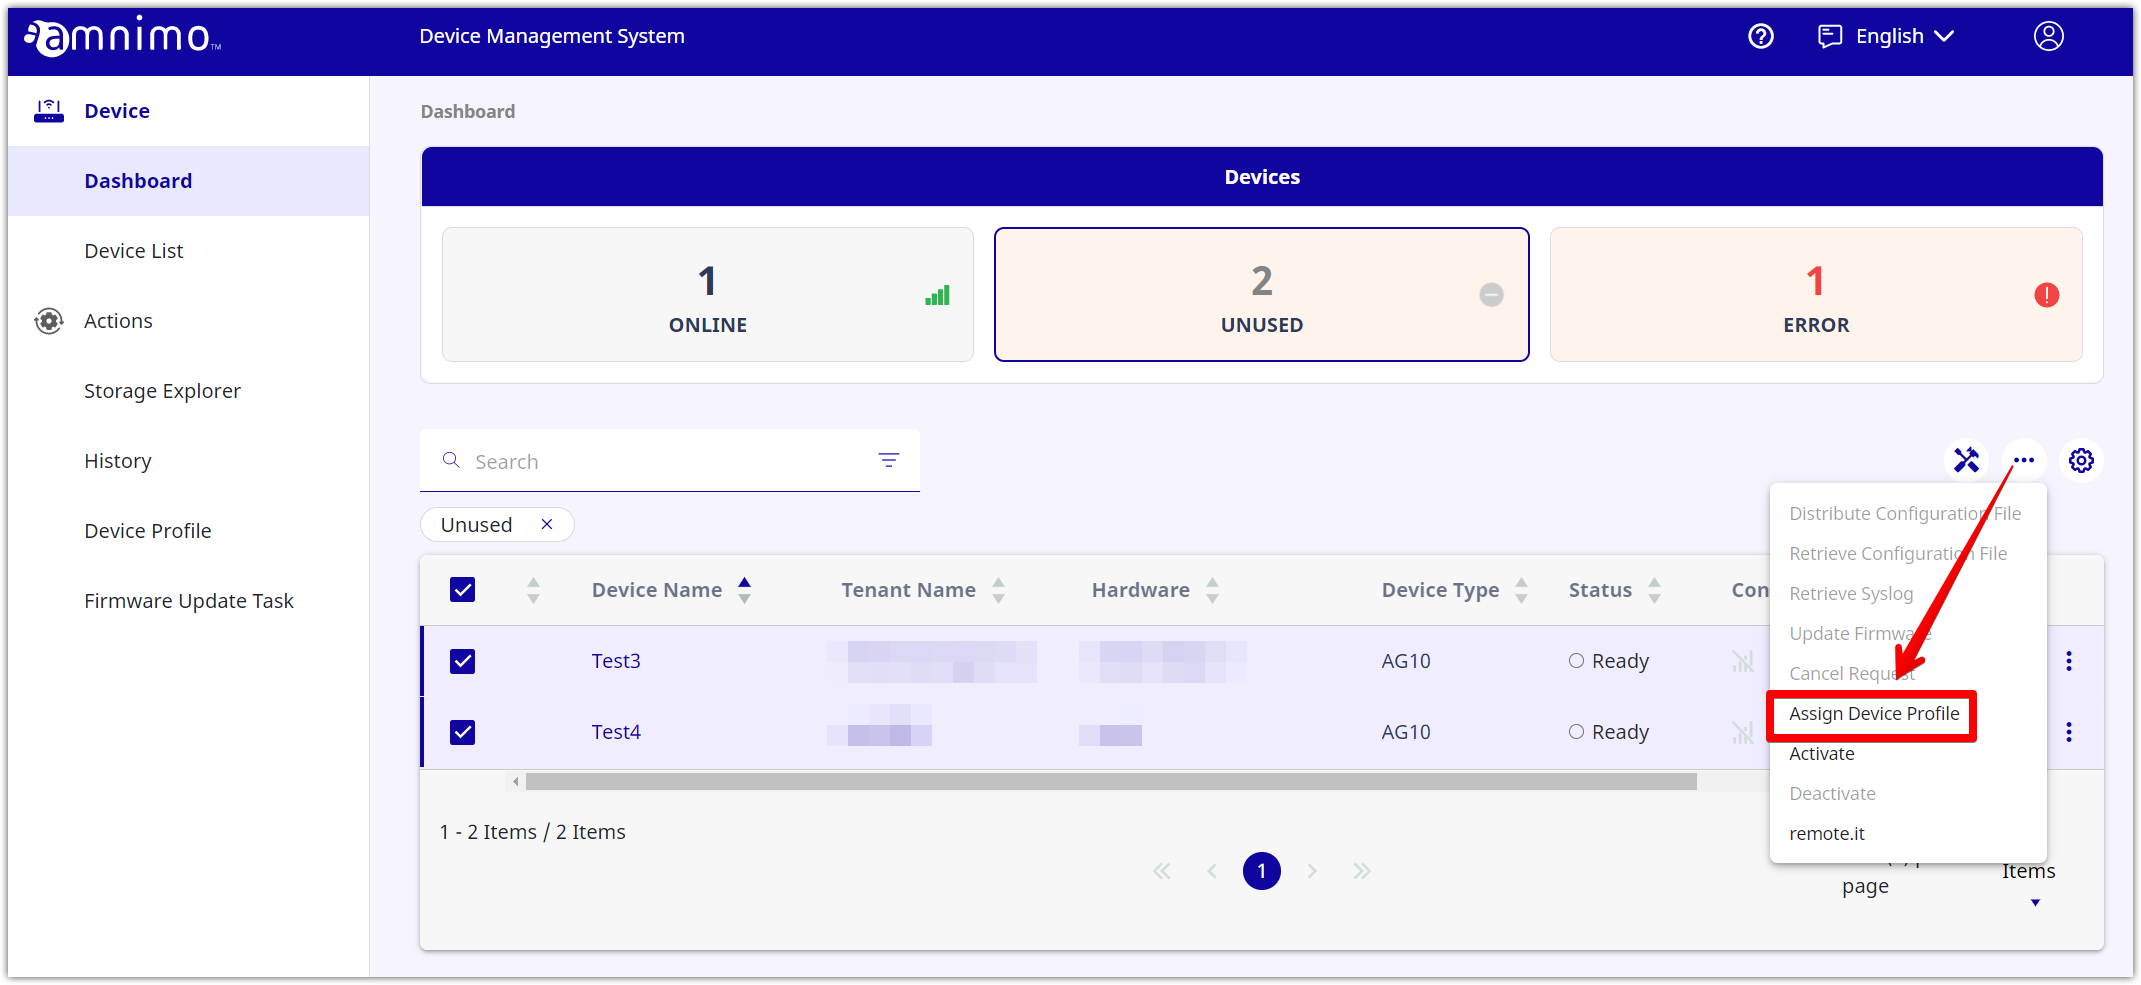
Click [ Assign Device Profile ].
-
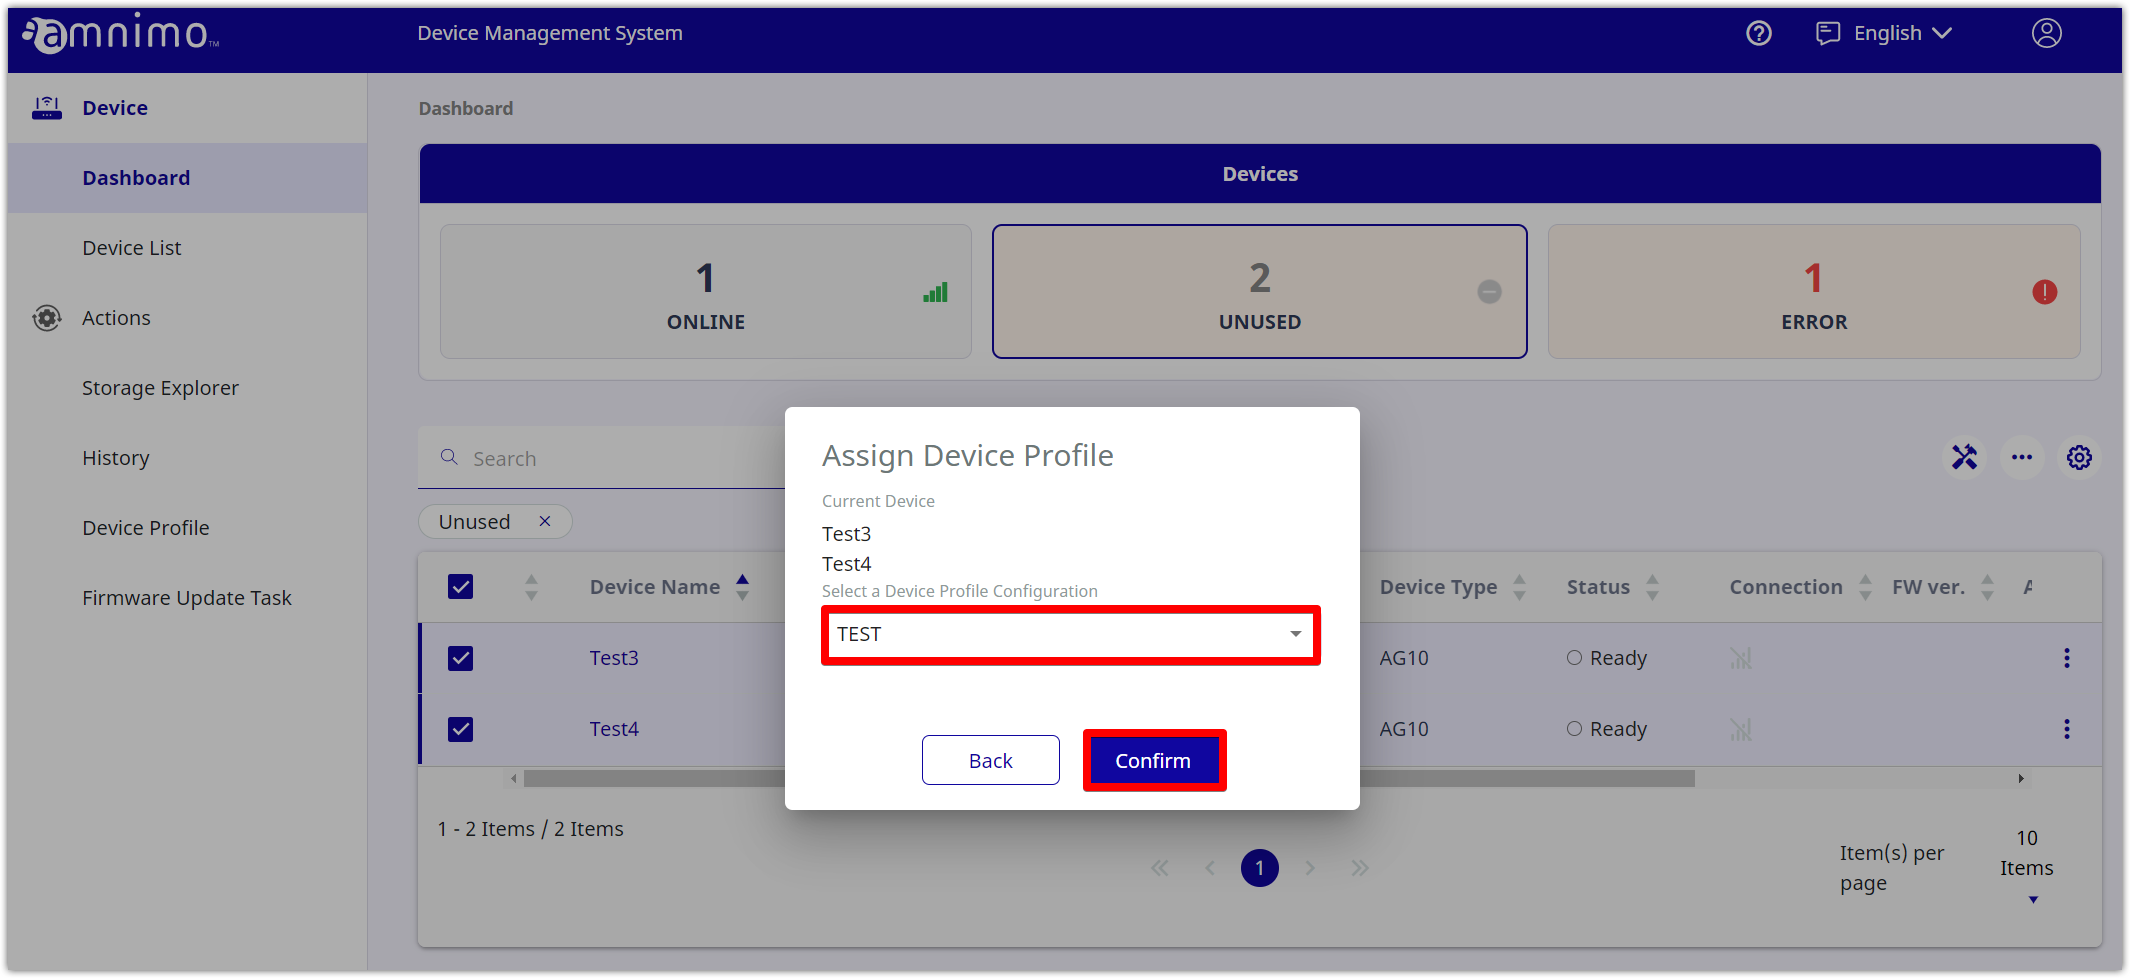
If you select the device profile created in Step 2 and click [ Confirm ], it will be assigned to the device.
-
(Additional information) How to unassign a device profile(Additional information) How to unassign a device profile
If you assign a wrong device profile to the target device, you will be able to unassign it from the device.
-
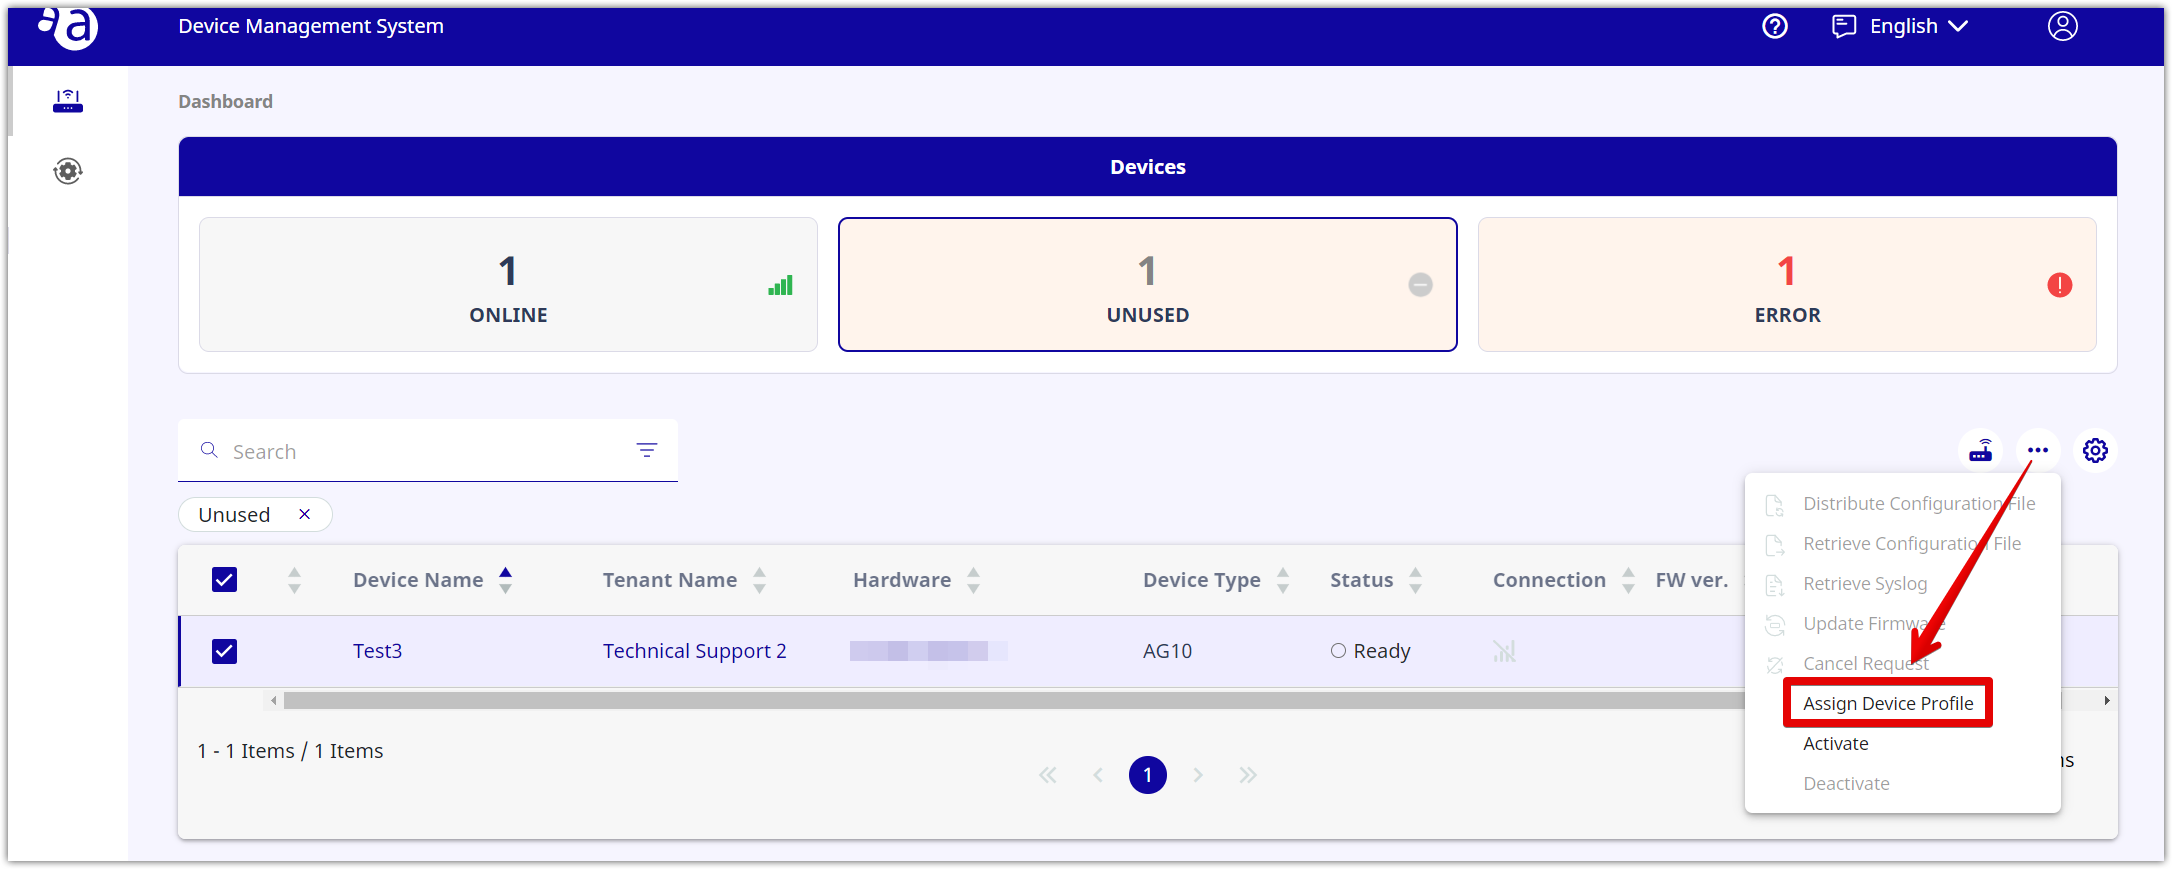
Select [ Assign Device Profile ].
-
If you select [ None ] and click [ Confirm ], you will be able to unassign the device profile from the device.
-
-
-
Connecting the device to the InternetConnecting the device to the Internet
After assigning the device profile to the target device by the Device Management System, if you connect the device to the Internet, the Device Management System will automatically download the firmware and configuration files.
It may take some time to download those files. Also, after completing the download, the device will be automatically restarted for updates.
-
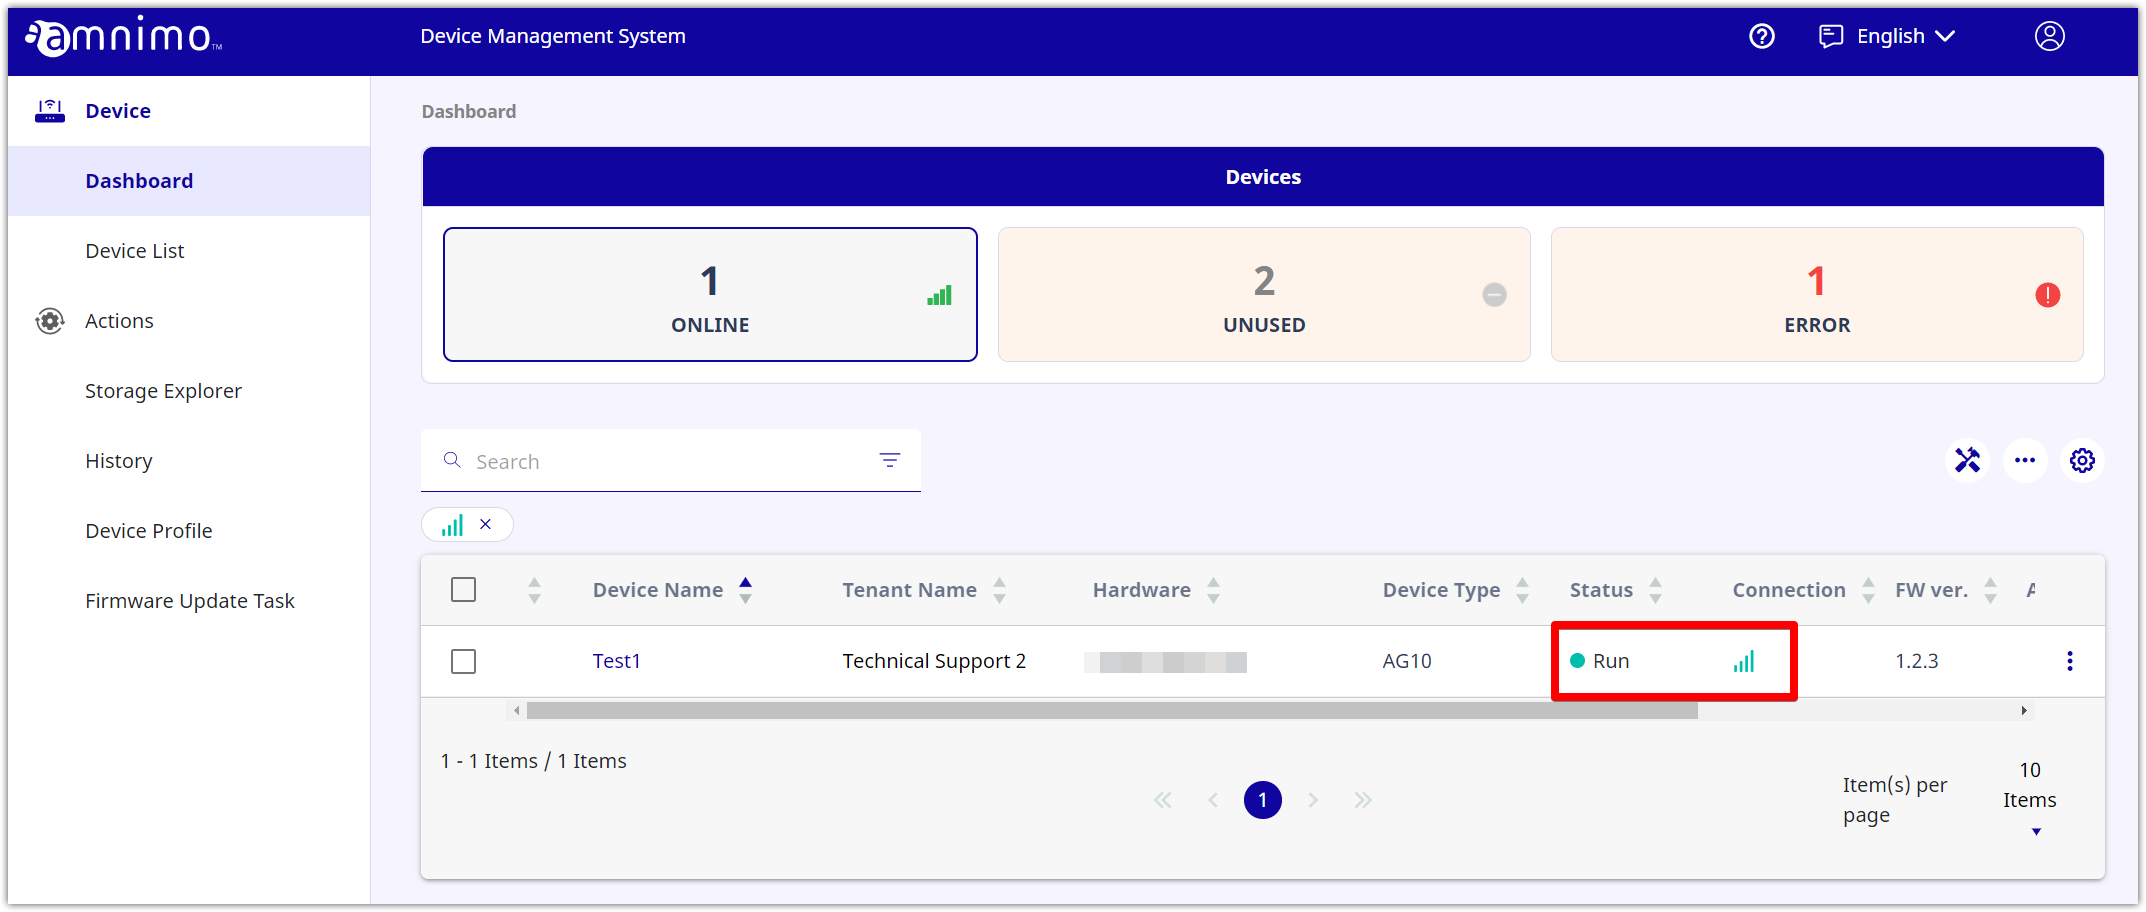
Connect the target device to the Internet.
-
Confirm that the status of the target device is normal.
-