 ) icon will be displayed on the sidebar.
This section explains the configuration of the tenant management screen and the functions and operations performed by tenant administrators.
On the portal screen opened by a tenant administrator, the tenant (
) icon will be displayed on the sidebar.
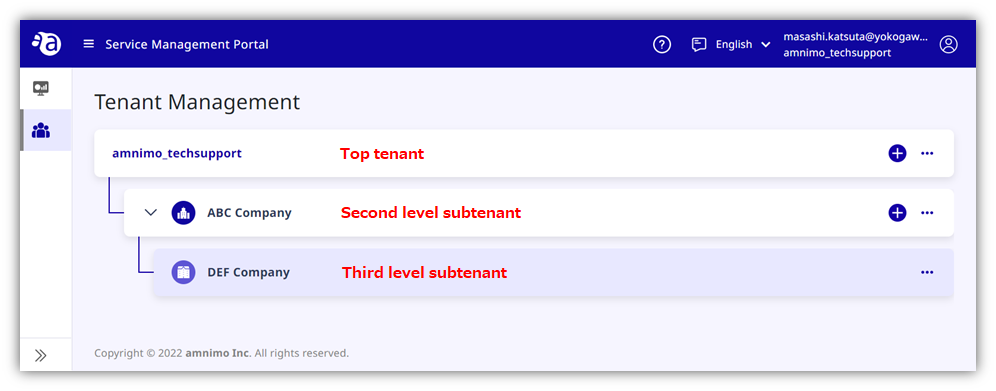
As shown in the figure above, if there are subtenants, the tenant names will be listed in a tree structure.
Common to all levels in the hierarchy is that you can perform the following operations if clicking the icon at the right end of each tenant name.
 Creating
new subtenants and groups: You can create new tenants and groups at levels
lower than the tenant you are managing.
Creating
new subtenants and groups: You can create new tenants and groups at levels
lower than the tenant you are managing.
 Editing
and deleting tenants and groups: You can edit and delete the tenants and
groups you are managing.
Editing
and deleting tenants and groups: You can edit and delete the tenants and
groups you are managing.
The following table shows the functions that can be performed by a tenant administrator.
[ Transferring devices ] and [ Managing members ] shown in yellow letters can be performed for the tenant you are managing and the subtenants placed below it.
Tenant type |
Creating subtenants |
Editing administrator information |
Transferring devices |
Selecting applications |
Managing members |
Deleting tenants/groups |
Top tenant |
〇 |
× |
〇 |
× ※Note |
〇 |
〇 |
Second level subtenant |
〇 |
〇 |
〇 |
× ※Note |
〇 |
〇 |
Third level subtenant |
× |
〇 |
〇 |
× ※Note |
〇 |
〇 |
Note:[ Selecting applications ] cannot
be performed by yourself.
An administrator at a higher level
(amnimo if you are at the top level) accesses the configuration screen
of an administrator at a lower level and configures the settings.
*If you cannot perform the target function, check with the tenant administrator at the higher level to see if the settings have been configured.
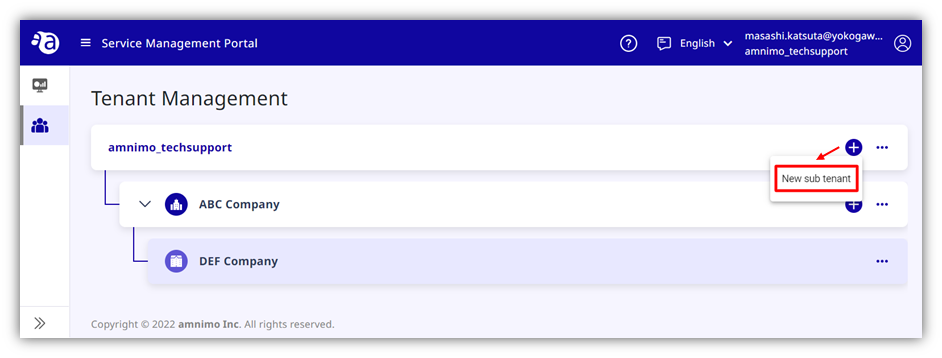
You can create new tenants (subtenants) or groups under the tenant you are managing.
Follow the procedure below to create subtenants.
If you click the rightmost ( + ) icon of the tenant name, and
click on the letters of [ New sub tenant ], the [ New sub tenant ]
window will be displayed.
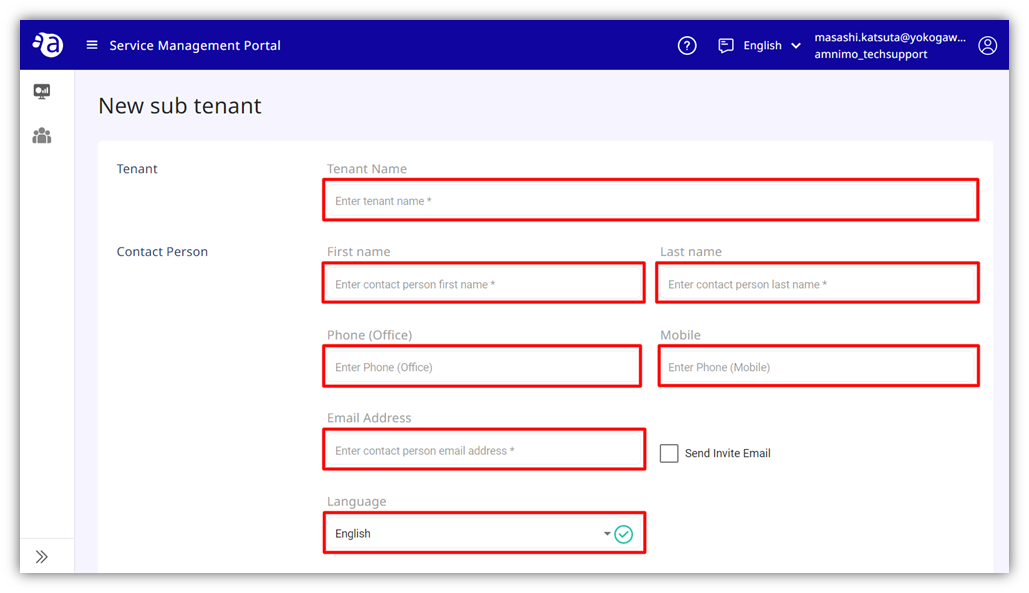
Follow the guidance described in the text, and enter
the information.
*For [ Contact Person ],
enter the information of the subtenant administrator.
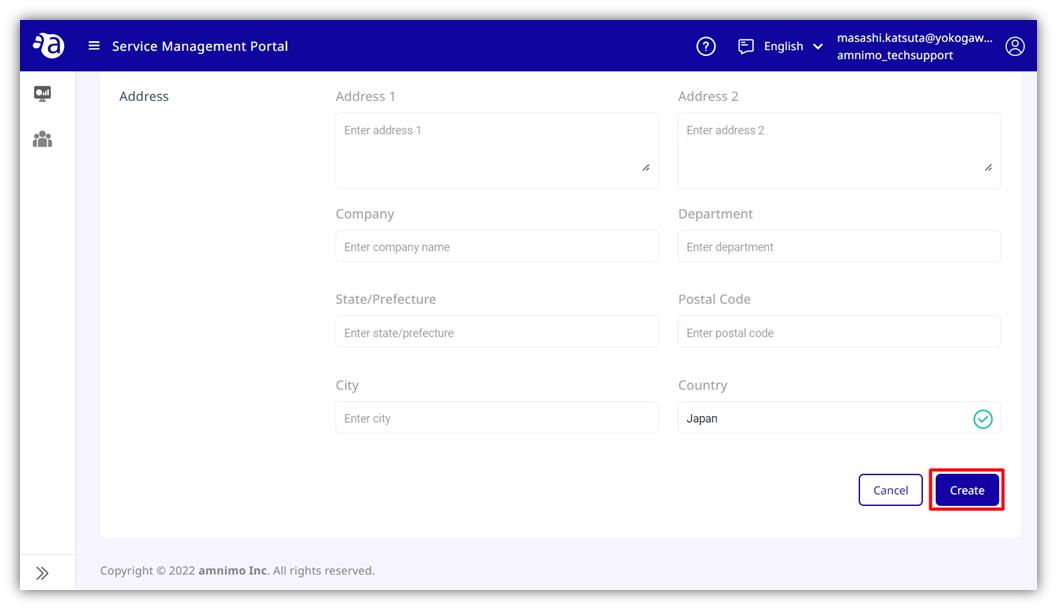
Enter the information after the address optionally, and click
the [ Create ] button at the end.
If you have received an invitation message, register your account by following the procedure described in the message.
Tenant managers can delete
subtenants and groups.
Also, if devices are assigned to a target tenant, or if there are subtenants or groups under it, it cannot be deleted.
In that case, it is necessary to perform operations such as moving the assigned devices to the higher-level tenant or deleting the subtenants or groups at the lower level.
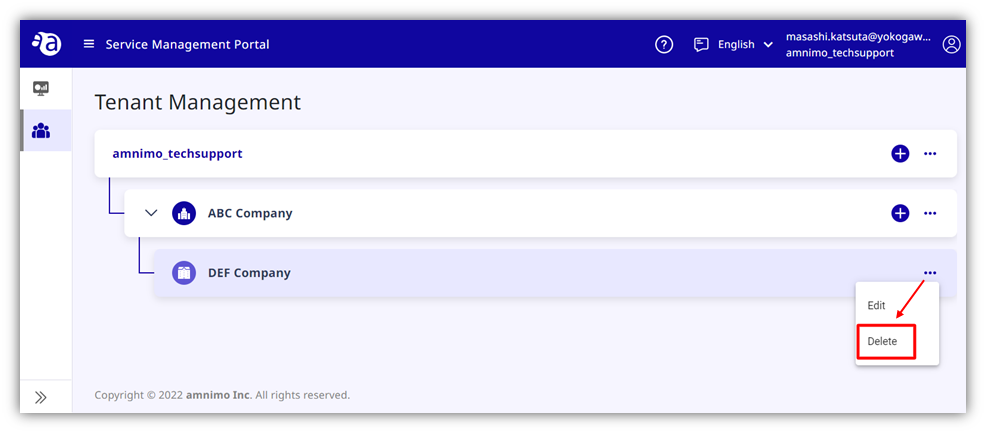
Open the menu
icon at the right end of the subtenant or group you want to delete,
and click [ Delete ].
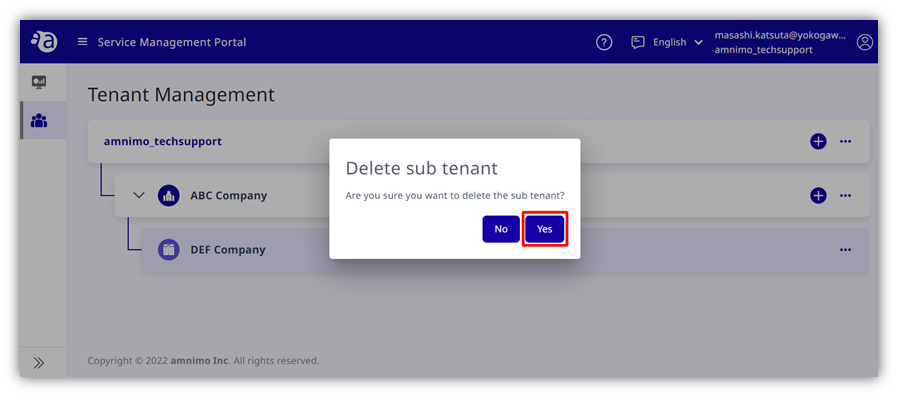
Click [ Yes ]
in the confirmation dialog .
The next page explains the functions and specific operation methods performed in tenants.